51/157
SDi Decades Extreme Service Manual www.ecoer.com
May. 2023Manufacturer reserves the right to change specifications or designs without notice.
5. Insulate the copper pipe
6. Flare the pipe
7. Drill holes if the pipes need to pass the wall.
8. According to the field condition to bend the pipes so that it can pass the wall smoothly.
9. Bind and wrap the wire together with the insulated pipe if necessary.
10. Set the wall conduit
11. Set the supporter for the pipe.
12. Locate the pipe and fix it by supporter
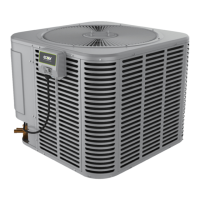
13. Connect the pipe to indoor unit and outdoor unit by using two spanners.
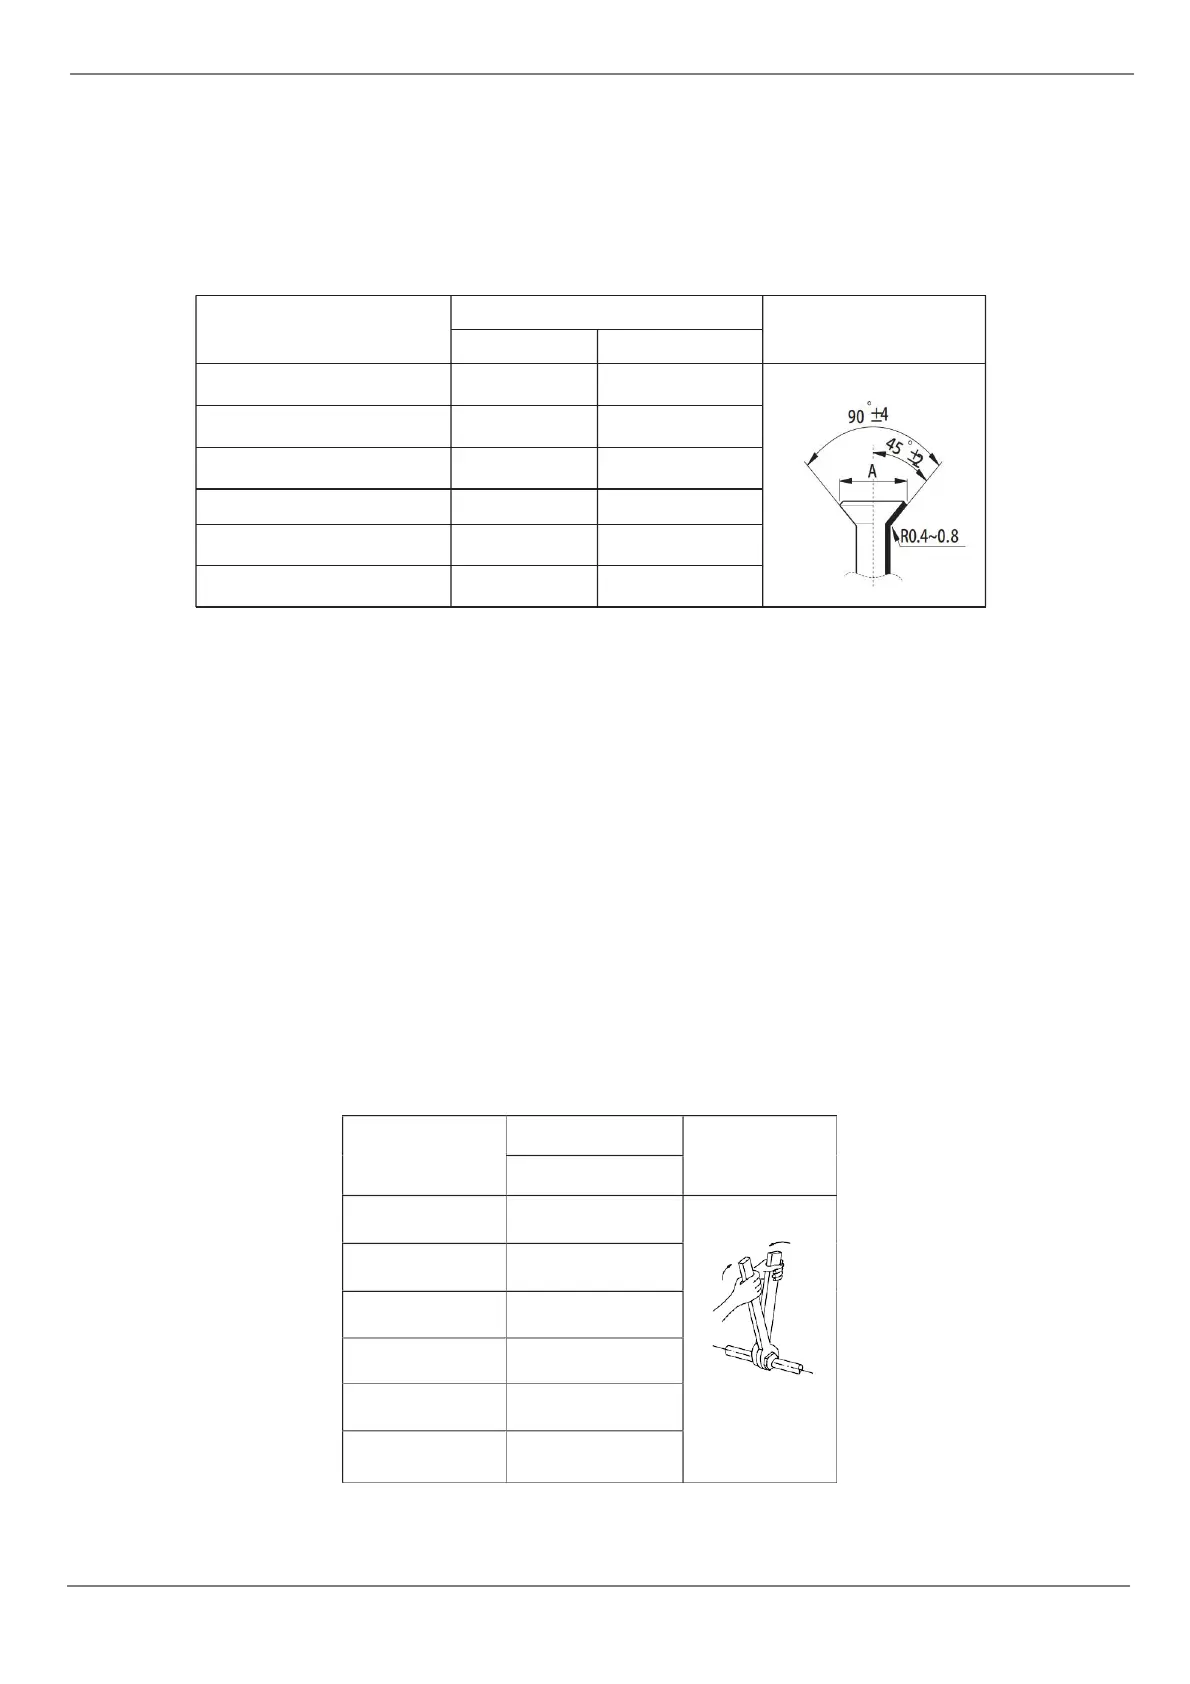
Flare dimension A (mm/inch)
Pipe Diameter
Torque
Sketch map
1/4" (6.35)
3/8" (9.52)
1/2" (12.7)
5/8" (15.9)
3/4" (19)
7/8" (22)
N.m(lb.ft)
18~20
(13.3~14.8)
32~39
(23.6~28.8)
49~59
(36.1~43.5)
57~71
(42~52.4)
67~101
(49.4~74.5)
85-110
(62.7-81.1)
• Before test operation, the joint parts should not be heat insulated.
• Insert a flare nut into the pipe before flaring the pipe
• According to the following table to flare the pipe.
• After flared the pipe, the opening part must be seal by end cover or adhesive tape to avoid duct or exogenous
impurity come into the pipe.
• Be sure to use two spanners and proper torque to fasten the nut, too large torque will damage the bell mouthing,
and too small torque may cause leakage. Refer the following table for different pipe connec- tion.
• For horizontal refrigerant pipe, the distance be- tween supporters should not be exceed 1m.
• For vertical refrigerant pipe, the distance between supporters should not be exceed 1.5m.