Installation of the pump
A suitable pump is always included in the delivery (see
Ä
Chapter
10 ‘Spare parts and accessories’ on page 38). If this has already been
used, we strongly recommend that you keep at least one pump in stock
so that you always have a spare pump available for upcoming
maintenance work. You can order suitable pumps as spare parts
(
Ä
Chapter 10 ‘Spare parts and accessories’ on page 38)
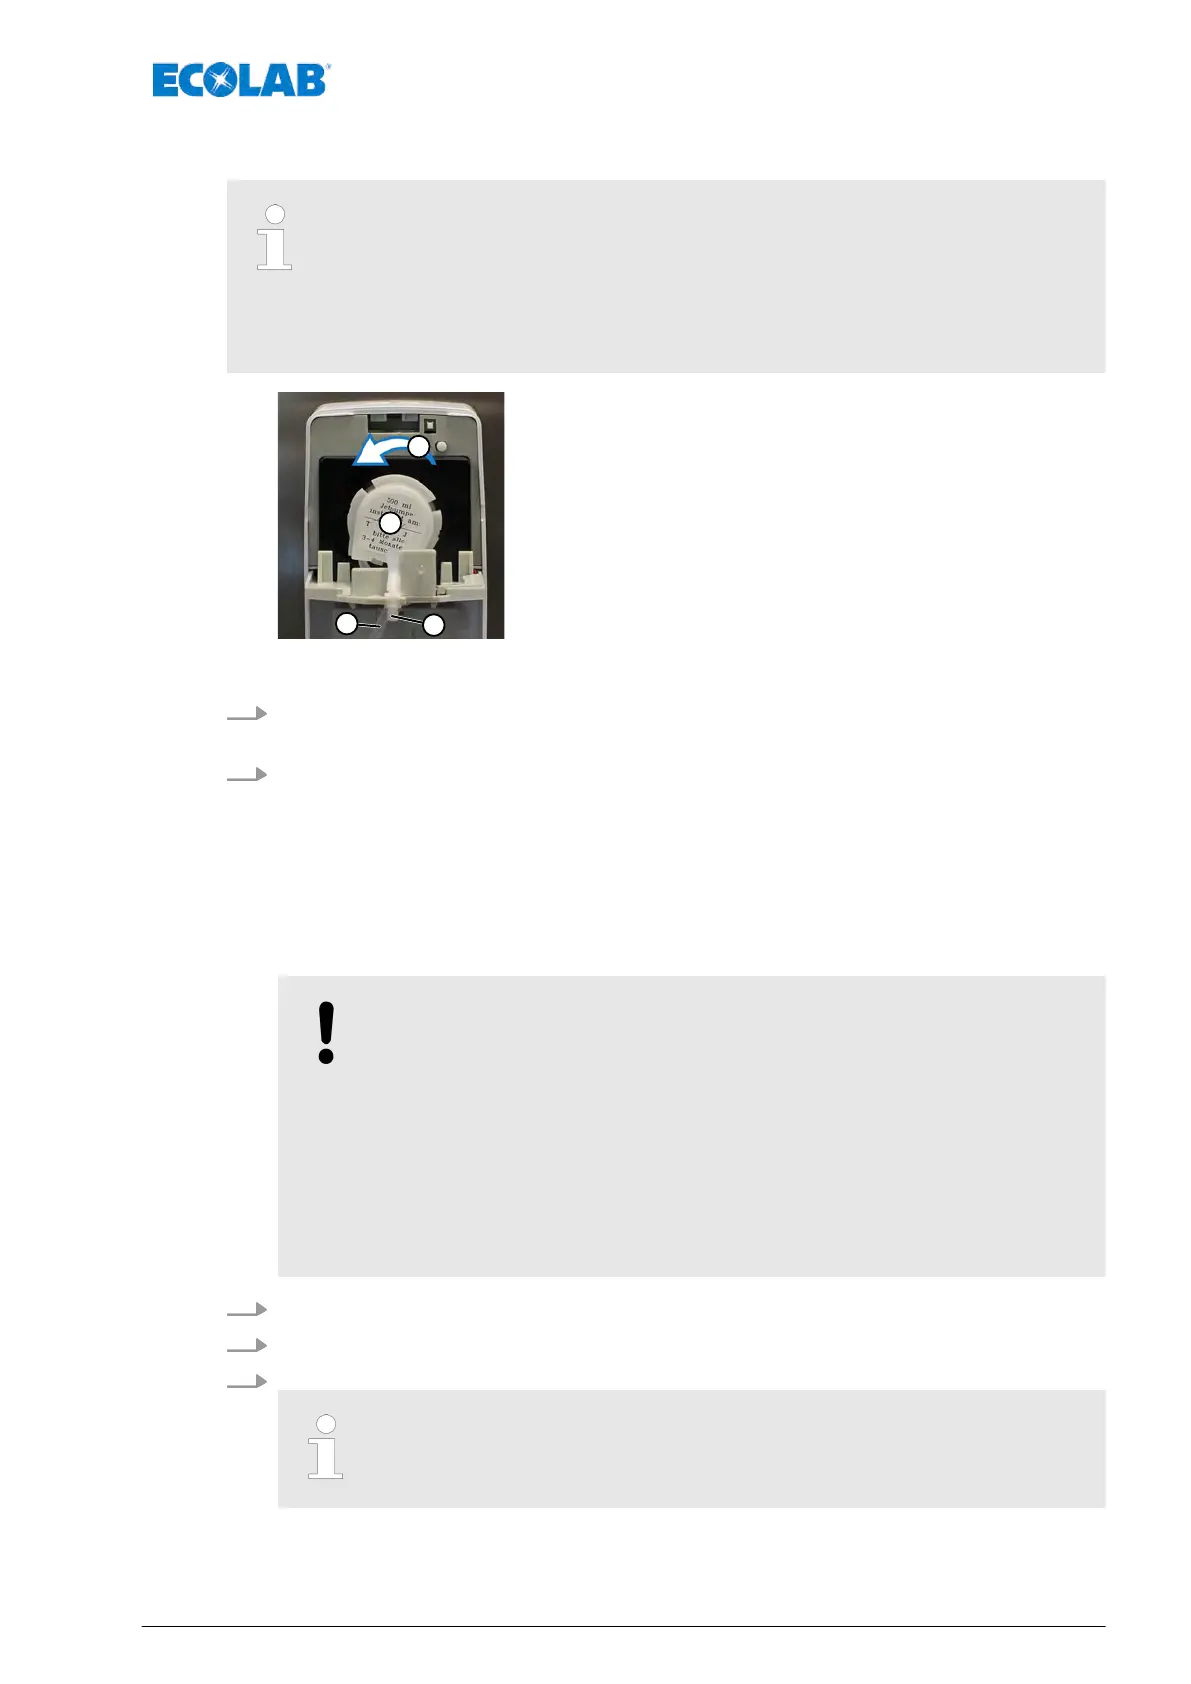
Fig. 7: Re-install the pump
1. Label the new pump (Pos. 1) with the current date, insert it and then turn it
counter-clockwise
(Pos. 2), until it engages.
2. 500 or 1000 ml variant:
Insert the longer end of the silicone hose (pos. 3), which comes out of the pump
(suction side), into the bottle, latch the shorter end (pressure side) with the nozzle
attached to the tip of the sensor carrier plate (pos. 4).
5 or 20 l variant:
Put the longer end of the silicone hose (pos. 3) coming from the pump (suction side)
over the hose connector and connect it to the hose leading into the canister
. Latch
the shorter end (print side) with the nozzle attached to the tip of the sensor carrier
plate (pos. 4).
NOTICE!
Note on the hose connector
Please make sure that the hose ends are pulled at least 12 mm over
the hose connector to avoid loosening of the hose connection
(e.g. due to transport vibrations or pump movements)!
Hose length of the spare pump for 5 and 20 l version
Please note that when ordering replacement pumps, the length of the
suction-side pump hose may have to be adjusted before it is pushed
over the hose connector
.
3. If properly positioned, the nozzle can be reinserted without any effort required.
4. Remove the key and close the dispenser.
5. Operate the dispenser until the used medium emerges from the nozzle.
If this does not work, please use the instructions at
Ä
Chapter
8 ‘Description and rectification of malfunctions’ on page 30.
ð
Dispenser is ready for use!
Service
33 MAN048961, Rev. 2-09.2020