38
order to set the voltage according to the RMS Voltmeter. After it is finished, press
“LOCK/LOCAL” key to save the data stored and the high range voltage calibration is
completed.
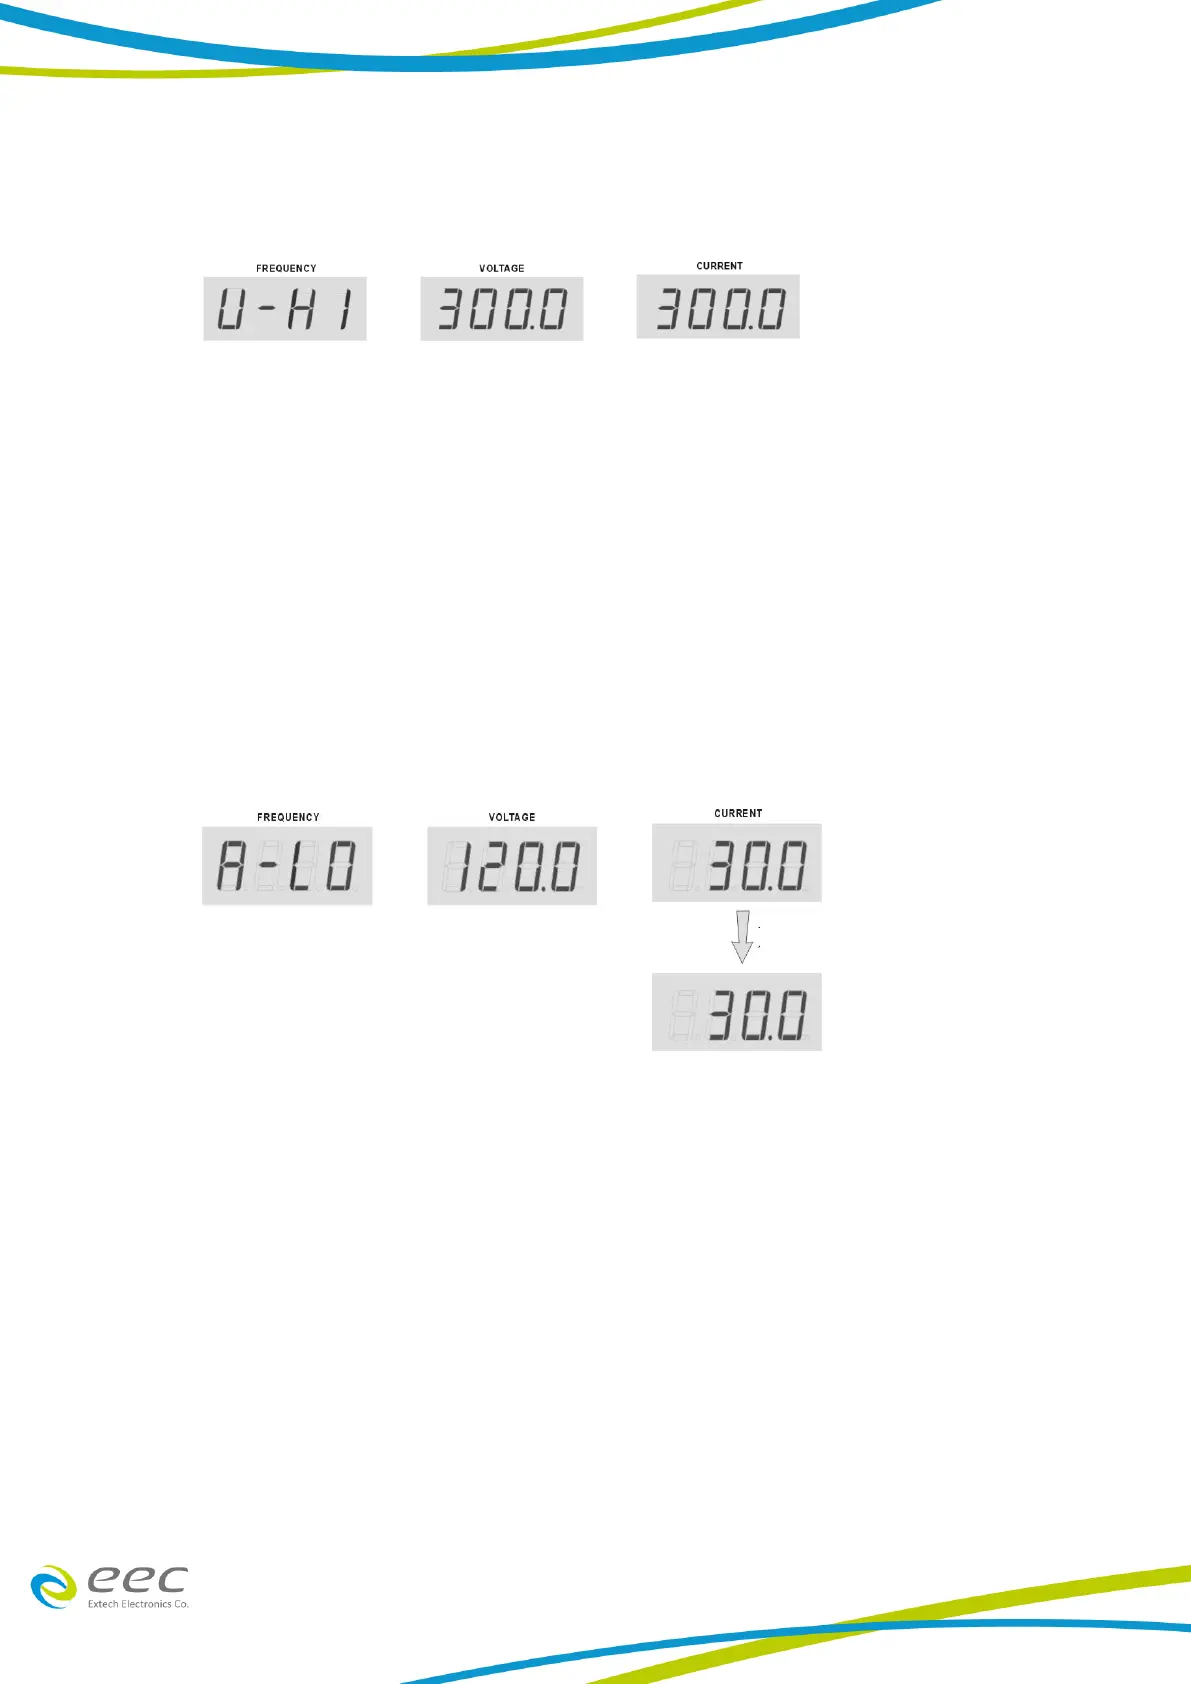
5. Low Range Current (A-LO) Calibration: Press “︿” or “﹀” key from the Frequency display
to select “A-LO". Connect a variable resistor as load and a calibrated true RMS Ammeter
on one of the output socket and press TEST key in order to activate the CPU to read a low
range offset current and send a 120VAC output voltage. The accurate RMS Ammeter will
indicate an actual current value while the Current display on the AC Power Source will
indicate a necessary value needed to be calibrated. Adjust the load or voltage to get the
reading from the ammeter to be 30A. Using the current value from the RMS Ammeter,
press “︿” or “﹀” key from the Current display to scroll the display, which indicates the
current value, in order to set the current according to the RMS Ammeter. After it is done,
press “LOCK/LOCAL” key to save the data stored and the low range current calibration is
completed.
6. High Range Current (A-HI) Calibration: Press “︿” or “﹀” key from the Frequency display
to select “A-HI". Connect a variable resistor as load and a calibrated true RMS Ammeter on
one of the output socket and press TEST key in order to activate the CPU to read a high
range offset current and send a 120VAC output voltage. The accurate RMS Ammeter will
indicate an actual current value while the Current display on the AC Power Source will
indicate a necessary value needed to be calibrated. Adjust the load or voltage to get the
reading from the ammeter for the output current value. Using the current value from the
RMS Ammeter, press “︿” or “﹀” key from the Current display to scroll the display, which
indicates the current value, in order to set the current according to the RMS Ammeter.
After it is done, press “LOCK/LOCAL” key to save the data stored and the high range
current calibration is completed.