How-To: Using the IQ-501 with the Fiery server
4
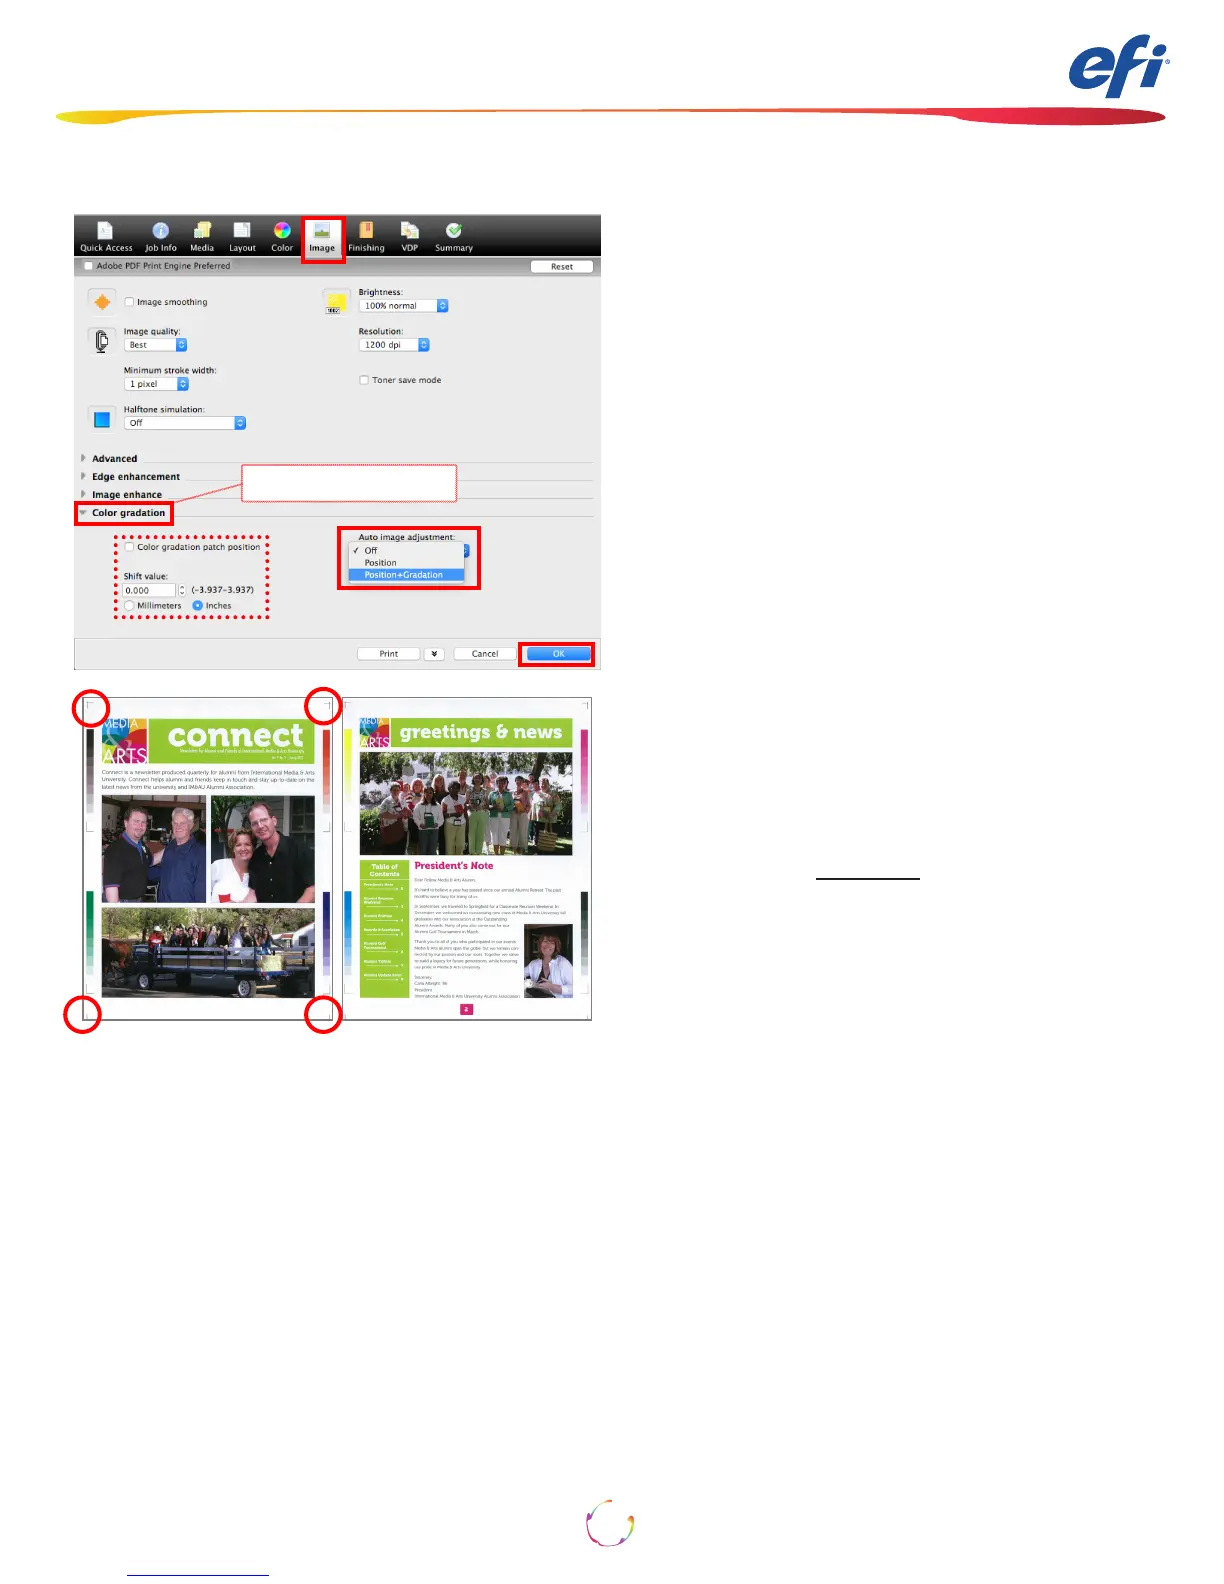
1. Open Job Properties of the job in which you
wish to engage Auto Image Adjustment.
2. Select the Image tab.
Note that on some software versions the Auto
Image Adjustment may be in the Job Info tab or
directly under the Image tab
3. Pull down the Color Gradation section
or Realtime Adjustment section.
4. Select either Position or Position+Gradation.
5. OPTIONAL: check the Color gradation patch
position check box and choose a +/- Shift value
to ne tune the placement of the color bars on
the edge of the sheet.
6. Click OK.
7. Print the job.
8. Follow directions as needed on the Press Control
Panel.
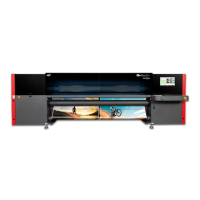
For the Position+Gradation selection the engine
places alternating CMYK and RGB/Process K
strips on the sheets’ inboard and outboard edges.
Approximately 9mm per edge is used. Position
places cross hair marks within the 9mm edge at
each corner. Please ensure that user content is
not placed in these border areas as the engine will
override and knock out content.
Note: ImageViewer or Preview will not show these
marks as they are added at the engine.
Note2: If the position marks or color bar strips do
not appear please contact Konica Minolta service
in order to resolve.
RGB/Process K strips CMYK strips
The engine keeps track of which set of strips were
last printed and ensures that they alternate.
Position markers shown in red circles.
Auto Image Adjustment
or Real time adjustment