12
NOTE: Letters in (parentheses) refer to the PARTS IDENTIFIER on page 2 and/or the PARTS ASSEMBLY on page 3. Use as needed for clarification.
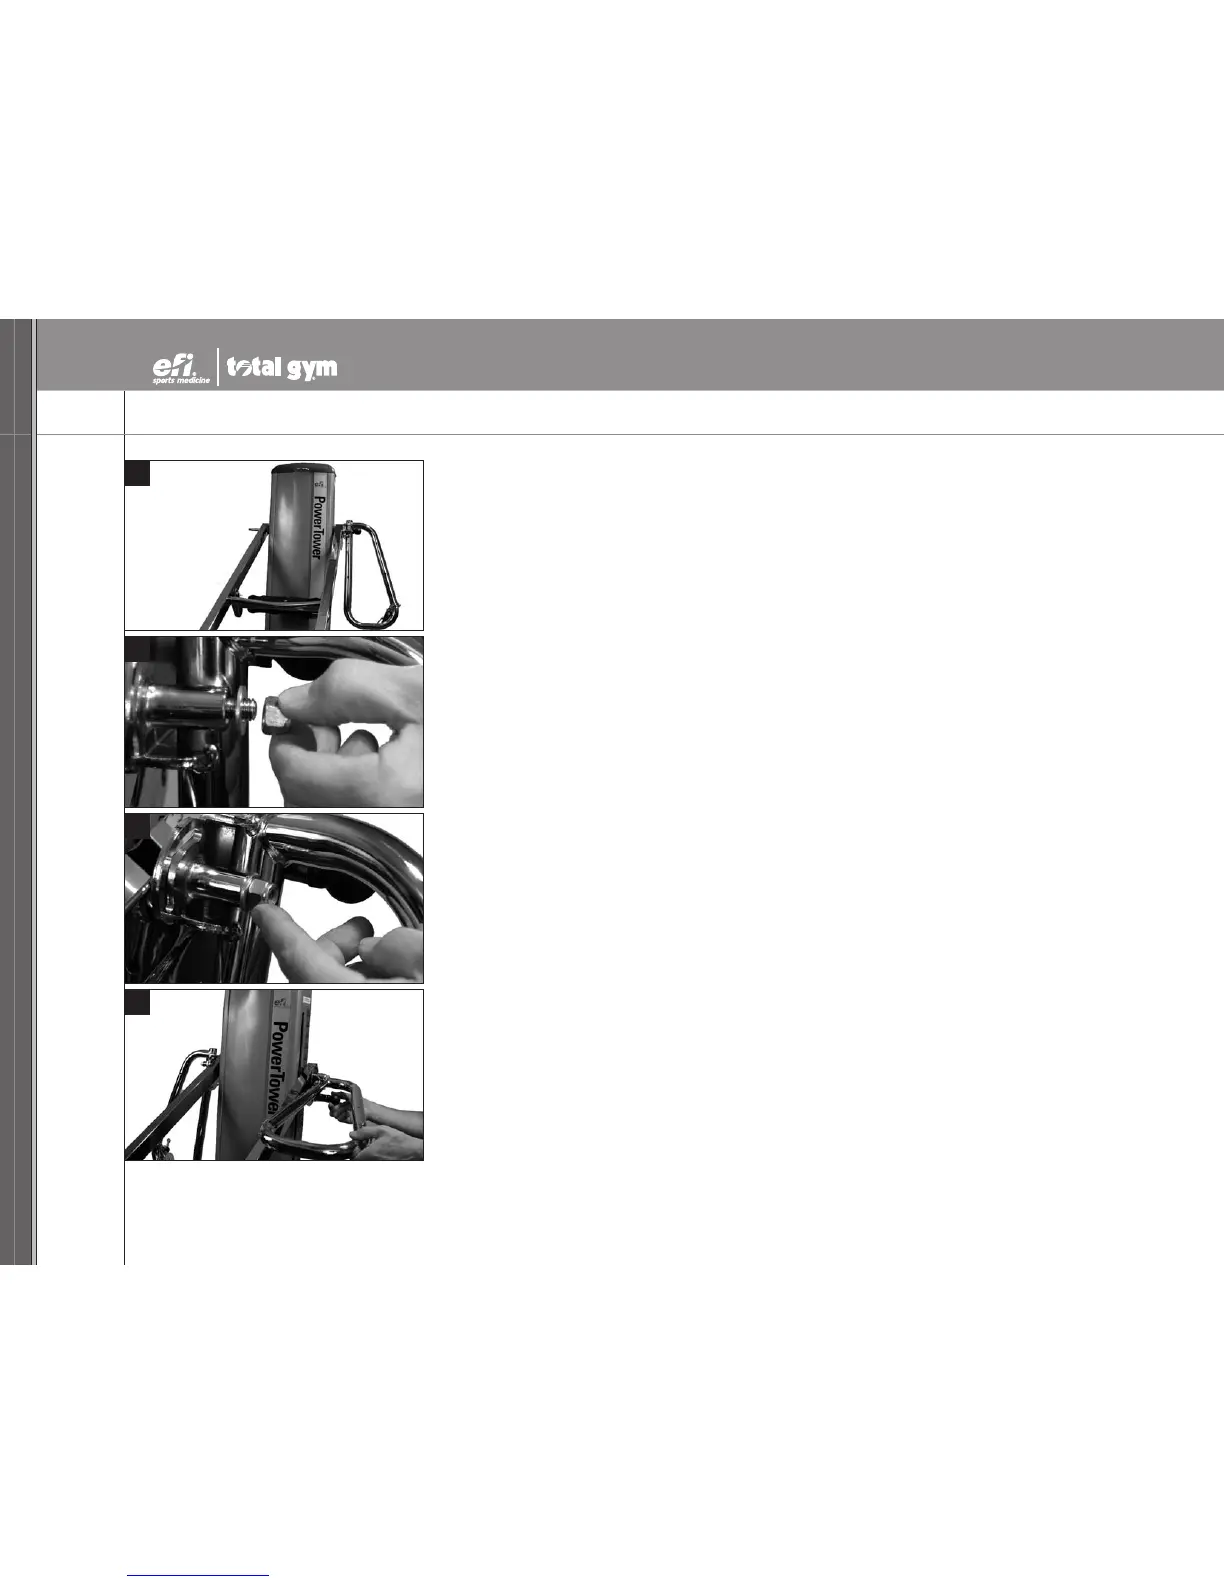
INSTALLING LAT BARS: POSITIONING THE LAT BARS - PHASE 2 (CONTINUED)
26.
Rotate the LAT Bar (B) upside-down until the other LAT Bar (B) is installed, and both nyloc nuts
on the Tower Crossbar (Y) have been tightened.
27. Return the Chrome Washer (II) to the end of the Tower Crossbar (Y) that extends beyond the
LAT Bar (B) cylinder.
Attach and finger tighten the nyloc nut onto the Tower Crossbar (Y) with the other hand.
28. Press against the nyloc nut to push the Tower Crossbar (Y) until it lies flush against the
LAT Bar (B) cylinder. This will help seat the LAT Bar (B) against the Upper Rail (X).
Repeat Phase 2 for the other LAT Bar (B). Tighten both LAT Bars (B) with the Wrenches (GG)
until the nyloc nuts get hard to turn (no threads should be showing).
ATTACHING THE LAT BAR BRACKET - PHASE 3
29.
Remove the remaining contents (shown on page 3)from your Hardware Packet. Lower the
LAT Bar (B) to the Pull-up position.
26
27
28
29