EasyManua.ls Logo

EGR CANOPY REMOTE LOCKING KIT User Manual

EGR CANOPY REMOTE LOCKING KIT
10 pages
To Next Page IconTo Next Page
Page #1 background imageLoading...
Page #1 background image
Page 1 of 1021/03/17
INSTALLATION TIME: 1.0 hour (Approximately)
CP0253
Phillips head screwdriver
Flat blade screwdriver Spanner 10&13mm
Torque wrench
Side cutters
Draw Wire
PVC Tape
Socket 10&13mm, extension bar and ratchet
Electrical Connector Crimping Tool
TOOLS REQUIRED:
CANOPY
REMOTE LOCKING KIT
INSTALLATION INSTRUCTIONS
Place these instructions in vehicle’s glove box after installation is complete
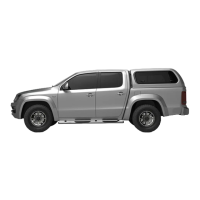
VW AMAROK MY17-
IMPORTANT!
• Read instructions carefully before installation.
• It is strongly recommended that installation is conducted by an authorized dealer.
• This product must be installed exactly as specified in these instructions.
Failure to do so may result in improper fit and/or retention/failure of components.
• Recommend installation by 2 people.
Question and Answer IconNeed help?

Do you have a question about the EGR CANOPY REMOTE LOCKING KIT and is the answer not in the manual?

EGR CANOPY REMOTE LOCKING KIT Specifications

General IconGeneral
CategoryAutomobile Accessories
Product TypeRemote Locking Kit
CompatibilityEGR Canopies
InstallationProfessional Installation Recommended
FunctionRemote locking and unlocking

Summary

Initial Safety and Tool Requirements

Important Installation Warnings and Recommendations

Key safety advice, dealer recommendation, and need for two people for installation.

Essential Tools for Installation

List of necessary tools required to perform the remote locking kit installation.

Parts Identification and Inventory

Main Carton Components

Detailed listing of all parts supplied in the main package for the remote locking kit.

Vehicle Wiring Kit Components

Inventory of parts included in the specific vehicle wiring kit (LOOM0127).

Vehicle Harness Routing and Connection

Routing Vehicle Harness

Procedure for feeding the main vehicle harness (LOOM0127A) through the vehicle's rear.

Locating and Disconnecting Connectors

Finding and unplugging existing vehicle harness connectors under the vehicle.

Vehicle Harness Connection and Canopy Wiring

Connecting Vehicle Harness

Connecting the new vehicle harness to the previously disconnected connectors.

Canopy Striker Plate and Loom Feed

Removing striker plate and feeding canopy loom (LOOM0127B) into the door frame.

Canopy Wiring and Latch Preparation

Installing Rubber Tube and Wiring

Feeding rubber tube and wiring harness LOOM0127B along the canopy window frame.

Fitting Latch Plate and Cover Removal

Securing the striker bracket with a plate and removing the LHS latch cover.

Canopy Lock Mechanism Disassembly

Removing Lock Covers and Cam Plate

Detailed steps for removing the lock cover, internal handle, and cam plate from the lock.

Unclipping Pull Rods

Disconnecting the pull rods from the retainer clips on the canopy lock mechanism.

Canopy Wiring Preparation and Application

Glass Preparation and Rubber Tube Application

Cleaning the rear window glass and applying the rubber tube for wiring protection.

Fitting Plastic Tube and Wiring

Feeding wiring into a clip and securing with plastic tube within the rubber tube.

RCL Unit Installation and Wiring

Completing Plastic Tube and Extrusion Fitting

Finalizing the plastic tube installation into the aluminium extrusion for secure wiring.

Installing RCL Unit and Wiring Connections

Connecting the RCL unit, wiring terminals (brown/orange), and securing the unit with a metal clip.

Lock Mechanism Reassembly and Final Connections

Reassembling Lock Mechanism Components

Refitting the cam plate with correct torque and clipping pull rods into retainer clips.

Connecting Window Harness to Vehicle Harness

Finalizing the electrical connection between the canopy window harness and the vehicle harness.

Final Checks and Refitting Covers

Verifying Latch Operation and Adjustment

Ensuring correct latch stages, striker alignment, and handle operation, with adjustment guidance.

Refitting Canopy Covers

Reattaching the latch covers and lock cover securely with screws.

Related product manuals