3
English
Connecting Cables
Attention
• Check that the monitor and the PC are powered off.
• When replacing the current monitor with this monitor, be sure to change the PC settings for resolution and vertical scan
frequency to those that are available for this monitor. Refer to the compatible resolution table (back of cover page) before
connecting the PC.
Note
• When connecting multiple PCs to this product, refer to the User’s Manual (on the CD-ROM).
1.
Turn the monitor screen 90˚ in clockwise direction.
The landscape position is the default monitor orientation. Turn the monitor screen ninety degrees to portrait
position before installing it.
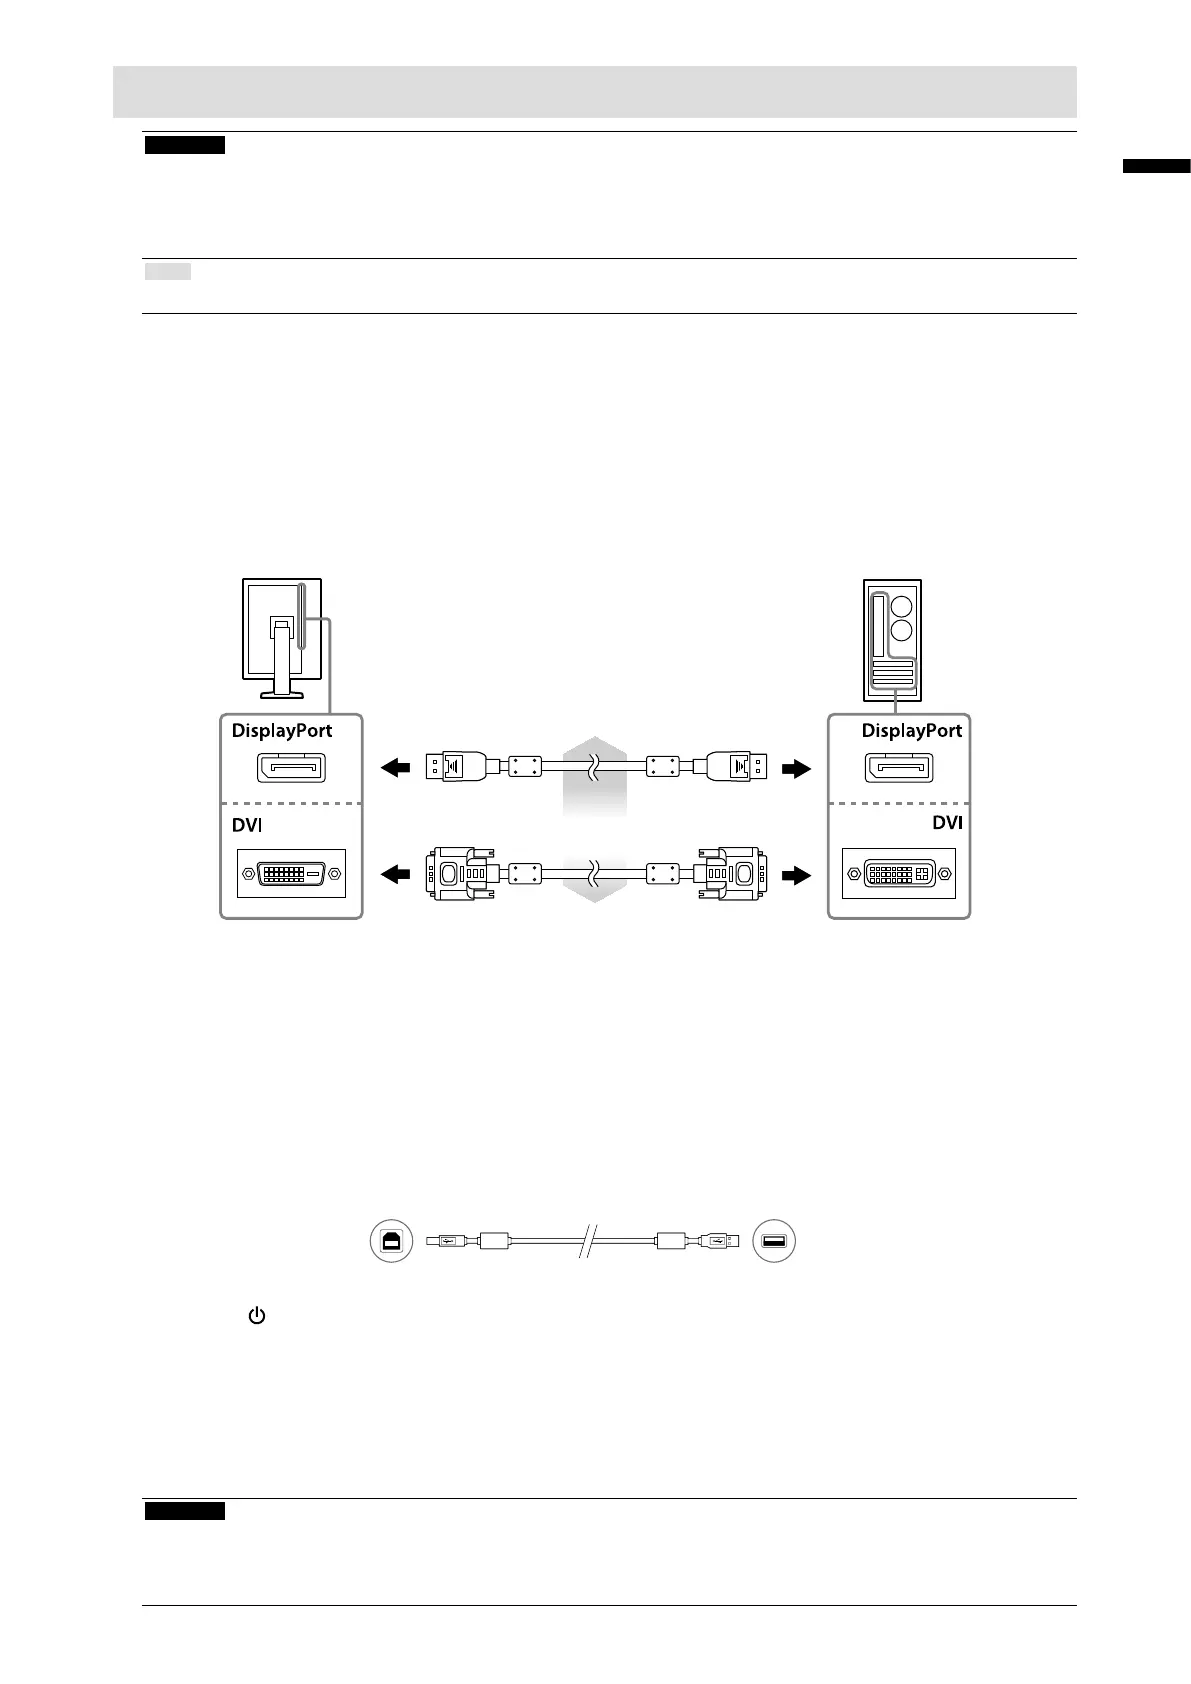
2.
Connect the signal cables to the input signal connectors and PC.
Check the shape of the connectors, and connect the cables.
After connecting the signal cable, tighten the screws of the connectors to secure the coupling.
Digitalconnection
(DisplayPort) PP300
Digitalconnection
(DVI)
DD300DL:
RX340/RX340-AR
GX340-CL
DD300:RX240/GX240-CL
or
3.
Plug the power cord into a power outlet and the power connector on the
monitor.
4.
Connect the USB cable when using RadiCS LE or ScreenManager Pro for
Medical.
ConnectingtotheMonitor ConnectingtoaComputer
5.
Press to turn on the monitor.
The monitor’s power indicator lights up green.
6.
Turn on the PC.
The screen image appears.
If an image does not appear, refer to “No picture” (page 6) for additional advice.
Attention
• Turn off the monitor and PC after using them.
• For the maximum power saving, it is recommended that the Power button be turned off. Turning off the main power switch
or unplugging the power cord completely shuts off power supply to the monitor.