- 9 -
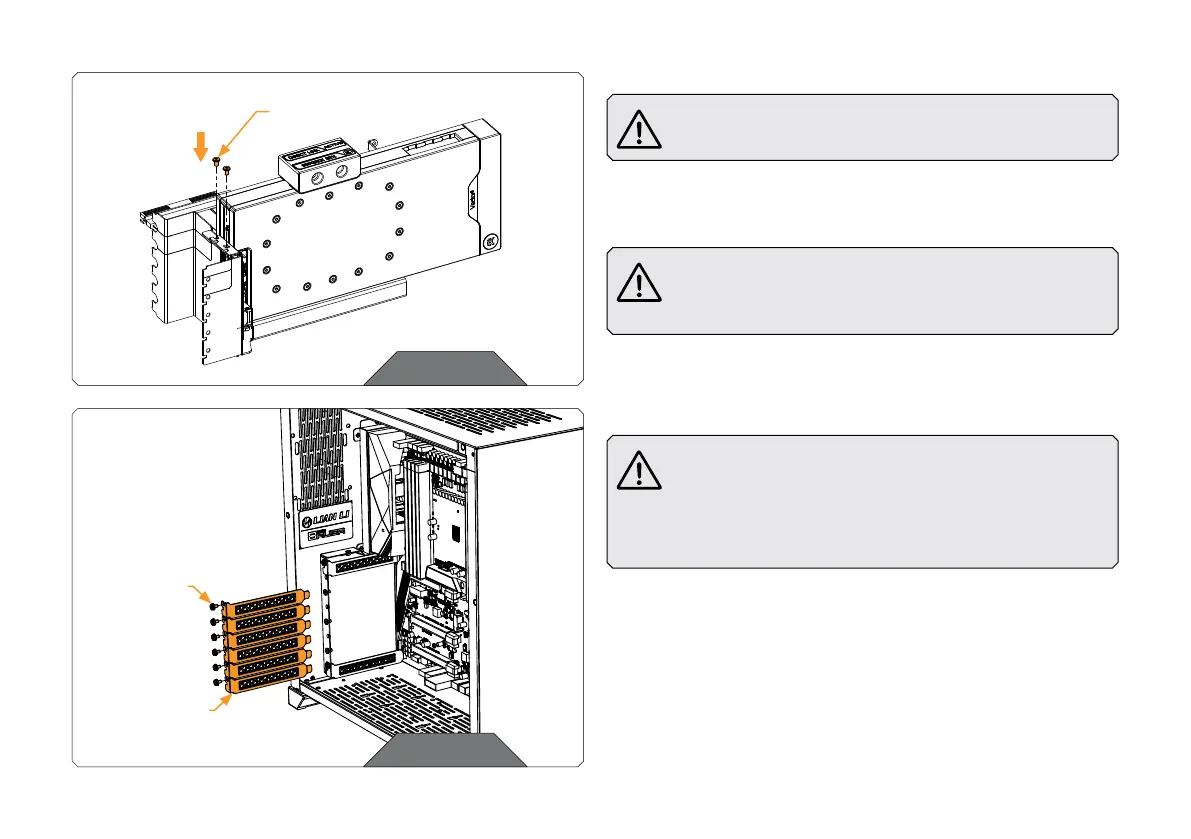
STEP 4
Before you mount the GPU, make sure the PCIE latch is not
closed – it must be pushed to the right side.
Carefully mount the GPU onto the GPU Holder, using two (2) UNC
6-32x1/4 screws. Pay special attention not to damage the GPU.
Secure the GPU by moving the PCIE latch that is positioned
underneath it, to the left. You may use a credit card,
screwdriver, or similar item to move the latch.
STEP 4
UNC 6-32x1/4
SCREW
STEP 5
PCIE
BRACKETS
SAVE THE
SCREWS
FOR L ATER
STEP 5
Before you start to assemble the Holder with the GPU
to the motherboard, make sure that your computer is
powered off and the PSU power cable unplugged. It is
also recommended that you put your computer with the
motherboard in a horizontal position before you continue
with the installation process.
Remove the six appropriate PCIE brackets from your case. Which
brackets you need to remove depends on the installation option you
chose at STEP 1.
Save all removed screws - you’ll need them later.