3 Select your language using the softkeys.
é
ê
The Elcometer 224 has a choice of three measurement modes;
‘Immediate’, ‘Custom’ and ‘Standards’ - see the table below for an
explanation of the different modes available. The mode selected
depends on which International Standard the user is working in
accordance with.
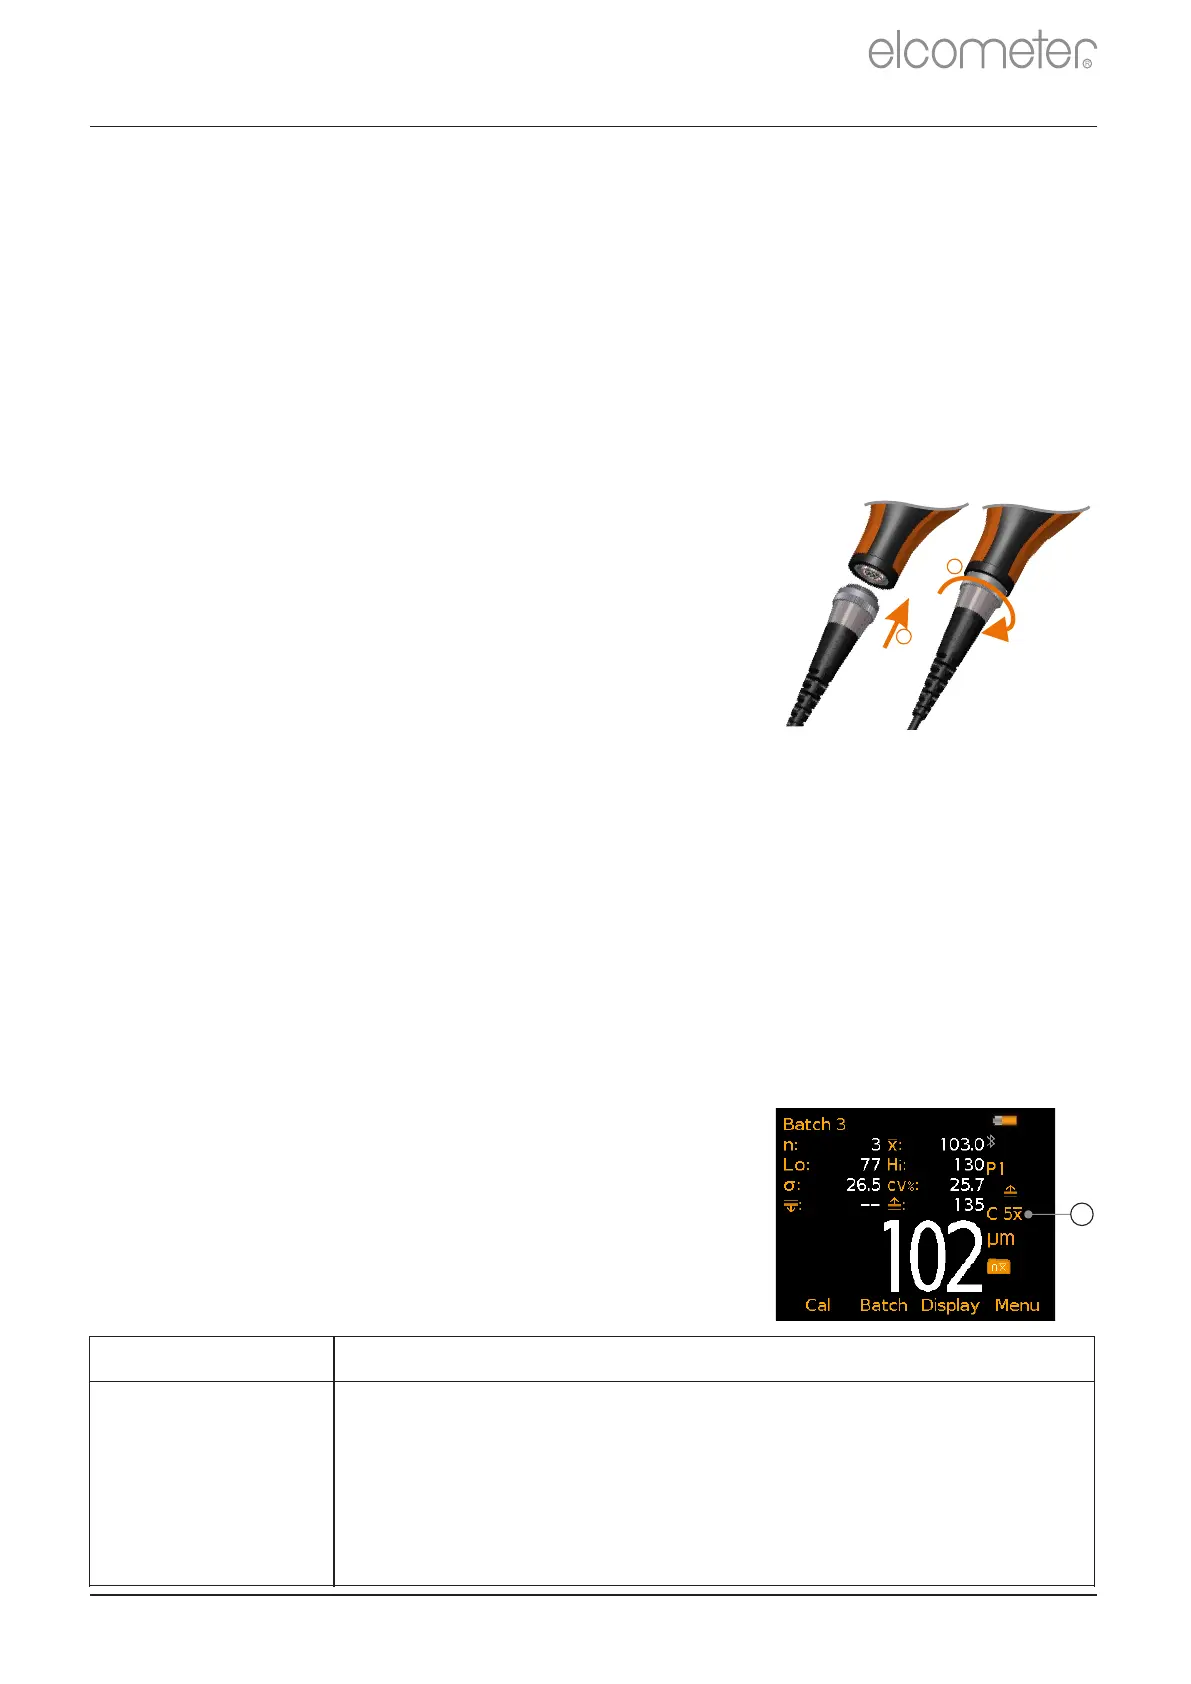
1 Switch the gauge .OFF
2 Screw in the collar - clockwise.
To select the measurement mode:
é
2 Use the softkeys to select the required measurement mode.
ê
To access the language menu when in a foreign language:
1 Rotate the probe plug to align the pins.
4.2 SELECTING YOUR LANGUAGE
2 Select your language using the softkeys.
é
ê
2 Press and hold the left softkey and switch the gauge .ON
1 Press and hold the / button until the Elcometer logo is ON OFF
displayed.
3 Follow the on screen menus.
4.3 CONNECTING THE PROBE -
SEPARATE GAUGES ONLY
See Section 13 ‘ Elcometer 224 Separate Probes’
on page en-13 for details of the probes available.
4.4 SELECTING THE MEASUREMENT MODE
1 Press Menu/Setup/Measurement Mode or when in batching
(Model T only), Batch/New Batch/Measurement Mode.
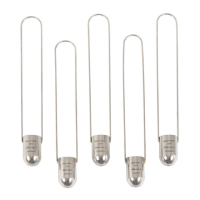
The measurement mode selected and in use, is
indicated by the icon shown on the right of the
display (a). If no icon is displayed, ‘Immediate’
Mode is in use.
R
4 GETTING STARTED (continued)
www.elcometer.com
en-4
1
2
a
continued...
Immediate: Allows the users to take single measurements
which are displayed on the gauge (Model B & T) and saved
into the batch memory (Model T only).
Note: This mode allows gauges to be used and measurements to be taken
in the same way as older Elcometer 224 models.