R
4 GETTING STARTED
4.1 ENSURING YOUR GAUGE HAS THE LATEST FIRMWARE &
UPGRADING YOUR GAUGE - MODEL T
To ensure that your gauge has the most up-to-date gauge firmware,
allowing you to benefit from the latest features and functionality, we
®
recommend that the gauge is connected to ElcoMaster on a regular
basis and before first use.
Simply connect the gauge via USB to an internet connected computer
®
running ElcoMaster using the ‘Connect Gauge’ feature. If a later
version of the gauge firmware is available, ‘Update Gauge’ will be
displayed to the right of the gauge details. Click ‘Update Gauge’ to
install the latest firmware.
4.2 FITTING THE BATTERIES
Each gauge is supplied with 2 x AA alkaline
batteries.
To insert or replace the batteries:
1 Lift the latch on the battery compartment
cover and rotate anti-clockwise to remove
the cover.
2 Insert 2 batteries taking care to ensure
correct polarity.
3 Refit the cover and rotate the latch clockwise to close.
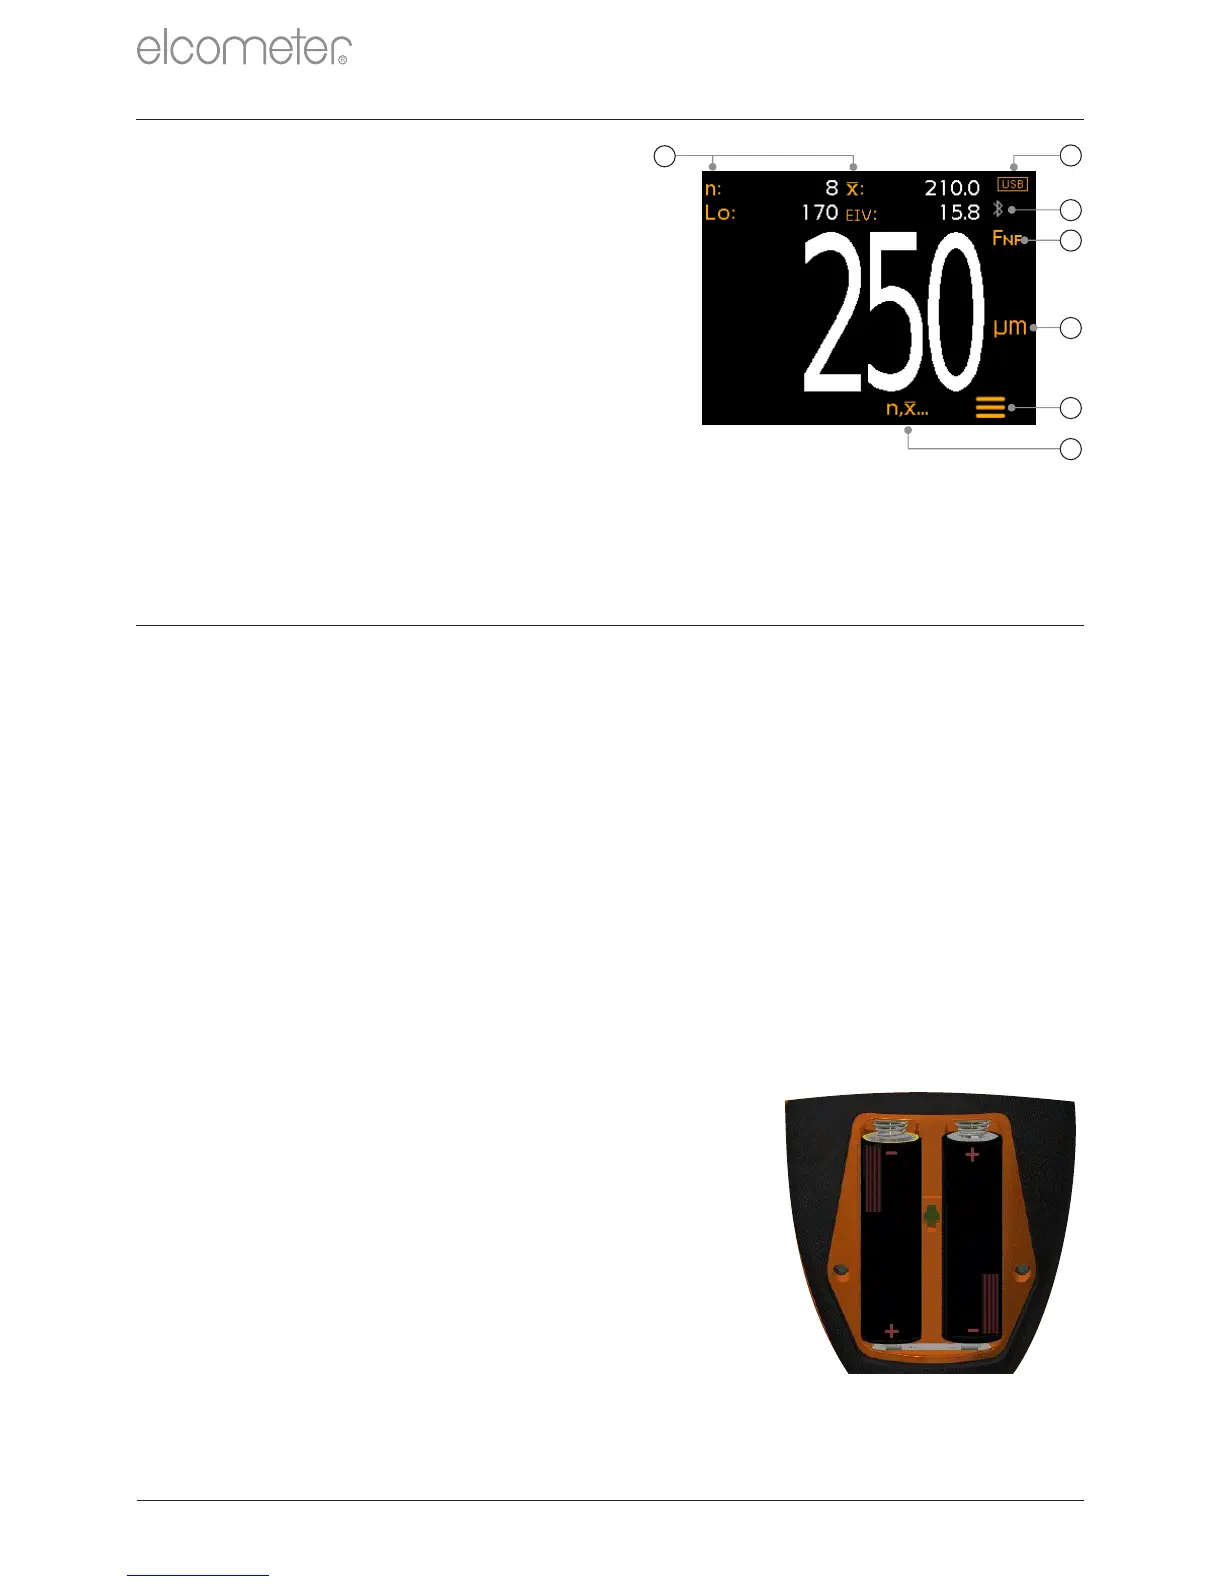
a
b
c
d
e
f
g
+
+