22
4. Remove the retainer/wash from the liquid end,
and insert the installation tool/dowel pin into
the liquid end through the piston seal (if your
pump uses a 3/32” or 1/8” diameter piston, the
installation tool has a “hooked” end, which is
used to remove the seals). If you are using the
installation tool, hook the existing seals and
remove and discard both the washer and the
seal. If you are using the ¼” dowel pin, rock
the dowel pin back and forth gently, and
remove and discard both the washer and seal.
Do not scratch the walls of the piston seal gland
in the liquid cylinder with the tool/dowel pin.
5. Inspect the piston. You can remove the piston by moving the piston up in the slot which holds it in
place. If the piston has scratches on the sapphire, or significant corrosion on the stainless steel piston
holder, you should replace it. If there is minor corrosion on the piston holder, clean the piston holder.
Also inspect for evidence of deposits on the sapphire. If deposits are present on the sapphire
(discoloration or particulates), clean it. If the sapphire does not clean, you should replace the piston.
6. Inspect the retainer. Clean the retainer/wash if necessary. If there is evidence of wear, or if the piston
does not fit snugly in the retainer/wash, or if the retainer/wash grips the piston too tightly, you should
replace the retainer/wash.
7. Inspect the liquid cylinder, paying special attention to the gland for the piston seal. Any scratches or
irregularities will require replacement of the liquid end.
8. Clean all parts with a liquid detergent, followed by a rinse. Clean any fluid in the mechanical end of the
pump.
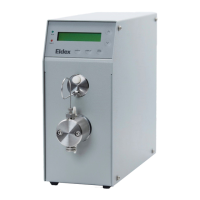
9. Insert the installation tool/dowel pin into the
retainer/wash and then into the new seal backup washer
(used on 1HI, 2HI, and 3HI pumps) and new piston seal.
When inserting the tool through the new piston seal, the
piston seal should lay flat on a hard surface with the
spring side down (the seal will generally “snap” onto the
tool). Position the parts on the tool in the order shown.
Insert the tool into the liquid end bore. CAUTION:
The open side of the seal (side revealing the spring or
the O ring) should face the closed (fluid side) end of the
liquid end.
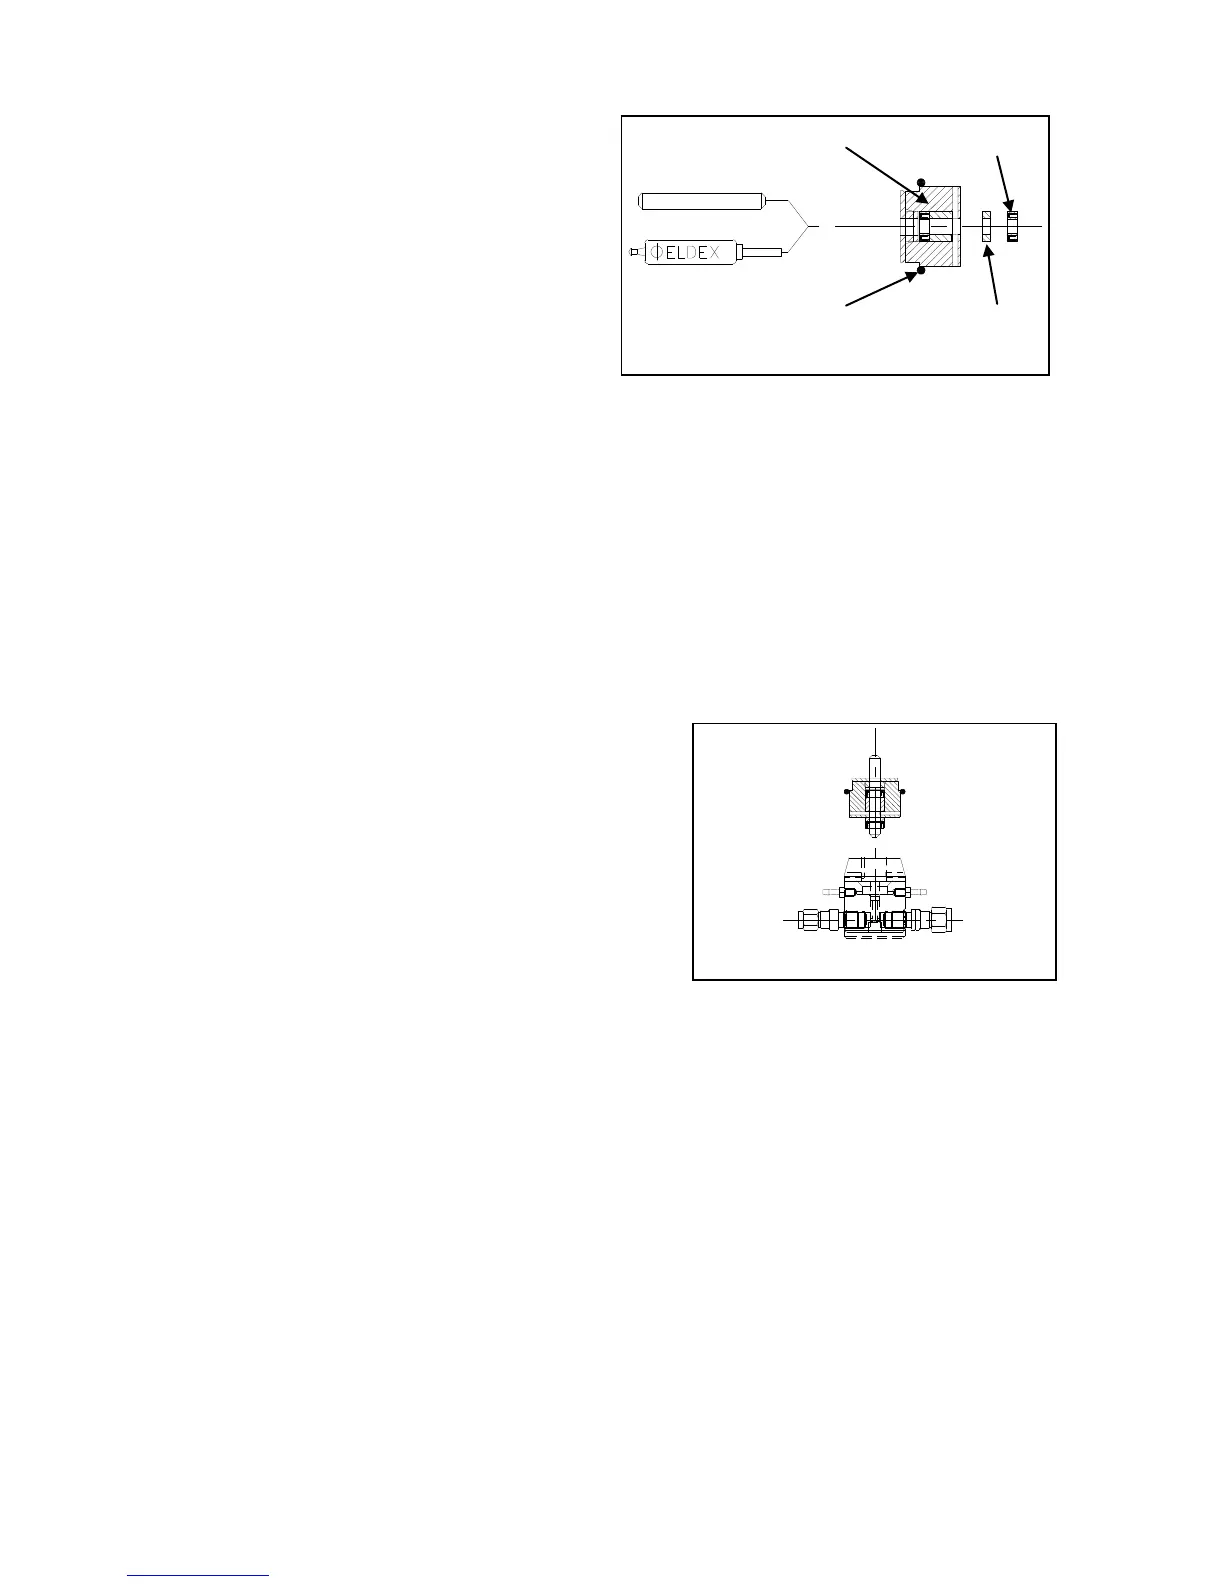
10. Keeping the tool perpendicular with the face of the liquid end, push the piston seal and washer into the
liquid end bore, by pressing down gently and evenly on the edge of the retainer/wash with both thumbs.
11. Withdraw the tool, while holding the retainer/wash and liquid end firmly in place. When installing the
retainer/wash, make sure you line up the holes in the retainer with the wash system.
12. Reinstall the liquid end on the pump. See Figure 4.1.
PRECAUTIONS:
1. Do not re-use the old piston seal.
2. Cleanliness is very important for optimal seal and check valve operation.
3. Note suggestion regarding seal “break-in” on page 15.
NOTE: If you retain the tools supplied with Eldex Part Nos. 5911, 5941, or 5944, you can purchase just the
seals and re-use the tools.
Figure 4.2: Piston Seal Assembly
Figure 4.3: Piston Seal Replacement