23
Replacing Valves
Always replace valves in a clean area to prevent dust and dirt from entering the pump.
Removal of Existing Valves
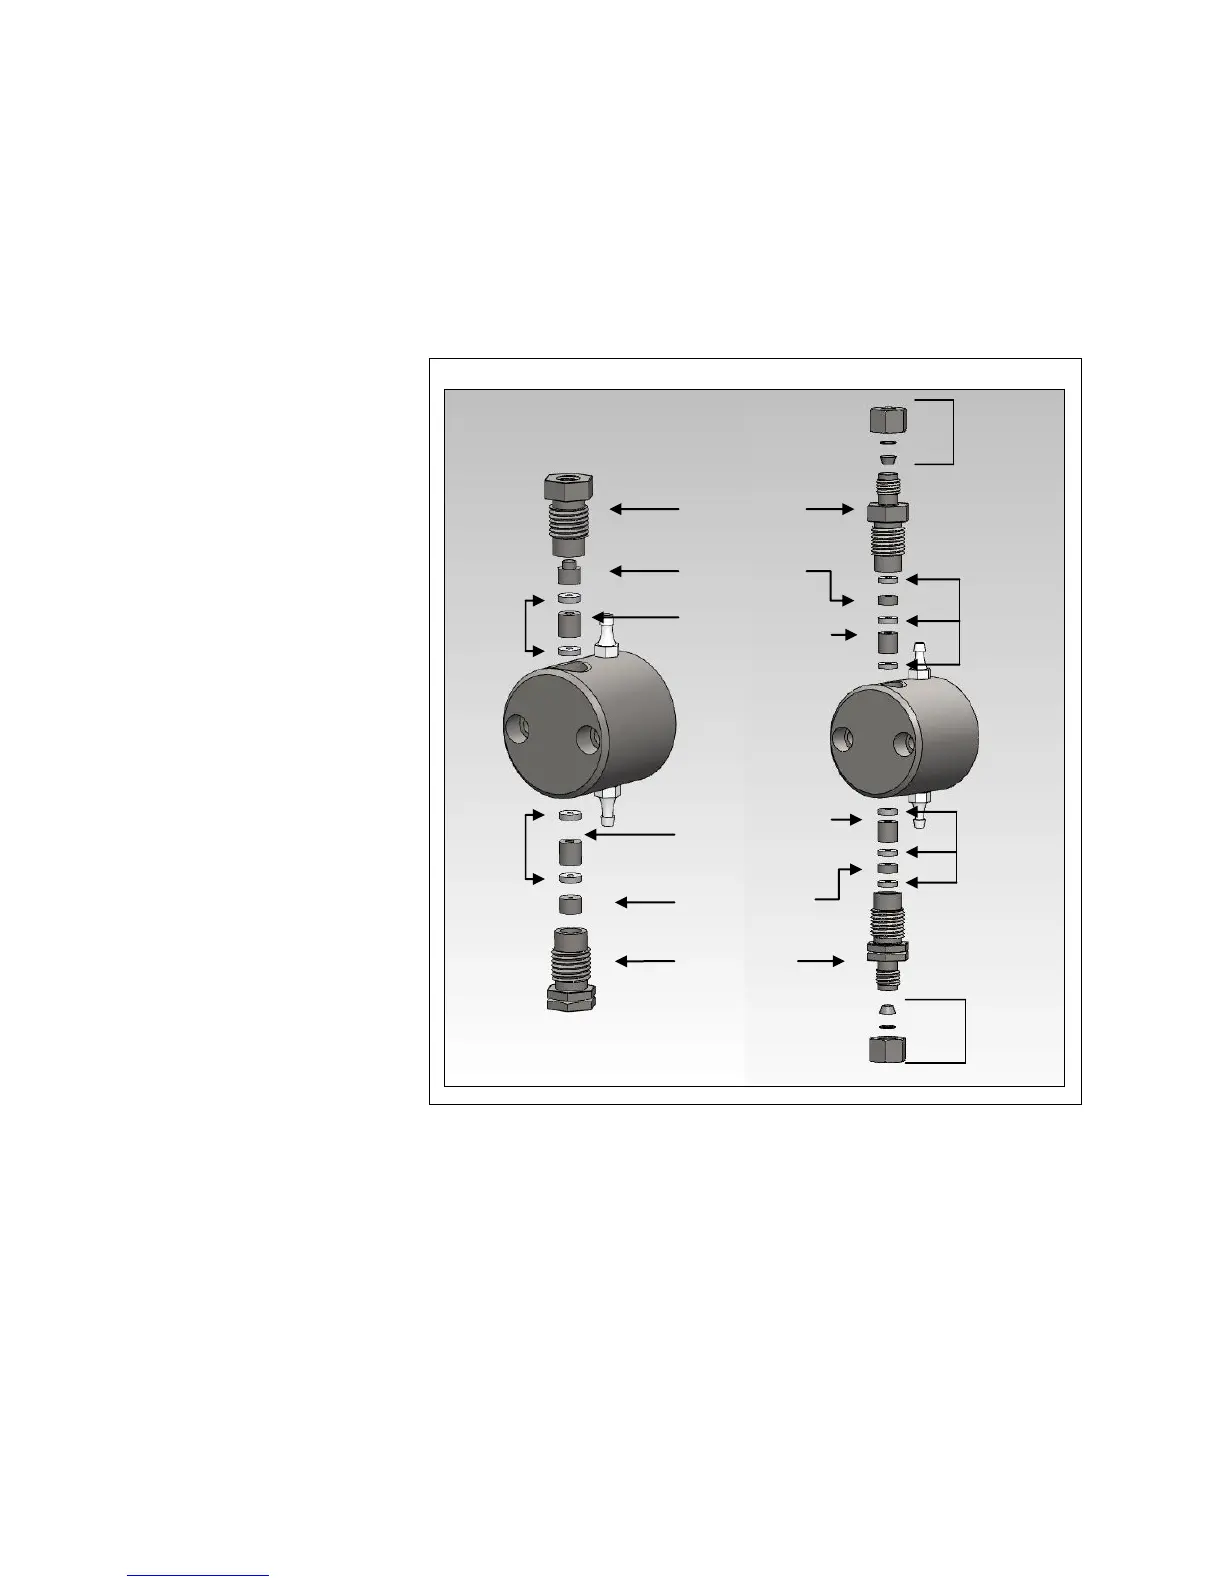
The valves are the two hexagon-shaped components on the liquid end assembly (see Figure 4.4). Inlet valves
can be distinguished from outlet valves by the groove on the hexagonal part of the valve. Remove the valves
with a ½” wrench, turning in a counter-clockwise direction. After removal, be careful to keep the valve oriented
so the translucent washers face upwards to prevent parts from falling out. If you wish to replace the cartridge in
the valve, you may purchase
replacement cartridges,
which include the cartridge
and instructions.
Installation of New
Valves
1. Inlet valves can be
distinguished from
outlet valves by the
groove on the
hexagonal part of
the valve.
2. Unscrew the
shipping nut and
remove the metal
shipping washer, as
these are not used
for installation of
the valves.
3. Insert the new valve
into the liquid end
assembly and
tighten by hand
until just finger-
tight. Then use a
½” wrench and
tighten ¼ turn more.
You should tighten
valves to the point
at which no further
leakage occurs, or
not more than 4.5
ft./lbs.
OVERTIGHTENING THE VALVES CAN CAUSE THE SAPPHIRE SEATS TO CRACK.
STABILIZE THE VALVE WITH A ½” WRENCH WHEN ATTACHING YOUR FITTINGS TO PREVENT
FURTHER VALVE TIGHTENING. DO NOT TIGHTEN FITTINGS TO BEYOND 40 IN./LBS., OR THE
POINT WHERE NO FURTHER LEAKAGE OCCURS.
Replacing Valve Cartridges
1. Remove the valve from the cylinder (see above for detailed instructions).
2. Using the smaller dowel pin provided (1-1/4” long by 1/8”diameter), press out the internal components
of the valve assembly using a steady pressure. Do not hammer parts through with the dowel pin or
hammer on the dowel pin. Do not allow the valve parts to fall out of the valve onto a hard surface.
Figure 4.4: Liquid End Assembly
Valve Cartridge:
Triangular Opening
faces up
Valve Cartridge:
Triangular Opening
faces up