16
ENGLISH
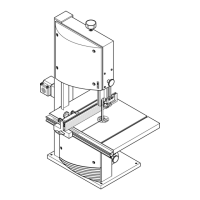
3. Set required blade tilt with the blade
tilt lever (43).
4. Lock the set bevel angle by tighten-
ing the twist handle again.
Danger!
Prior to all servicing:
− switch machine OFF;
− unplug power cable;
− wait for saw blade to stop.
• Check that all safety devices are
operational again after each service.
• Repair and maintenance work other
than described in this section should
only be carried out by qualified spe-
cialists.
9.1 Saw blade change
Danger!
Directly after cutting the saw
blade can be very hot – burning haz-
ard! Let a hot saw blade cool down.
Do not clean the saw blade with com-
bustible liquids.
Risk of injury, even with the blade at
standstill. Wear gloves when chang-
ing blades.
When assembling, the direction of
rotation of the saw blade and outer
flange must be observed!
1. Raise saw blade fully.
2. Remove blade guard.
3. Turn the flat head screw (45) of the
table insert extrusion (44) clockwise
by 1/4 turn and remove the table
insert.
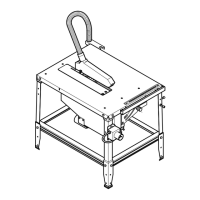
4. To arrest the saw blade remove
plastic cap (47) and put retention pin
(46) throught the motor shaft.
5. Loosen arbor bolt (50) with spanner
(L.H. thread!).
6. Remove outer blade collar (49) and
saw blade (48) from the saw spin-
dle.
7. Clean clamping surfaces of saw
spindle and saw blade.
Danger!
Do not use cleaning agents
(e.g. to remove resin residue) that
could corrode the light metal compo-
nents of the saw; the stability of the
saw would be adversely affected.
8. Put on a fresh saw blade (observe
direction of rotation!).
Danger!
Use only suitable saw blades
(see "Technical Specifications") –
when using unsuitable or damaged
blades parts could be explosive-like
hurled from it by centrifugal force.
Do not use:
− saw blades made of high speed
steel (HSS);
− saw blades with visible damage;
− cut-off wheel blades.
Danger!
− Mount saw blade only using
genuine parts.
− Do not use loose-fitting reducing
rings; the saw blade could work
loose.
− Saw blades have to be mounted
in such way that they do not
wobble or run out of balance and
can not work loose during opera-
tion.
9. Put on outer blade collar (52) (the
inner blade collar’s lug must engage
in the groove of the outer blade col-
lar).
10. Screw arbor bolt (51) back in the
saw spindle (L.H. thread!) and
tighten it. Use retention pin to hold
the saw blade.
Danger!
− Do not extend arbor bolt tighte-
ning wrench.
− Do not tighten arbor bolt by hit-
ting the wrench.
− After tightening the arbour bolt
do not forget to remove the reten-
tion pin!
Riving knife adjustment.
Danger!
The riving knife is one of the
safety devices and has to be correctly
installed for a safe operation:
In order to match the riving knife exactly
with the saw blade, its position can be
adjusted in two planes:
− in the distance to the saw blade;
− in its lateral alignment.
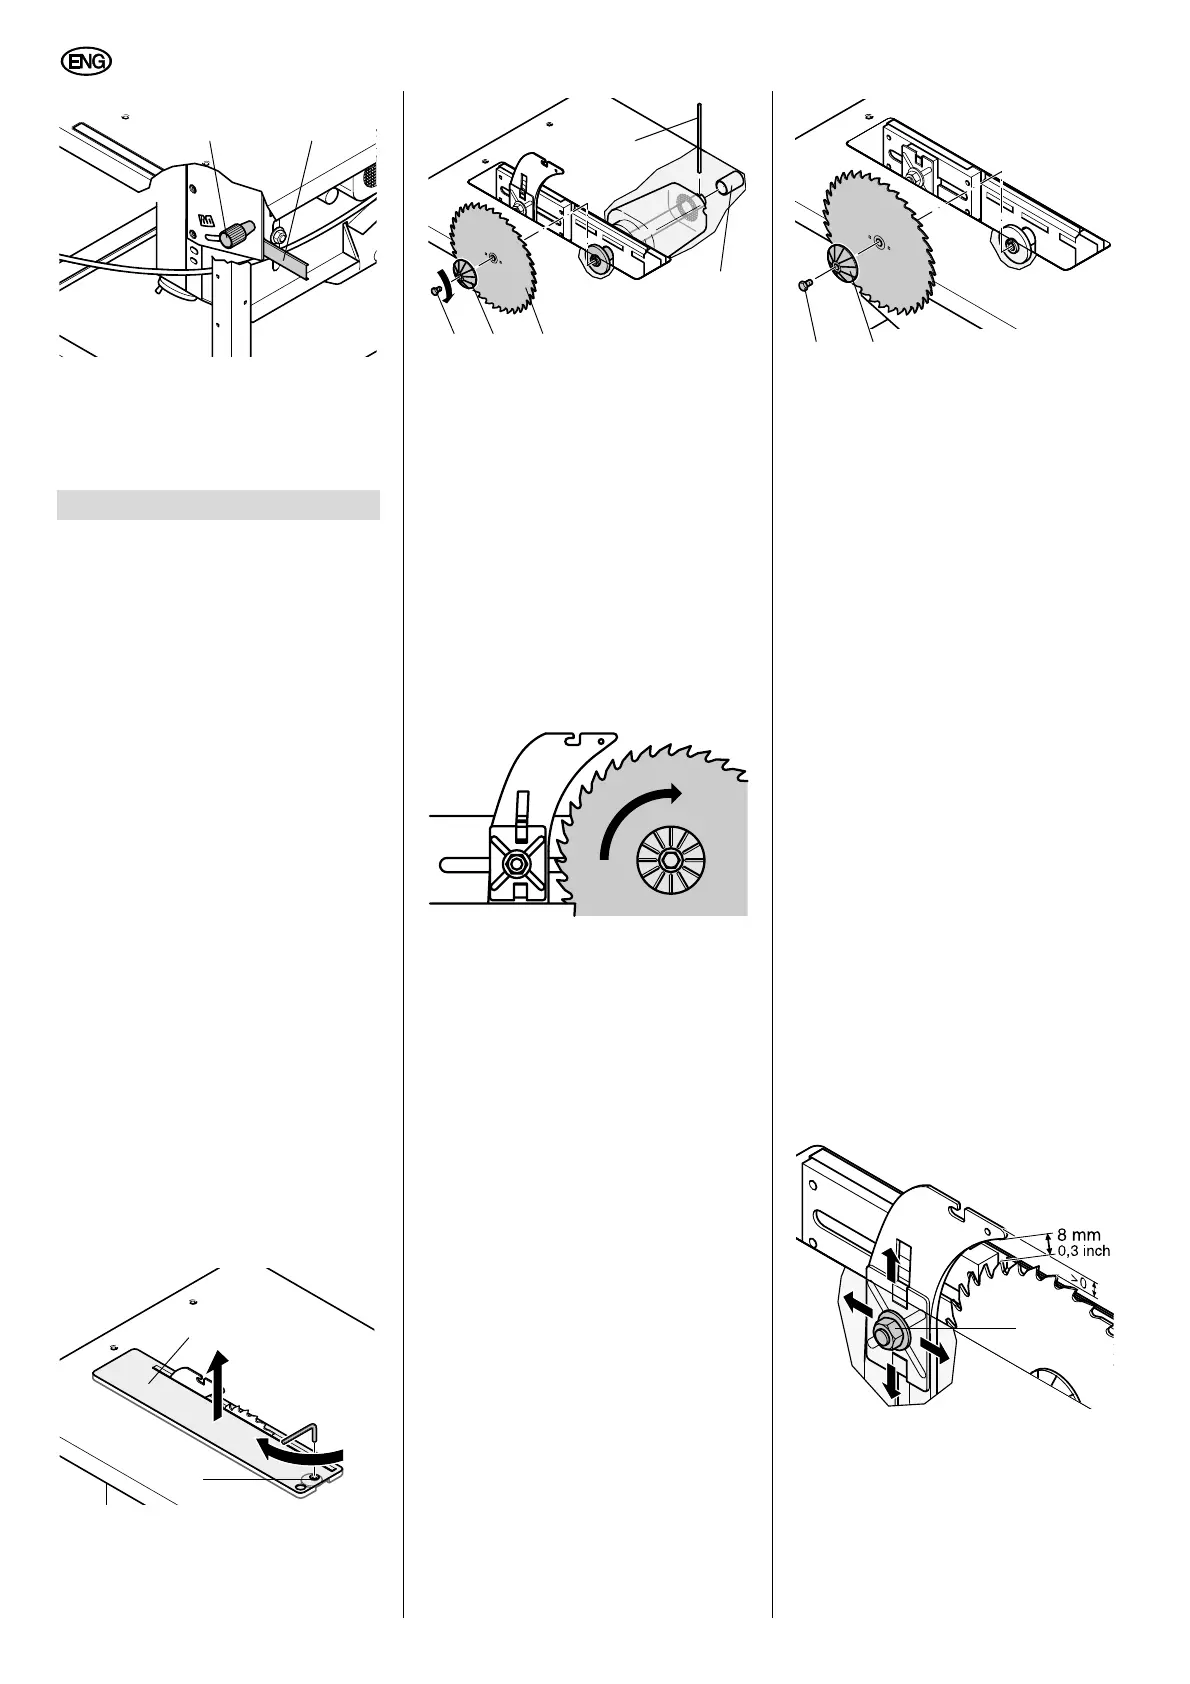
Distance to the saw blade:
The distance between the saw blade’s
peripheral edge and the riving knife shall
be between 3...8 mm.
The riving knife must project at least the
same distance over the saw table as the
saw blade.
1. If necessary, loosen the Keps nut
(53) on the riving knife one turn.
2. Adjust distance of the riving knife to
the saw blade.
3. Tighten the Keps nut.
9. Care and Maintenance
42 43
44
45
47
46
50 49 48
51 52
53