OVERLOAD
POWER
BATTERY LOW
OPEN RELAY
CLOSE RELAY
TIMER
UP
ON
OFF
60
0
PW
CENTRAL CONTROL
S
Y
S
T
E
M
O
N
D
C
O
P
E
R
A
T
O
R
v
5
M
MADE IN USA
A
L
A
R
M
S
E
N
S
O
R
R
E
V
E
R
S
E
S
E
N
S
O
R
H
E
A
V
Y
G
A
T
E
F
IR
E
D
E
P
T
S
T
R
IK
E
O
P
E
N
S
A
F
E
T
Y
L
O
O
P
E
X
IT
L
O
O
P
R
A
D
IO
R
E
C
CHARGING
POWER
BOARD
POWER
CHECK
FUSE
J2
C
H
AR
G
E O
K
CHARGE OK
OVERLOAD
POWER
BATTERY LOW
OPEN RELAY
CLOSE RELAY
TIMER
UP
ON
W1
OFF
O
P
E
N
T
O
R
IG
H
T
60
0
PW
CENTRAL CONTROL
S
Y
S
T
E
M
O
N
D
C
O
P
E
R
A
T
O
R
v
5
M
M
ADE IN USA
A
L
A
R
M
S
E
N
S
O
R
R
E
V
E
R
S
E
S
E
N
S
O
R
H
E
A
V
Y
G
A
T
E
F
IR
E
D
E
P
T
S
T
R
IK
E
O
P
E
N
S
A
F
E
T
Y
L
O
O
P
E
X
IT
L
O
O
P
R
A
D
IO
R
E
C
CHARGING
POWER
BOARD
POWER
CHECK
FUSE
J2
CHARGE OK
STEP BY STEP INSTALLATION
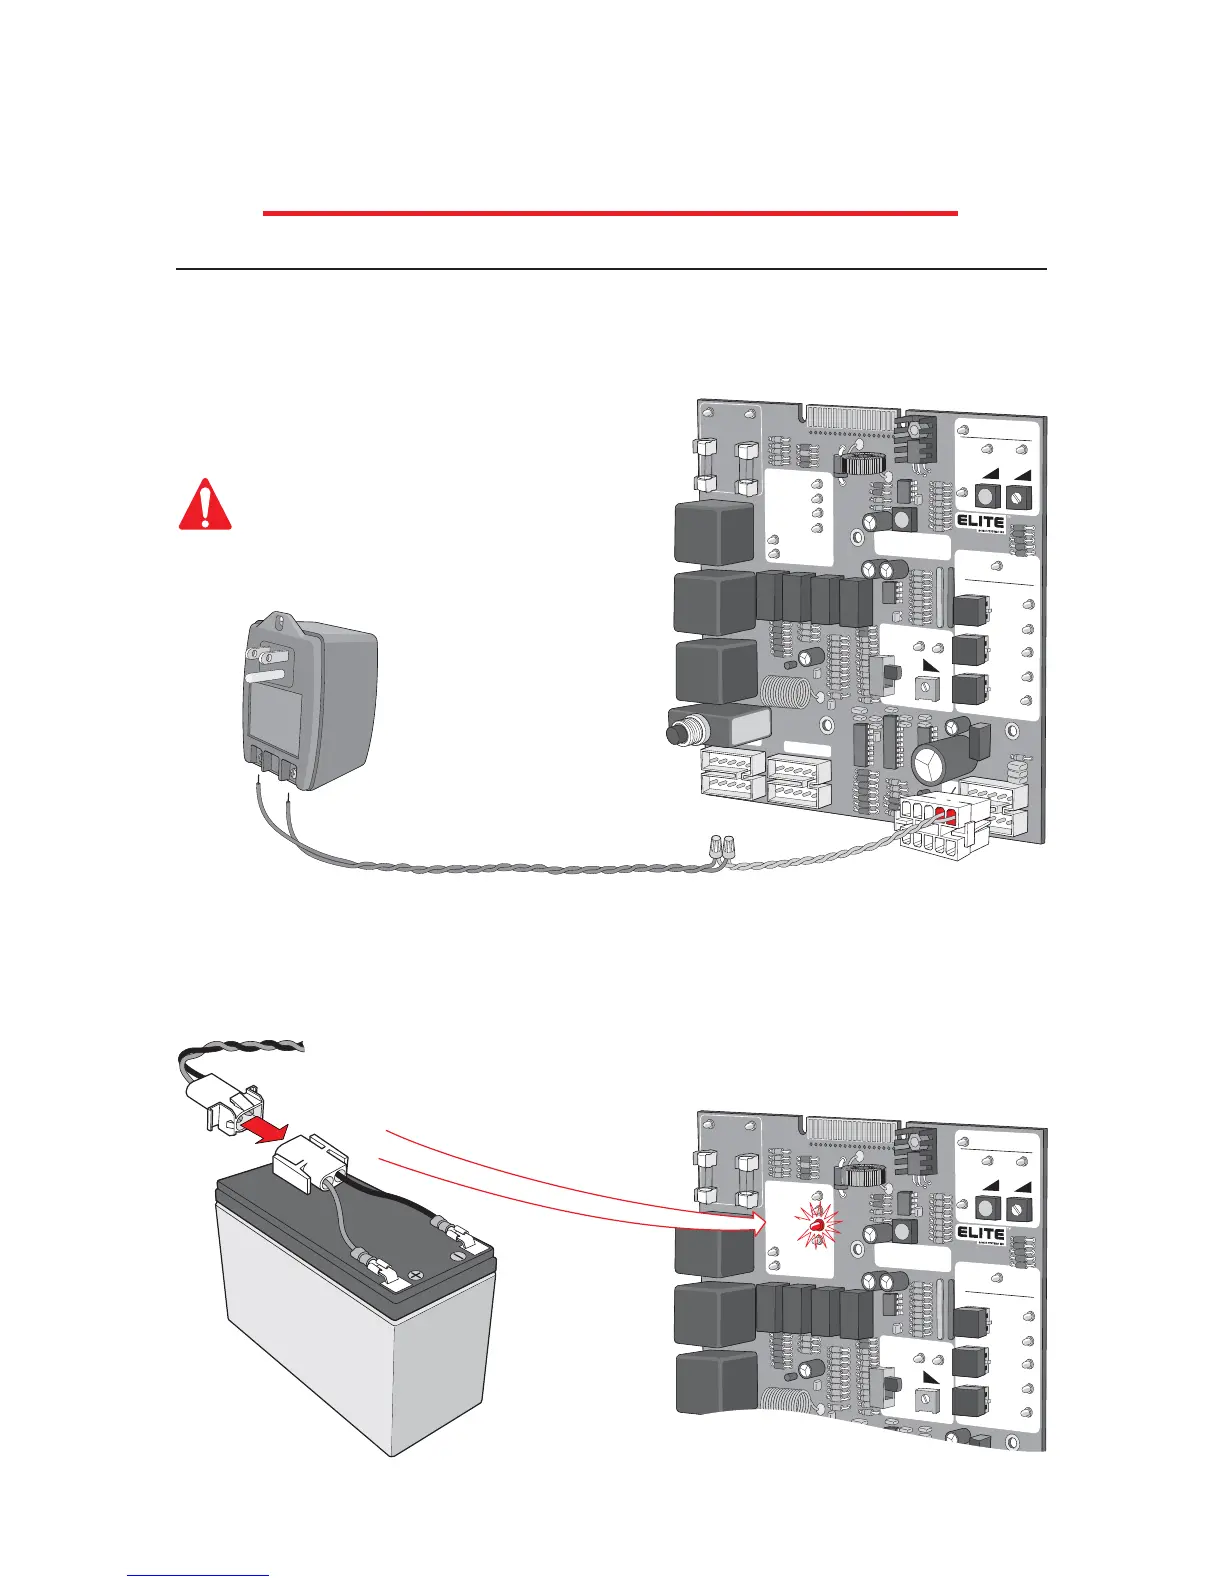
Use Elite's optional 18 VAC plug-in transformer (Elite Part # A POW-1). Hook up the
transformer to 115 VAC. Use two, low voltage, 14 gauge / 300watt direct burial, landscape
lighting cables. Hook these wires to the two yellow wires from the control board to the
plug-in transformer.
STEP 5: DC Power Supply Connection
18 VAC Plug-in Transformer
14 Gauge Wires
Maximum Wire Length
should not exceed 1000 ft.
Polarity Does Not Matter
2
1
3
5
6
8
1
0
7
9
4
Yellow Wires #2, #4
Do Not use solar panel and plug-in
transformer at the same time.
To
115 VAC
CAUTION
Beep!
After the plug-in transformer has been connected to the power source, connect the battery
cable plug to the limit/motor harness plug. You will immediately hear a beep for a few
seconds. After the beep, check the “Charge OK” LED......
Limit/Motor Harness
......it must be “ON”.