EasyManua.ls Logo

Elmo TT-12iD User Manual

Elmo TT-12iD
2 pages
To Next Page IconTo Next Page
Page #1 background imageLoading...
Page #1 background image
With Interactive Whiteboard
USB
RGB OUT
To projector
RGB IN
From
computer
USB
To computer
Plug-in for
AC adaptor
Rear
panel
1
Configure
your classroom
Basic Configuration
Install Image
Mate software
AC plugs
AC plugs
RGB/HDMI cable
HDMI OUT
To projector
To speaker
With Computer
Power on the TT-12iD
Zoom and Focus
Press the Auto-focus button to focus
after zooming
Twist the zoom knob to zoom in/out
2
LED light
Rotate
Rotate the camera column close to a
small object, turn the camera head
horizontally to view students giving a
presentation, speech, etc.
Rotate the arm 180°
and position camera
head downward for left-
handed users.
3
4
Capture and Review
A. Insert SD
card/USB
flash drive
C. Review saved images
Use buttons to
scroll and select.
QUICK TRAINING GUIDE:
TT-12iD
1
Pause the camera image. Press again to unfreeze.
Menu(see page 2)
Adjust brightness
View computer desktop
View document camera image
B. Capture image
Training Video (TT-12): http://www.elmousa.com/tt-12-interactive-document-camera
HDMI IN
From
computer
Question and Answer IconNeed help?

Do you have a question about the Elmo TT-12iD and is the answer not in the manual?

Elmo TT-12iD Specifications

General IconGeneral
BrandElmo
ModelTT-12iD
CategoryDocument Camera
LanguageEnglish

Summary

Configure Classroom Setup

Basic Configuration and Connections

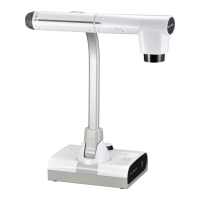
Guides physical setup with computer and interactive whiteboard connections, including AC and USB plugs.

Rear Panel Connectivity

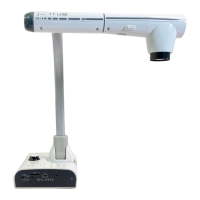
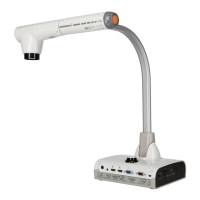
Details input/output ports on the rear panel for peripherals like speakers, projectors, and computers.

Power On and Image Adjustment

Zoom and Focus Control

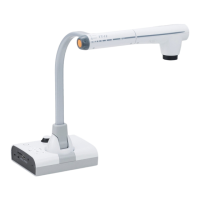
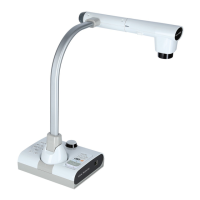
Instructions on using the zoom knob for magnification and the auto-focus button for image clarity.

Camera Rotation for Viewing

Guidance on rotating the camera arm and head for optimal viewing angles, including for left-handed users.

Capture and Review Content

Media Storage Insertion

Instructions for inserting SD cards or USB flash drives to save captured images and videos.

Image Capture and Review

Steps for capturing images, viewing the computer desktop, and reviewing saved content.

Remote Control Operations

Basic Remote Functions

Overview of primary remote functions like power, zoom, auto-focus, and brightness adjustments.

Advanced Remote Features

Utilizing compare, mask, and scroll features for enhanced image interaction and presentation.

Media Playback from SD Card

How to view images and videos stored on the SD card using the remote control.

Additional Features and Software

Menu Button and Special Modes

Using the menu button for preferences and special modes like Mosaic and Microscope.

Image Mate Software Installation

Installing and using Image Mate software for computer connectivity and time-lapse photography.

Related product manuals