EasyManua.ls Logo

Elmo MO-1 - User Manual

Elmo MO-1
43 pages
Print Icon
To Next Page IconTo Next Page
Loading...
INSTRUCTION MANUAL
VISUAL PRESENTER
MO-
Please read this instruction manual carefully before using this product
and keep it for future reference

Other manuals for Elmo MO-1

Questions and Answers

  • B
    Brett NovakAug 17, 2025
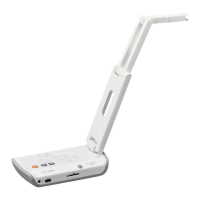
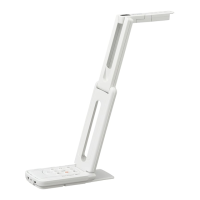
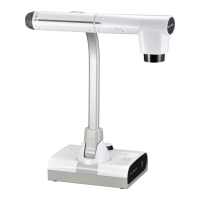
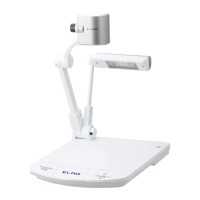
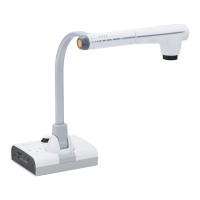
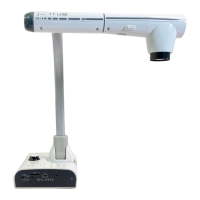
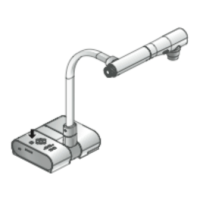
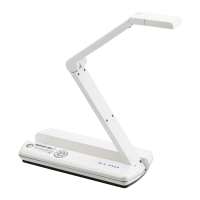
    How to fix Elmo MO-1 Document Camera when no image is displayed?
    • M
      michelle82Aug 17, 2025
      If your Elmo Document Camera displays no image, several factors could be the cause. Ensure the AC adapter is properly connected to the wall outlet and the unit's power supply socket. Verify the power is ON (look for a blue light). Adjust the zoom if it's set to the TELE side. If you just turned the power off and on, wait a few seconds before turning it back on. Check the Image Selection setting to match the connected video cable. If using USB power, ensure the USB cable is properly connected. Reconnecting the AC adapter may resolve the issue.
  • D
    Deborah JonesAug 19, 2025
    Why is the Elmo Document Camera image out of focus and how to fix it?
    • J
      Jason WashingtonAug 19, 2025
      If the image from your Elmo Document Camera is out of focus, it might be because the object is too close to the lens. Try moving the document slightly away. If auto focus is having trouble, manually adjust the focus using the 'FOCUS' setting in the menu.
  • B
    Bobby RandallAug 22, 2025
    What to do if the Elmo Document Camera image is too dark?
    • M
      Michele BrownAug 22, 2025
      If the image from your Elmo Document Camera appears too dark, the lighting might be insufficient. You can adjust the brightness by pressing the [] button on the operating panel and turn on the lamp.
  • R
    Richard GonzalesAug 25, 2025
    Why does the Elmo MO-1 Document Camera output image resolution change automatically?
    • J
      Jacob OconnorAug 26, 2025
      When an HDMI monitor is connected to the Elmo Document Camera, the output image resolution may automatically change based on information received from the connected monitor.
  • S
    Samantha WallaceAug 27, 2025
    How to resolve striped image on Elmo Document Camera?
    • R
      Richard DavisAug 28, 2025
      Striped images on your Elmo Document Camera may be due to interference fringes between the printed material's dots and the TV scanning lines or CMOS pixels. Try changing the shooting range. If you're using an LCD projector, manually adjusting the dot clock on the projector may also help.
  • B
    Brooke RobinsonAug 30, 2025
    What to do if images on the SD card are not displayed on Elmo MO-1 Document Camera?
    • M
      Mike RodriguezAug 30, 2025
      To resolve the issue of images on the SD card not being displayed on your Elmo Document Camera, remove the SD card, wait a few seconds, and then reinsert it.
  • C
    Catherine RogersSep 2, 2025
    What to do if no image is displayed from the USB on Elmo MO-1 Document Camera?
    • D
      Danny ButlerSep 2, 2025
      If no image is displayed from the USB connection on your Elmo Document Camera, the slide switch may not be set to the correct image output (USB). Ensure the switch is set correctly.
  • I
    iburnsSep 5, 2025
    How to fix flickering fluorescent light on Elmo Document Camera?
    • C
      creevesSep 5, 2025
      To correct the flickering of fluorescent light on your Elmo Document Camera, set the value of the flicker correction in the menu to match the power frequency of your area.
  • C
    Caroline Brown PhDSep 7, 2025
    What to do if operations cannot be performed on Elmo MO-1 after inserting the SD card?
    • S
      Sylvia DonaldsonSep 7, 2025
      If you cannot perform operations on your Elmo Document Camera after inserting the SD card, the card may not be reading correctly. Try formatting the card using the main unit.
  • M
    mark24Sep 10, 2025
    Why does the image not move on my Elmo Document Camera?
    • D
      Diana KingSep 12, 2025
      If the image on your Elmo Document Camera is not moving, the camera image may be set to [Pause]. Press the Pause button on the operating panel again to restart.

Summary

Important Safeguards

General Safety Instructions

Read, retain, and follow all safety and operating instructions.

Product Care and Usage

Proper care, placement, and usage conditions to prevent hazards.

Power and Electrical Safety

Power and Electrical Safety

Safety precautions related to power sources, cords, and electrical hazards.

Physical Safety Precautions

Warnings against object entry, liquid spills, and unauthorized servicing.

Service and Damage Conditions

Service and Damage Conditions

Conditions requiring service, parts replacement, and safety checks.

Heat Management

Keep the product away from heat sources.

Product Warnings and Compliance

General Product Warnings

Important warnings regarding product exposure and safety.

FCC Compliance and User Cautions

FCC rules for Class A devices and installer cautions.

Before You Use

Initial Setup and Handling

Essential steps for setup, safe handling, and LED light awareness.

Environmental and Care Guidelines

Guidelines for operating environment, cleaning, and lens protection.

CMOS Sensor Phenomenon

Explanation of luminescent and black spots on the screen.

SD Card and Lifespan Notes

SD Card and Lifespan Notes

Notes on SD card usage and product longevity.

Connectivity and Usage Restrictions

Guidelines for menu, software, copyright, and HDMI connections.

1 Bundled Items

Package Contents Overview

List of items included in the product package.

Included Accessories and Software

Details on CD-ROM contents, cables, and documentation.

2 Part Names and Functions

Device Components and Identification

Identification and overview of the main unit's parts and their functions.

Operating Panel Button Functions

Operating Panel Button Functions

Detailed explanation of buttons like Power, Lamp, Image Rotation, Freeze, Menu, Selection, Auto Focus.

Zoom and Brightness Controls

Zoom and Brightness Controls

How to adjust image magnification and brightness.

Video Output Status Indicators

Explanation of Video Output LEDs for HDMI, RGB, USB, EXT.

Rear Panel and Cable Connections

Connection Ports Overview

Description of all ports on the rear panel and their uses.

Connecting External Devices via Ports

Connecting External Devices via Ports

Step-by-step guides for connecting various external devices.

Connecting to HDMI Output Terminal

Connecting to HDMI Output Terminal

How to connect to a device with an HDMI output terminal.

Side Panel Features

SD Card Slot Functionality

Information about inserting and removing SD cards.

Bottom Panel Controls

RGB Output Resolution Dip Switch

Using dip switches to configure RGB output resolution.

3 Preparation and Connection

Setting Up the Visual Presenter

Instructions for physically setting up the device.

Mobile Document Camera Movement

Mobile Document Camera Movement

Demonstrates articulation and movement of the camera arm and head.

Connecting to Displays

Connecting to Displays

How to connect the device to projectors or monitors.

Connecting to a Computer

Connecting to a Computer

Steps for establishing a USB connection to a PC.

Powering the Device

Powering the Device

Procedures for powering the device using AC adapter or USB.

4 Shooting Images

Image Size and Brightness Adjustment

How to adjust image magnification and brightness.

Focus, Lamp, and Pause Controls

Controls for focus, illumination, and pausing the video feed.

Saving Still Images

Saving Still Images

Procedure for capturing and saving a static image.

Rotating Captured Images

How to rotate live or still images.

Switching Video Output

HDMI and RGB Output Modes

How to select and use HDMI or RGB output modes.

USB and External Input Modes

How to select USB connection or external input modes.

Output Video Selection Flow

Output Video Selection Flow

Explains the sequence of output video changes and LED status.

5 Changing the Settings

Accessing and Navigating Settings Menu

Guide to entering and moving through the on-screen menu.

Display Mode Settings

Display Mode Settings

Options for Preferences, Thumbnails, and Exit.

Resolution Settings (HDMI;RGB)

Configuring HDMI and analog RGB output resolutions.

Image Quality Settings

Image Quality Settings

Adjustments for flicker, white balance, focus, and edge enhancement.

System Settings

Language selection and factory reset options.

SD Card Formatting

SD Card Formatting

Procedure for formatting the SD card.

Setting Device Time

How to set the date and time.

6 Using a USB

Software Installation Guide

Instructions for installing the "Image Mate" software.

USB Connection Procedure

Steps to connect the device to a PC via USB.

PC Control with Image Mate Software

PC Control with Image Mate Software

Performing tasks like image transfer and device operation via PC.

7 Using an SD Card

Saving and Viewing SD Card Data

How to save images and view stored data on an SD card.

SD Card Compatibility and Care

Notes on SDXC cards, formatting, and recommended classes.

Image Saving Process

Image Saving Process

Detailed steps for saving images to the SD card.

Viewing Saved Images

How to display images stored on the SD card.

Thumbnail Image Display

Thumbnail Image Display

How to view images in thumbnail format.

Still Image Management Menu

Options for camera view and deleting images.

8 Trouble Shooting

Image Display Issues

Solutions for problems like no image or automatic resolution changes.

Focus and Brightness Problems

Troubleshooting blurry images and low brightness.

Image Quality and Movement Issues

Image Quality and Movement Issues

Resolving image stripes, flickering lights, and frozen images.

SD Card and Time Reset Issues

Solutions for SD card recognition and time setting problems.

Lamp and Product Longevity

Information regarding lamp brightness and product lifespan.

9 Specifications

General Device Specifications

Power, dimensions, weight, and interface details.

Main Camera Technical Details

Lens, frame rate, and shooting area specifications.

Image Pickup and Output Standards

Image Pickup and Output Standards

Details on focus, sensor, and various output standards.

Control and Adjustment Features

Specifications for USB output, balancing, brightness, rotation, and effects.

Illumination Device Details

White LED Illumination

Information about the White LED illumination.

Legal and Support Information

Trademarks and Licensing

List of registered trademarks and licensing information.

Product Usage Warnings

Important warnings about copyright, interference, and personal data.

Product Serviceability

Repairable Period and Parts

Information on spare parts availability and repair service duration.

Elmo MO-1 Specifications

General IconGeneral
Product colorPink
Built-in microphoneYes
Sensor typeCMOS
White balanceAuto, Manual
Optical sensor size1/3.2 \
Effective sensor resolution5 MP
Supported graphics resolutions-
Digital zoom8 x
Shooting area (WxD)257 x 342 mm
VGA (D-Sub) input ports1
AC input voltage100-240 V
Power supply typeAC
AC input frequency50 - 60 Hz
Cables includedAC, USB
Weight and Dimensions IconWeight and Dimensions
Depth226 mm
Width101 mm
Height338 mm
Weight550 g
Dimensions folded (WxDxH)101 x 226 x 28 mm

Related product manuals