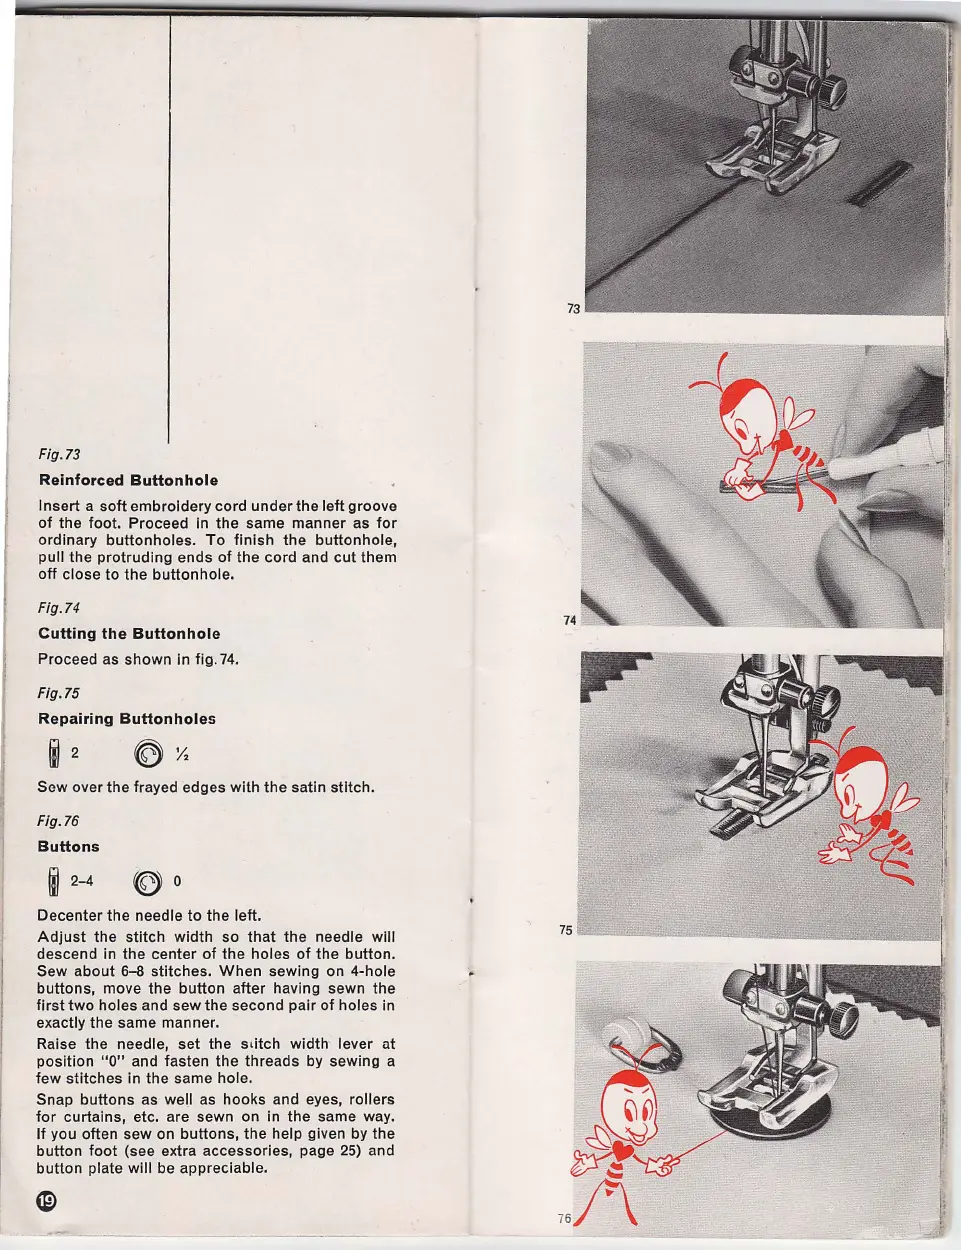
Fig.73
Reinforced
Buttonhole
Insert a
soft
embroidery cord under the left groove
of
the foot. Proceed in the same manner as
for
ordinary buttonholes.
To
finish
the
buttonhole,
pull the protruding ends
of
the cord and
cut
them
off close to
the
buttonhole.
Fig.
74
Cutting
the
Buttonhole
Proceed
as
shown
in fig.
74
.
Fig.l5
Repairing
Buttonholes
Sew over the frayed edges with the satin stitch.
Fig.76
Buttons
~
2-4
~0
Decenter the needle
to
the left.
Adjust
the stitch width so
that
the needle will
descend in the center
of
the holes
of
the button.
Sew about 6-8 stitches.
When
sewing on 4-hole
buttons, move the button after having sewn the
first
two
holes and sew the second pair
of
holes in
exactly the same manner.
Raise the needle, set the
sLitch width· lever at
position
"0"
and fasten the threads by sewing a
few
stitches in the same hole.
Snap buttons as well
as
hooks and eyes, rollers
for
curtains, etc. are sewn on in the same way.
If
you often sew on buttons, the help given by the
button
foot
(see extra accessories, page
25)
and
button plate will be appreciable.
f.
\ r