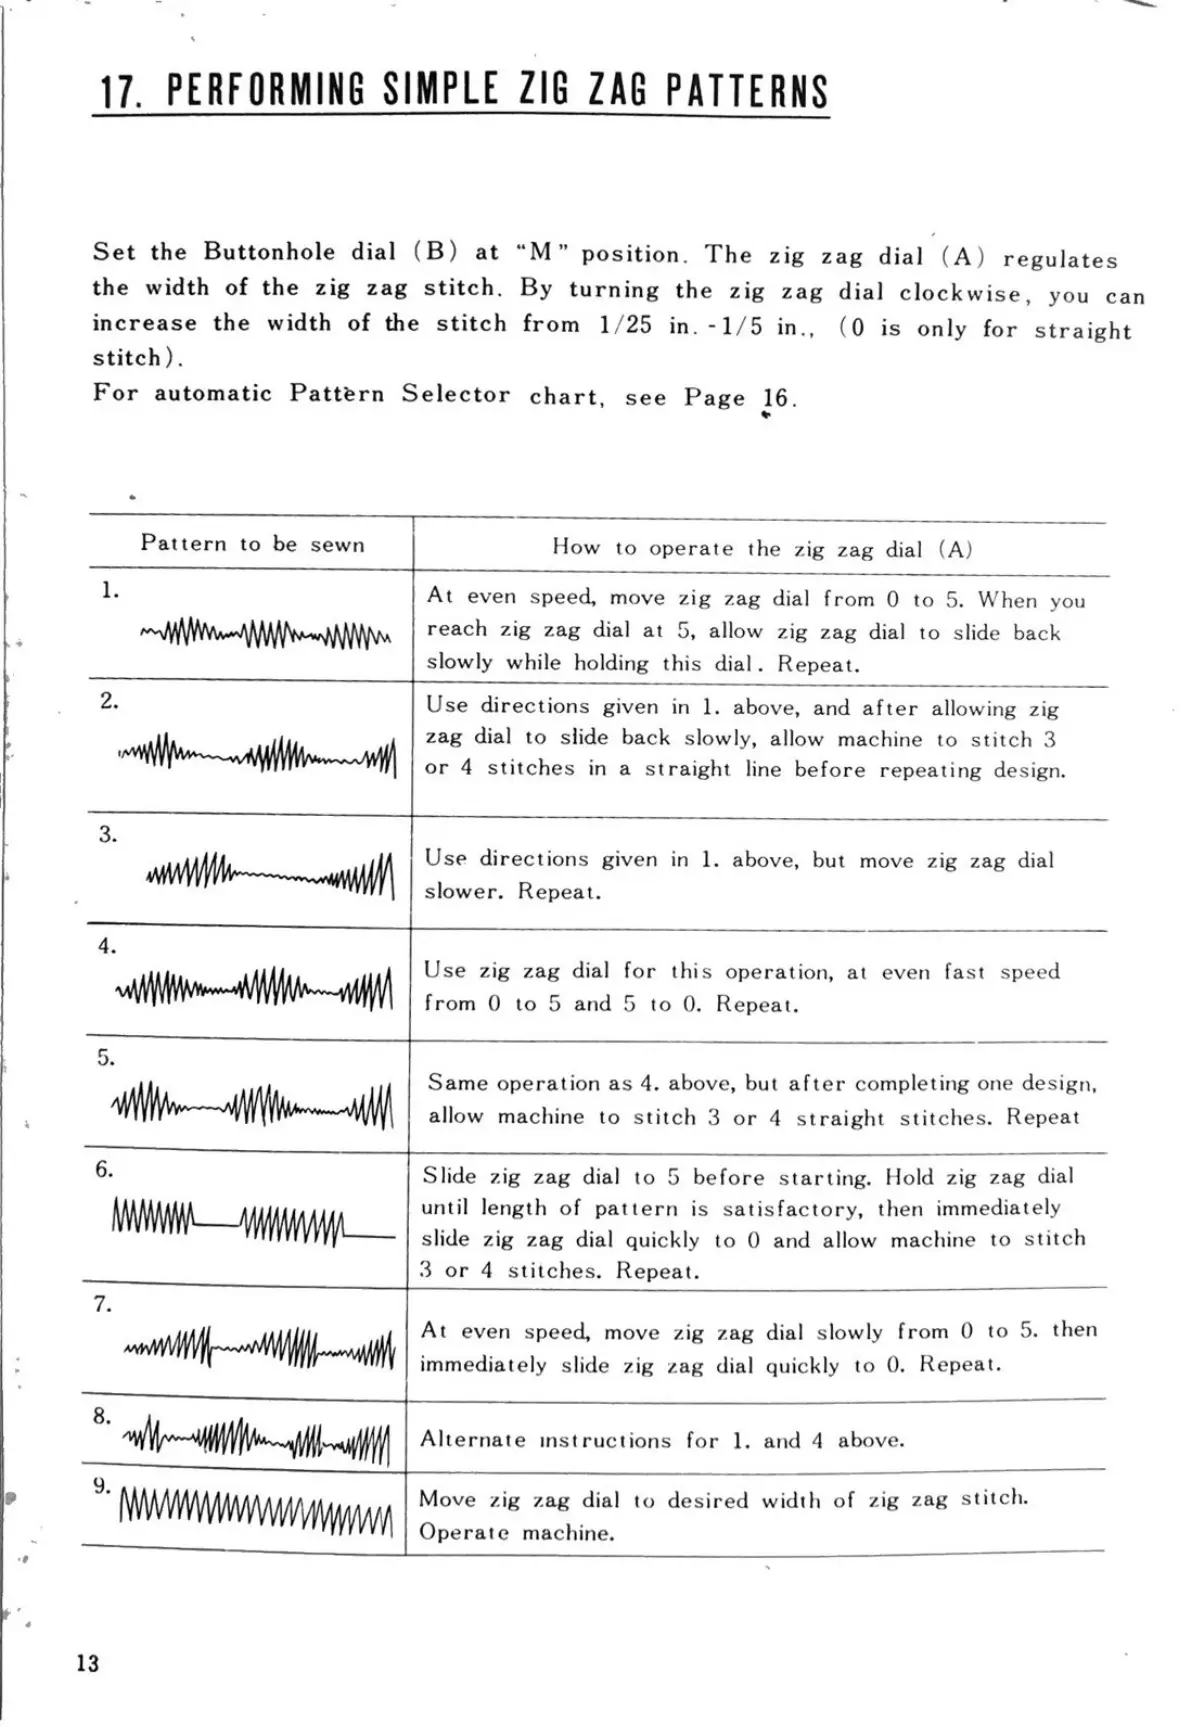
17. PERFORMING SIMPLE ZIG ZAG PATTERNS
Set the Buttonhole dial (B) at "M" position. The zig zag dial (A) regulates
the width of the zig zag stitch. By turning the zig zag dial clockwise, you can
increase the width of the stitch from 1/25 in. - 1/5 in., (0 is only for straight
stitch).
For automatic Pattern Selector chart, see Page 16.
Pattern to be sewn
1.
2.
How to operate the zig zag dial (A)
At even speed, move zig zag dial from 0 to 5. When you
reach zig zag dial at 5, allow zig zag dial to slide back
slowly while holding this dial. Repeat.
Use directions given in 1. above, and after allowing zig
zag dial to slide back slowly, allow machine to stitch 3
or 4 stitches in a straight line before repeating design.
3.
wwWW
Use directions given in 1. above, but move zig zag dial
slower. Repeat.
4.
wwww
Use zig zag dial for this operation, at even fast speed
from 0 to 5 and 5 to 0. Repeat.
6.
www
8.
9.
Same operation as 4. above, but after completing one design,
allow machine to stitch 3 or 4 straight stitches. Repeat
Slide zig zag dial to 5 before starting. Hold zig zag dial
until length of pattern is satisfactory, then immediately
slide zig zag dial quickly to 0 and allow machine to stitch
3 or 4 stitches. Repeat.
At even speed, move zig zag dial slowly from 0 to 5. then
immediately slide zig zag dial quickly to 0. Repeat.
Alternate instructions for 1. and 4 above.
Move zig zag dial to desired width of zig zag stitch.
Operate machine.
13