iii
Figure 21 Three-stage heating . . . . . . . . . . . . . . . . . . . . . . . . . . . . . . . . . . . . . . . . . . . . . . . . . . . . . . . . . . . . . 25
Figure 22 Two single-step compressors with SCR reheat set to Tight mode . . . . . . . . . . . . . . . . . . . . . . . . . 26
Figure 23 Two single-step compressors with SCR reheat set to Standard mode . . . . . . . . . . . . . . . . . . . . . . 27
Figure 24 Humidity proportional band. . . . . . . . . . . . . . . . . . . . . . . . . . . . . . . . . . . . . . . . . . . . . . . . . . . . . . . 27
Figure 25 Placing temperature and temperature/humidity sensors. . . . . . . . . . . . . . . . . . . . . . . . . . . . . . . . 32
Figure 26 Teamwork Mode 1 with two cooling units . . . . . . . . . . . . . . . . . . . . . . . . . . . . . . . . . . . . . . . . . . . . 42
Figure 27 Standby unit layout example—10 Precision Cooling units in room. . . . . . . . . . . . . . . . . . . . . . . . 44
Figure 28 Connecting two cooling units, each with a small display using a crossover Ethernet cable . . . . 46
Figure 29 U2U network setup diagram . . . . . . . . . . . . . . . . . . . . . . . . . . . . . . . . . . . . . . . . . . . . . . . . . . . . . . 47
Figure 30 Wiring a small display for stand-alone operation . . . . . . . . . . . . . . . . . . . . . . . . . . . . . . . . . . . . . . 48
Figure 31 Wiring a small display for U2U network operation . . . . . . . . . . . . . . . . . . . . . . . . . . . . . . . . . . . . 49
Figure 32 Wiring a large display for U2U network operation. . . . . . . . . . . . . . . . . . . . . . . . . . . . . . . . . . . . . 50
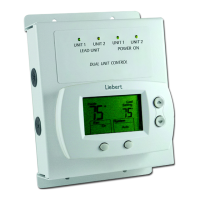
Figure 33 Liebert vNSA with optional remote large display. . . . . . . . . . . . . . . . . . . . . . . . . . . . . . . . . . . . . . 51
Figure 34 User menu icons . . . . . . . . . . . . . . . . . . . . . . . . . . . . . . . . . . . . . . . . . . . . . . . . . . . . . . . . . . . . . . . . 53
Figure 35 Setpoints parameters screen . . . . . . . . . . . . . . . . . . . . . . . . . . . . . . . . . . . . . . . . . . . . . . . . . . . . . . 53
Figure 36 Set alarms screen . . . . . . . . . . . . . . . . . . . . . . . . . . . . . . . . . . . . . . . . . . . . . . . . . . . . . . . . . . . . . . . 54
Figure 37 Sensor data screen . . . . . . . . . . . . . . . . . . . . . . . . . . . . . . . . . . . . . . . . . . . . . . . . . . . . . . . . . . . . . . 56
Figure 38 Sensor data screen - Page 2 (return only) . . . . . . . . . . . . . . . . . . . . . . . . . . . . . . . . . . . . . . . . . . . . 57
Figure 39 Display setup parameters screen . . . . . . . . . . . . . . . . . . . . . . . . . . . . . . . . . . . . . . . . . . . . . . . . . . . 58
Figure 40 Total run hours parameters screen . . . . . . . . . . . . . . . . . . . . . . . . . . . . . . . . . . . . . . . . . . . . . . . . . 59
Figure 41 Sleep mode parameters screen. . . . . . . . . . . . . . . . . . . . . . . . . . . . . . . . . . . . . . . . . . . . . . . . . . . . . 59
Figure 42 Service Menu Main Screen . . . . . . . . . . . . . . . . . . . . . . . . . . . . . . . . . . . . . . . . . . . . . . . . . . . . . . . . 60
Figure 43 Setpoints parameters screen - Page 1 . . . . . . . . . . . . . . . . . . . . . . . . . . . . . . . . . . . . . . . . . . . . . . . 61
Figure 44 Setpoints parameters screen - Page 2 . . . . . . . . . . . . . . . . . . . . . . . . . . . . . . . . . . . . . . . . . . . . . . . 62
Figure 45 Setpoints parameters screen - Page 3 . . . . . . . . . . . . . . . . . . . . . . . . . . . . . . . . . . . . . . . . . . . . . . . 63
Figure 46 Setpoints parameters screen - Page 4 . . . . . . . . . . . . . . . . . . . . . . . . . . . . . . . . . . . . . . . . . . . . . . . 64
Figure 47 Setpoints parameters screen - Page 5 . . . . . . . . . . . . . . . . . . . . . . . . . . . . . . . . . . . . . . . . . . . . . . . 65
Figure 48 Setpoints parameters screen - Page 6 . . . . . . . . . . . . . . . . . . . . . . . . . . . . . . . . . . . . . . . . . . . . . . . 66
Figure 49 Standby settings / lead-lag parameters screen . . . . . . . . . . . . . . . . . . . . . . . . . . . . . . . . . . . . . . . . 67
Figure 50 Wellness basic settings screen- Page 1 . . . . . . . . . . . . . . . . . . . . . . . . . . . . . . . . . . . . . . . . . . . . . . 68
Figure 51 Wellness motor settings parameters screen - Page 2 . . . . . . . . . . . . . . . . . . . . . . . . . . . . . . . . . . . 69
Figure 52 Wellness compressor 1 settings parameters screen - Page 3 . . . . . . . . . . . . . . . . . . . . . . . . . . . . . 69
Figure 53 Wellness compressor 1 settings parameters - Page 4 . . . . . . . . . . . . . . . . . . . . . . . . . . . . . . . . . . . 70
Figure 54 Wellness electric heater 1 settings parameters screen - Page 5. . . . . . . . . . . . . . . . . . . . . . . . . . . 70
Figure 55 Wellness electric heater 2 settings parameters screen - Page 6. . . . . . . . . . . . . . . . . . . . . . . . . . . 71
Figure 56 Wellness electric heater 3 settings parameters screen - Page 7. . . . . . . . . . . . . . . . . . . . . . . . . . . 71
Figure 57 Wellness humidifier settings parameters screen - Page 8 . . . . . . . . . . . . . . . . . . . . . . . . . . . . . . . 72
Figure 58 Diagnostics / service mode parameters screen - Page 1 . . . . . . . . . . . . . . . . . . . . . . . . . . . . . . . . . 73
Figure 59 Diagnostics / service mode parameters screen - Page 2 . . . . . . . . . . . . . . . . . . . . . . . . . . . . . . . . . 74
Figure 60 Diagnostics / service mode parameters screen - Page 3 . . . . . . . . . . . . . . . . . . . . . . . . . . . . . . . . . 75
Figure 61 Diagnostics / service mode parameters screen - Page 4 . . . . . . . . . . . . . . . . . . . . . . . . . . . . . . . . . 76
Figure 62 Diagnostics / service mode parameters screen - Page 5 . . . . . . . . . . . . . . . . . . . . . . . . . . . . . . . . . 77
Figure 63 Diagnostics / service mode parameters screen - Page 6 . . . . . . . . . . . . . . . . . . . . . . . . . . . . . . . . . 78
Figure 64 Diagnostics / service mode parameters screen - Page 7 . . . . . . . . . . . . . . . . . . . . . . . . . . . . . . . . . 78
Figure 65 Set alarms parameters screen - Page 1 . . . . . . . . . . . . . . . . . . . . . . . . . . . . . . . . . . . . . . . . .
. . . . . 79
Figure 66 Set alarms parameters screen - Page 2 . . . . . . . . . . . . . . . . . . . . . . . . . . . . . . . . . . . . . . . . . . . . . . 80
Figure 67 Set alarms parameters screen - Page 3 . . . . . . . . . . . . . . . . . . . . . . . . . . . . . . . . . . . . . . . . . . . . . . 80
Figure 68 Set alarms parameters screen - Page 4 . . . . . . . . . . . . . . . . . . . . . . . . . . . . . . . . . . . . . . . . . . . . . . 81
Figure 69 Set alarms parameters screen - Page 5 . . . . . . . . . . . . . . . . . . . . . . . . . . . . . . . . . . . . . . . . . . . . . . 81
Figure 70 Set alarms parameters screen - Page 6 . . . . . . . . . . . . . . . . . . . . . . . . . . . . . . . . . . . . . . . . . . . . . . 82