EL – Owner’s Manual – Rev.00 – September 2022 24
The released hydrogen will pose a risk of explosion – therefore, it must be led into a safe area at a
height of at least 3 m, without any source of possible ignitions. For more information, see the section
Safety areas around the O2 vent and H2 vent outlet. If this is not possible, manage the vent line in other
ways, such as using a flare stack, burn box or forced dilution.
Caution! Never mix the output of the H2 vent line with the output of the O2 vent line.
The H2 vent line can be combined with the H2 purge line of the Enapter DR2.1, using the check
valves downstream the electrolyser H2 vent ports.
Make sure, that there is never building up overpressure or underpressure of more than 0.2 barg
inside the pipe.
The line contains water steam and liquid water which is able to freeze and block the pipe. The
pipe of each device shall contain the check valve provided for every device and the common
pipes for several devices must be sized appropriately and managed with an appropriate
drainage system, heater and good engineering practices to always allow bidirectional gas
exchanges while still draining the water safely.
The operator must ensure that the outlet satisfies all relevant local safety guidelines, rules,
directives and regulations, in terms of the safe dispersion of the vented gas, noise emission, risk
assessments, maintenance, a satisfactory safety concept being utilised, and all other relevant
areas.
It is the operator’s responsibility to regularly check and maintain all pipes.
Enapter is not responsible for any damage caused to the device from mismanaged piping
arrangements.
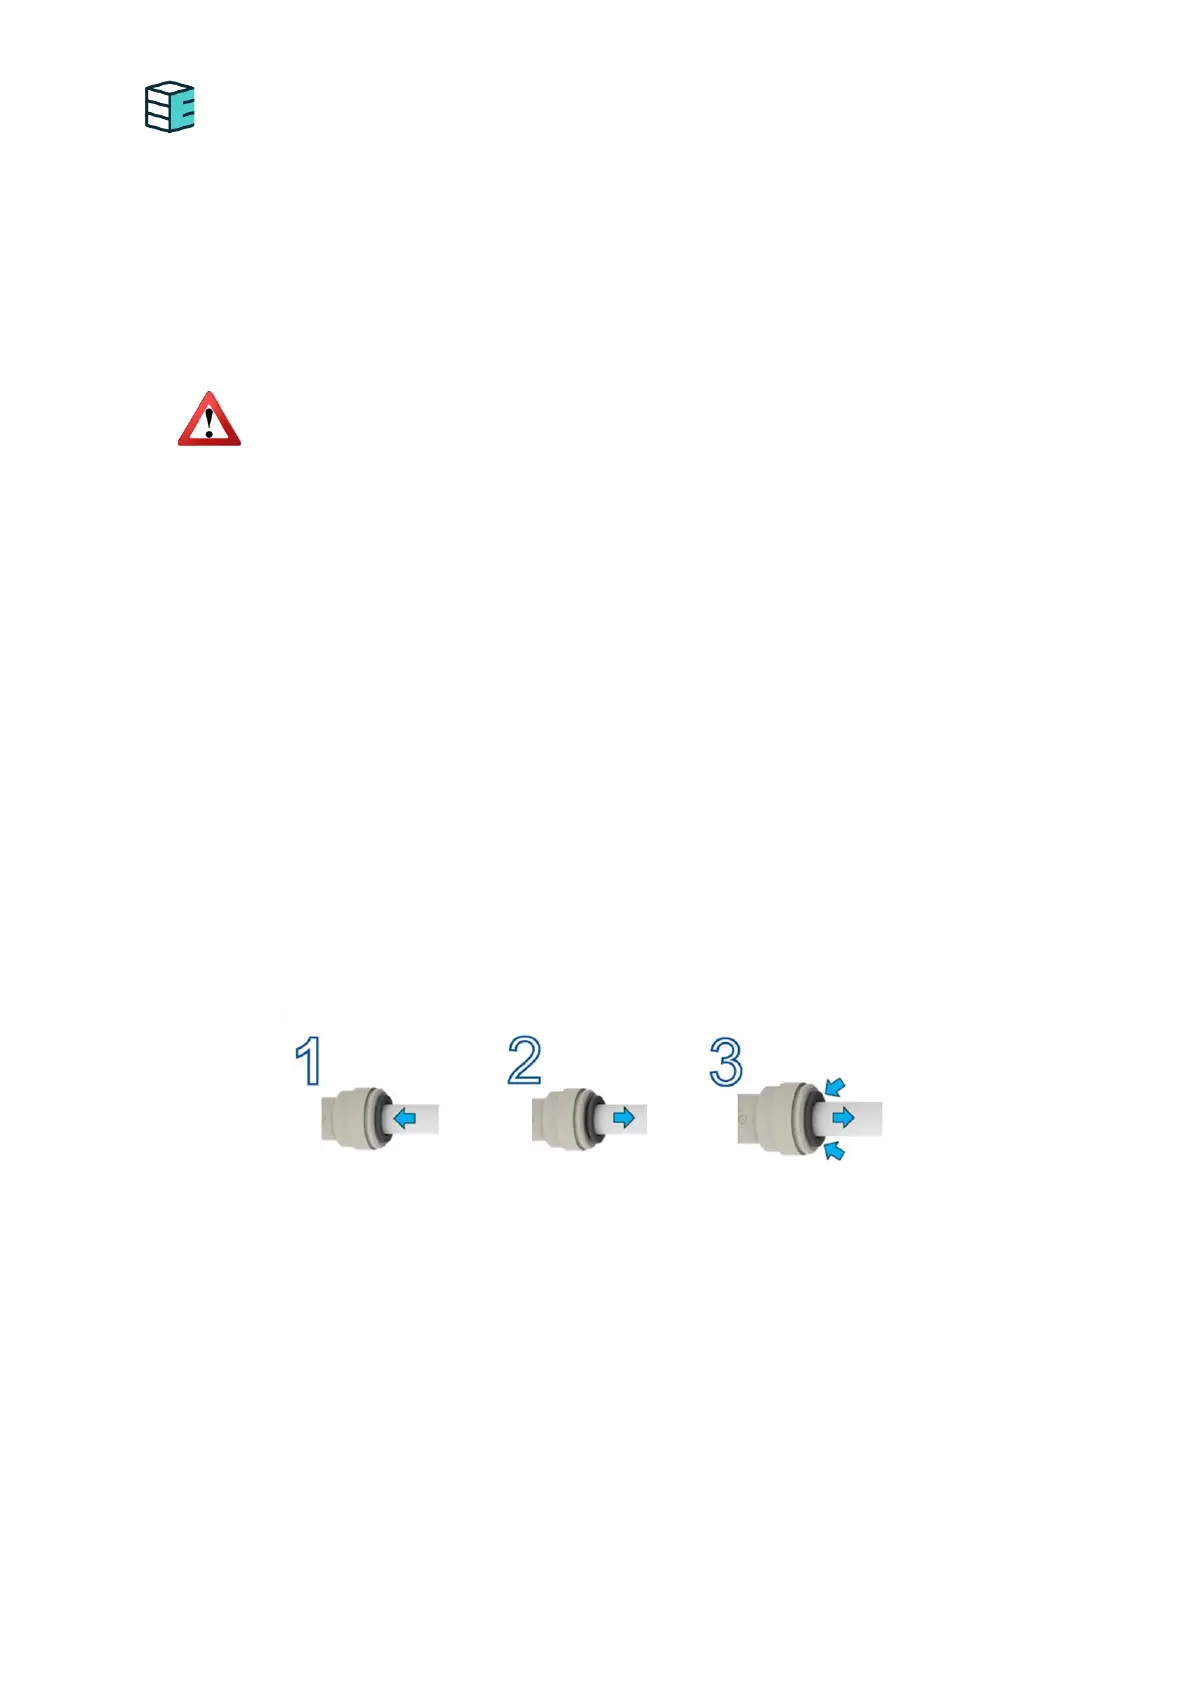
4.6 INSTRUCTIONS FOR CONNECTING PLASTIC TUBES
1. Cut the tube perpendicular to the axis and remove sharp edges. Ensure the outside diameter is
free of score marks, and the cut is perpendicular across the tube. Fully insert the tube into the
fitting. The inserted pipe diameter must match the fitting.
2. Pull the tube to check it is firmly held in place, then secure the connection by inserting a red
fastening clip.
3. To disconnect, ensure that the line is depressurised. Then, remove the red fastening clip and push
the collet against the fitting, while simultaneously pushing the tube into the fitting. Holding the
collet in this position, pull the tube out of the fitting in one smooth motion.