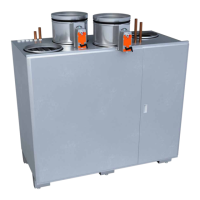
15User instructions
EN
1. Detach the bayonet connector from the socket.
2. Remove the heat exchanger from the unit carefully.
3. Unscrew the six screws on the heat exchanger
maintenance hatch lid at the front side of the heat
exchanger.
4. Open the maintenance hatch with the help of a at
tool.
• Use for example a Stanley knife.
5. Pull o the broken heat exchanger belt.
6. Inspect the belt wheel to make sure it is
undamaged, in its place and rotating properly.
7. Clean the heat exchanger and the belt wheel.
• Use water and neutral detergent with a soft,
lint-free cloth.
• Rotate the heat exchanger to make sure
everything gets cleaned.
• Make sure that the heat exchanger is rotating
freely, without excessive force. You should be
able to rotate the heat exchanger with only
one nger.
Go to step 8 if a spare belt is not attached on your heat
exchanger.
• Pull the spare exchanger belt from the holders by
rotating the exchanger.
• Leave the holders on the heat exchanger.
8. Loosen the U-beam on one side of the heat
exchanger by removing the screws under the
U-beam rubber gasket.
9. Unscrew the hexagonal screw of the axle in the
middle of the U-beam and remove the beam.
10. Slide the new belt inside around the heat
exchanger through the opening in the casing and
the gasket.
11. Rotate the heat exchanger to get the belt properly
in place.
12. Replace the U-beam and reattach the axle and
U-beam screws.
13. Go through the new belt with the cleaning cloth
to make sure it is free of dirt.
14. Pull the belt onto the belt wheel.
15. Rotate the heat exchanger to see that the belt is in
its place and everything looks ne.
16. Vacuum clean the heat exchanger casing.
• Rotate the heat exchanger when you are
vacuuming to be sure to clean everywhere.
17. Close the maintenance hatch.
18. Add some silicone onto the rubber strips outside
the heat exchanger casing.
19. Place the heat exchanger back into the unit.
20. Reconnect the bayonet connector to the socket.
21. Reconnect the power.
22. Make sure the heat exchanger rotates.