14
Cleaning
To clean:
DANGER
DANGER: Before opening the service hatch,
always make sure that the unit’s supply voltage
is switched o.
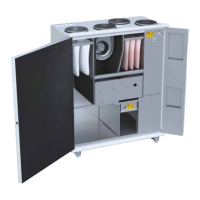
1. Remove the heat exchanger from the unit.
2. Wash the heat exchanger with water and neutral
detergent or use pressurized air.
WARNING
WARNING: Do not submerge the heat
exchanger in water. The electric motor inside the
exchanger must not get wet.
WARNING
WARNING: The use of a pressure washer is
strictly forbidden.
3. Dry the heat exchanger properly.
4. Place the heat exchanger back into the unit.
5. Start the unit up to verify the rotation.
6. Close the service hatch.
Replacing heat exchanger belt
If the heat exchanger has stopped rotating, the reason
for it may be a broken drive belt. Check the condition of
the belt from the round opening at the front of the heat
exchanger. There is one spare belt attached to all heat
exchangers.
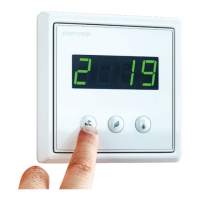
NOTE: Visit the HelpCenter on our webpage
www.enervent. for videos showing the
maintenance tasks.
To replace:
DANGER
DANGER: Turn o the ventilation unit by
switching o the main power supply, by
removing the fuse or by disconnecting the wall
plug.
Fans
Inspecting
To inspect:
DANGER
DANGER: Before opening the service hatch,
always make sure that the unit’s supply voltage
is switched o.
1. Inspect the cleanness of the fans visually when
changing the lters.
• If they look dirty, clean them.
TIP: Vacuum the inside of the unit for better
performance and cleaner indoor air.
Cleaning
To clean:
DANGER
DANGER: Before opening the service hatch,
always make sure that the unit’s supply voltage
is switched o.
1. Remove the fans from the unit.
2. Clean the fans with a toothbrush or pressurized air.
3. Place the fans back into the unit.
Heat exchanger
Inspecting
To inspect:
1. Check the cleanness of the heat exchanger visually
when changing the lters.
• If it looks dirty, clean it.
TIP: Vacuum the inside of the unit for better
performance and cleaner indoor air.