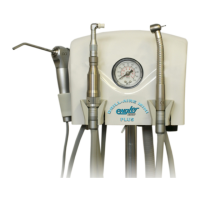
WATER TANK CARE & MAINTENANCE
• Release air pressure by pulling and turning knob of pressure relief valve (if equipped). Pull out
fully and allow air to escape. Otherwise, unscrew the cap slowly then wait until the hissing
stops.
• Remove pump & cap assembly. Pour out any remaining liquid & rinse all parts thoroughly with
clean water.
• Always store tank empty and with tank cap loose.
• For issues with mold, see page 35
TROUBLESHOOTING:
PROBLEM: TANK FAILS TO PRESSURIZE
• Confirm the cap is tight.
• Check to see if pressure relief valve (if equipped) is in safety position. Release the relief valve
by twisting 1/4” turn in either direction.
• Remove the pump from the tank. Turn pump handle counter-clockwise to unlock. Pull the
pump handle up and locate the “oil here” hole on the top of the pump cap. Place 3-5 drops of
mineral oil into the oil hole. Pump several times to work the oil into the walls of the pump until it
moves freely. Repeat if necessary. Screw the pump assy. back into the tank and resume
normal operations. This process should be repeated as often as necessary or when pumping
becomes difficult.
• Black particles found in water bottle indicates that the pump assembly is deteriorating. Order
new pump assembly from Engler Engineering.
Pump assembly has been pre-lubricated.
WARNING:
READ AND FOLLOW ALL INSTRUCTIONS
Inspect the pump periodically.
DO NOT use mechanical devices to pressurize the tank .
D0 NOT alter the functions of the pressure relief valve (if equipped) or plug the pressure relief
valve hole, as this could cause an unsafe condition.
It is not necessary to pressurize the tank until ready for use.
DO NOT lift or carry the tank by waterline, extension rod or pump handle unless it is securely
locked in place.
28