4 Getting Started STACK 710
32 (PC-000878-MA Issue 7, December 2021) ENVEA UK Ltd
4.6 Align the Retro-reflector
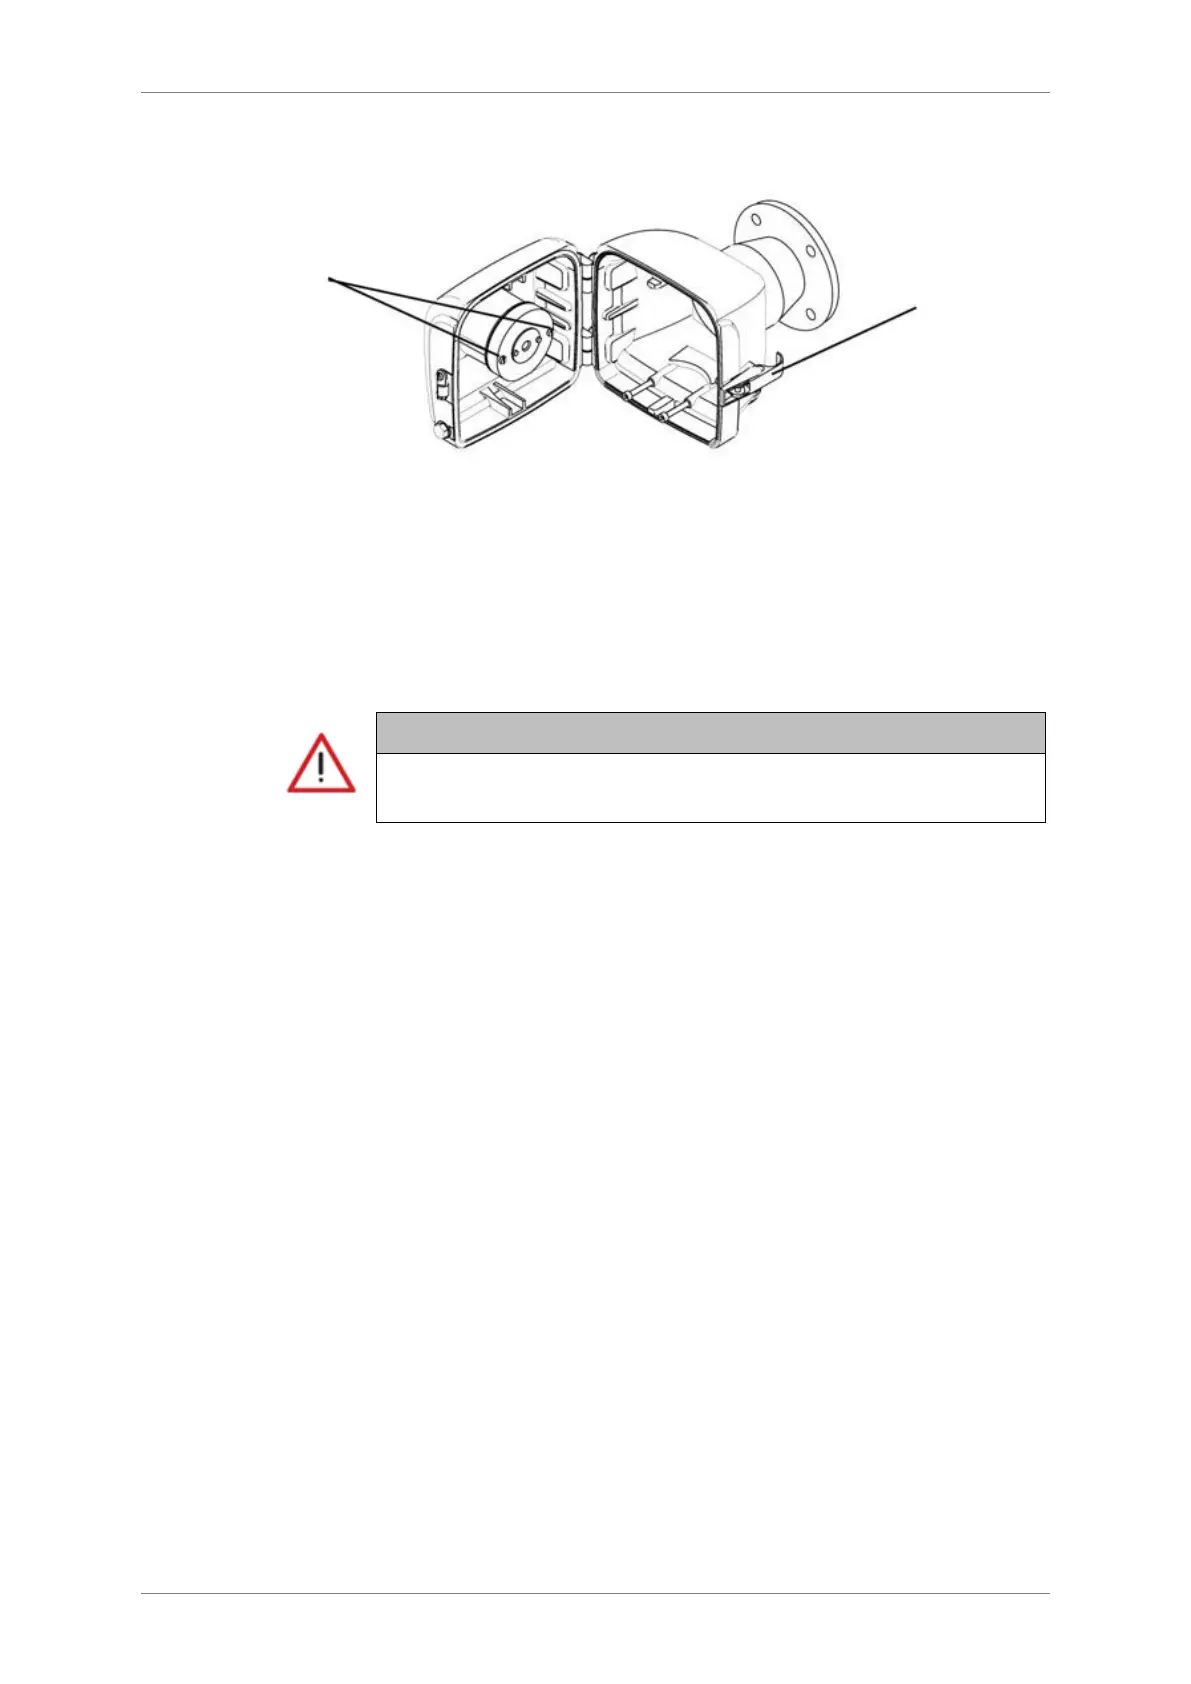
Figure 14: Opening the Retro-reflector case & releasing the reflector.
1. Open the Retro-reflector case by undoing the two quick-release clamps.
2. Release the Retro-reflector Mount by unscrewing the two captive socket
head screws on either side of the Retro-reflector Mount. Remove the
reflector and stow it in the purge housing.
3. Close the case and fasten the quick-release clamps.
4. Observe the alignment target through the window (3). A bright green spot
(4) should be visible.
5. If the green spot is not visible, undo the quick release clamps on the Retro-
reflector and look down the purge barrel. The bright green light from the
Transceiver should be clearly visible. If not, then the Transceiver is either
misaligned, or the instrument is malfunctioning.
6. To move the green spot horizontally, adjust the M10 nut (1) on the air purge
flange and to move it vertically, adjust the M10 nut (2), also on the air
purge flange as illustrated in . Adjust these nuts until the green
spot is central in the inner circle.
7. In bright sunshine, the green spot on the alignment target may not be
visible. In this case, return to the Transmissometer, undo the quick-release
clamps and swing the instrument away from the purge. It should now be
possible to adjust the Retro-reflector until the bright circle of sunlight, visible
through the Transmissometer purge unit, is centred on the target.
8. Ensure that the 4 pairs of spring washers between the air purge flange and
the mounting flange are under moderate compression. The instrument must
be firmly held in place to maintain optical alignment.
9. Open the Retro-reflector case, re-fix the Retro-reflector in position, and
tighten the captive socket head screws. Close the Retro-reflector case and
fasten the two quick-release clamps.