11
ENVISION RESIDENTIAL INSTALLATION MANUAL
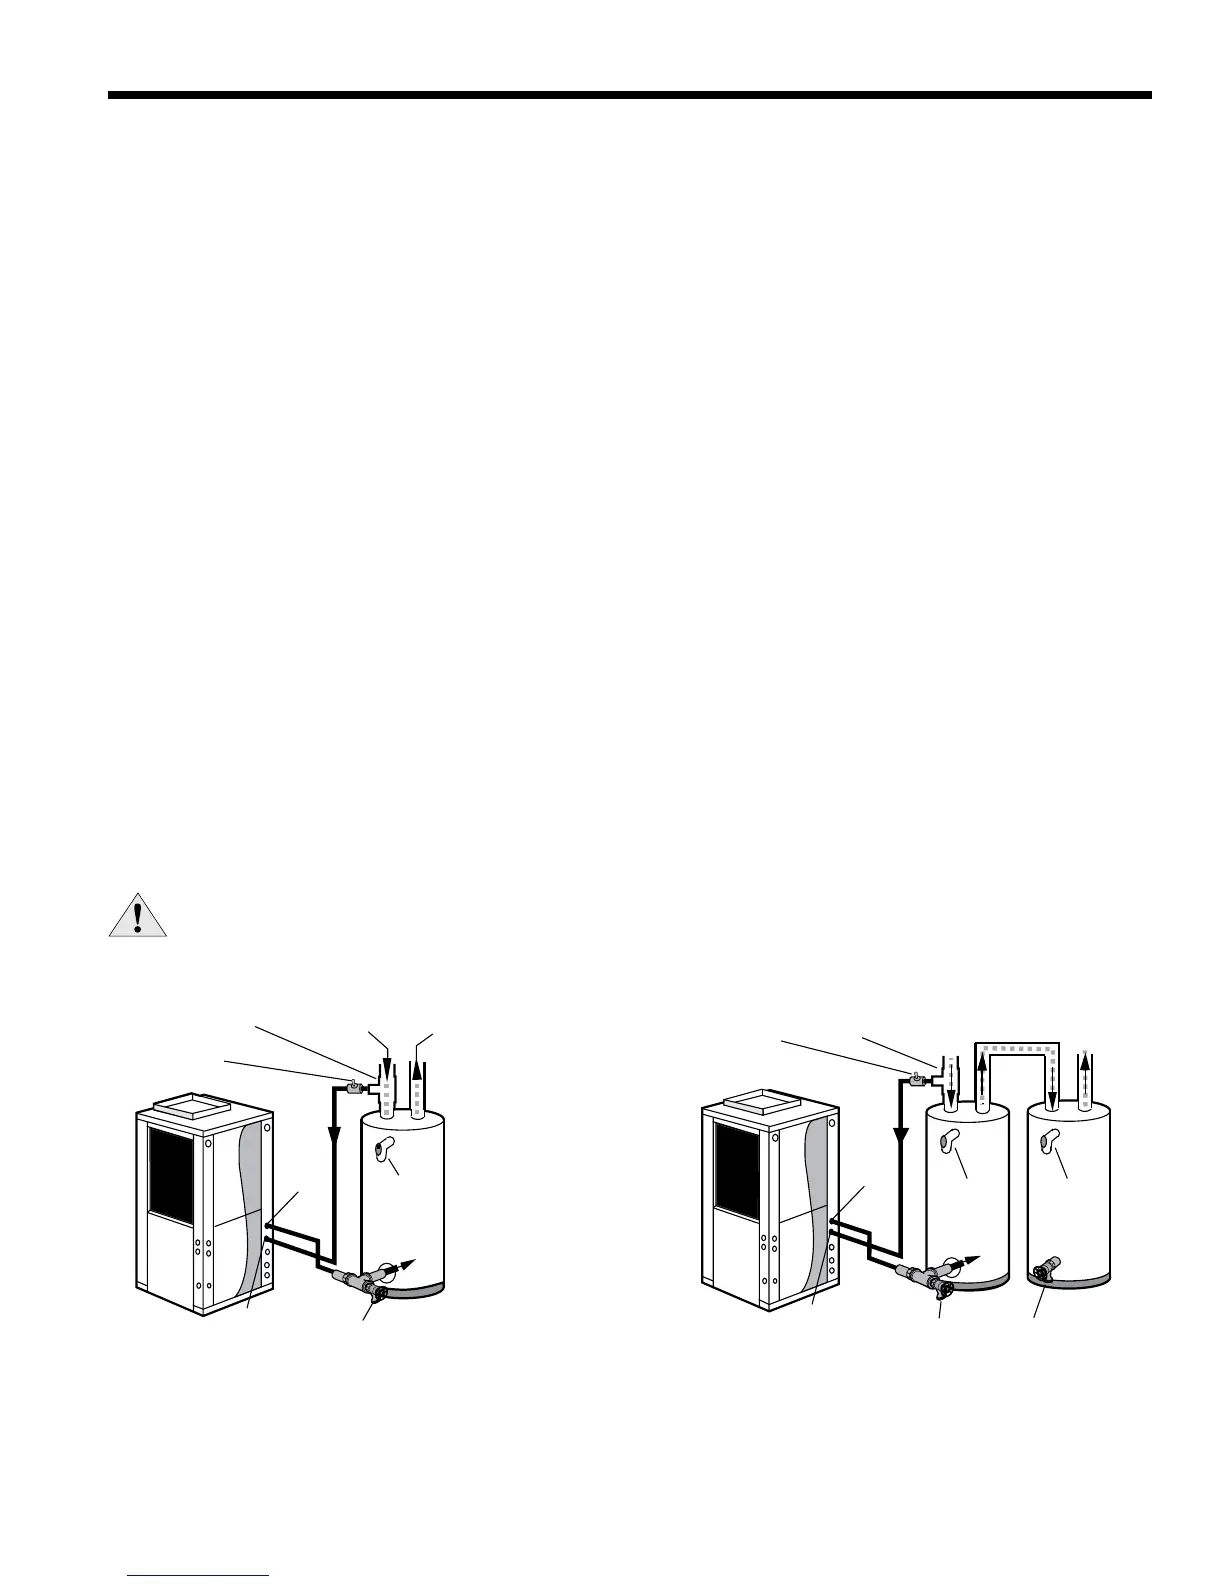
Desuperheater Connections
Tomaximizethebenetsofthedesuperheateraminimum50-gallonwaterheaterisrecommended.Forhigher
demandapplications,usean80-gallonwaterheaterortwo50-gallonwaterheatersconnectedinaseriesasshown
below. Electric water heaters are recommended. Make sure all local electrical and plumbing codes are met for installing
a desuperheater.
Residentialunitswithdesuperheaterscontainaninternalcirculatorandttings.
Note: Under certain conditions, Envision dual capacity units operate with very low refrigerant discharge temperatures,
producing little or no water heating capability. This scenario occurs when the unit is operating with cold entering source
water (loop or well). Allowing the desuperheater pump to operate during these conditions actually removes heat from the
DHW circulating through the unit. To overcome this, Envision unit microprocessors have been programmed to disengage
the desuperheater pump during such conditions. (During low capacity cooling operation, the pump will operate only if
theDHWtemperatureenteringtheunitislessthantheliquidlinetemperatureplus35ºF.Duringhighcapacitycooling
operation,thepumpwilloperateonlyiftheDHWtemperatureislessthantheliquidlinetemperatureplus60ºF.)Using
apreheattank,asshowninFigure12,willmaximizedesuperheatercapabilities.
Figure 11: Typical Desuperheater Installation
CAUTION: Elements will burn out if energized dry.
Figure 12: Desuperheater Installation In Preheat Tank
In
Venting Waste Valve
or Vent Coupling
3/4" x 3/4" x 1/2"
tee
Cold
Water In
Hot
Water Out
P/T Relief
Valve
P/T Relief
Valve
DHW
Water In
DHW
Water Out
Drain ValveDrain Valve
Water Tank Preparation
To install a unit with desuperheater, follow these installation guidelines.
Turn off the power to the water heater.1.
Attach a water hose to the water tank drain connection and run the other end of the hose to an open drain or 2.
outdoors.
Close the cold water inlet valve to the water heater tank.3.
Drain the tank by opening the valve on the bottom of the tank, then open the pressure relief valve or hot water 4.
faucet.
Flush the tank by opening the cold water inlet valve to the water heater to free the tank of sediments. Close when 5.
draining water is clear.
Disconnect the garden hose and remove the drain valve from the water heater.6.
RefertoPlumbingInstallationandDesuperheaterStartuponpage12.7.
Note: Thiscongurationmaximizesdesuperheatercapability.
Drain Valve
In
P/T Relief
Valve
Cold
Water In
Hot
Water Out
DHW
Water In
DHW
Water Out
Venting Waste
Valve or Vent
Coupling
3/4 x 3/4 x 1/2 tee
 Loading...