33
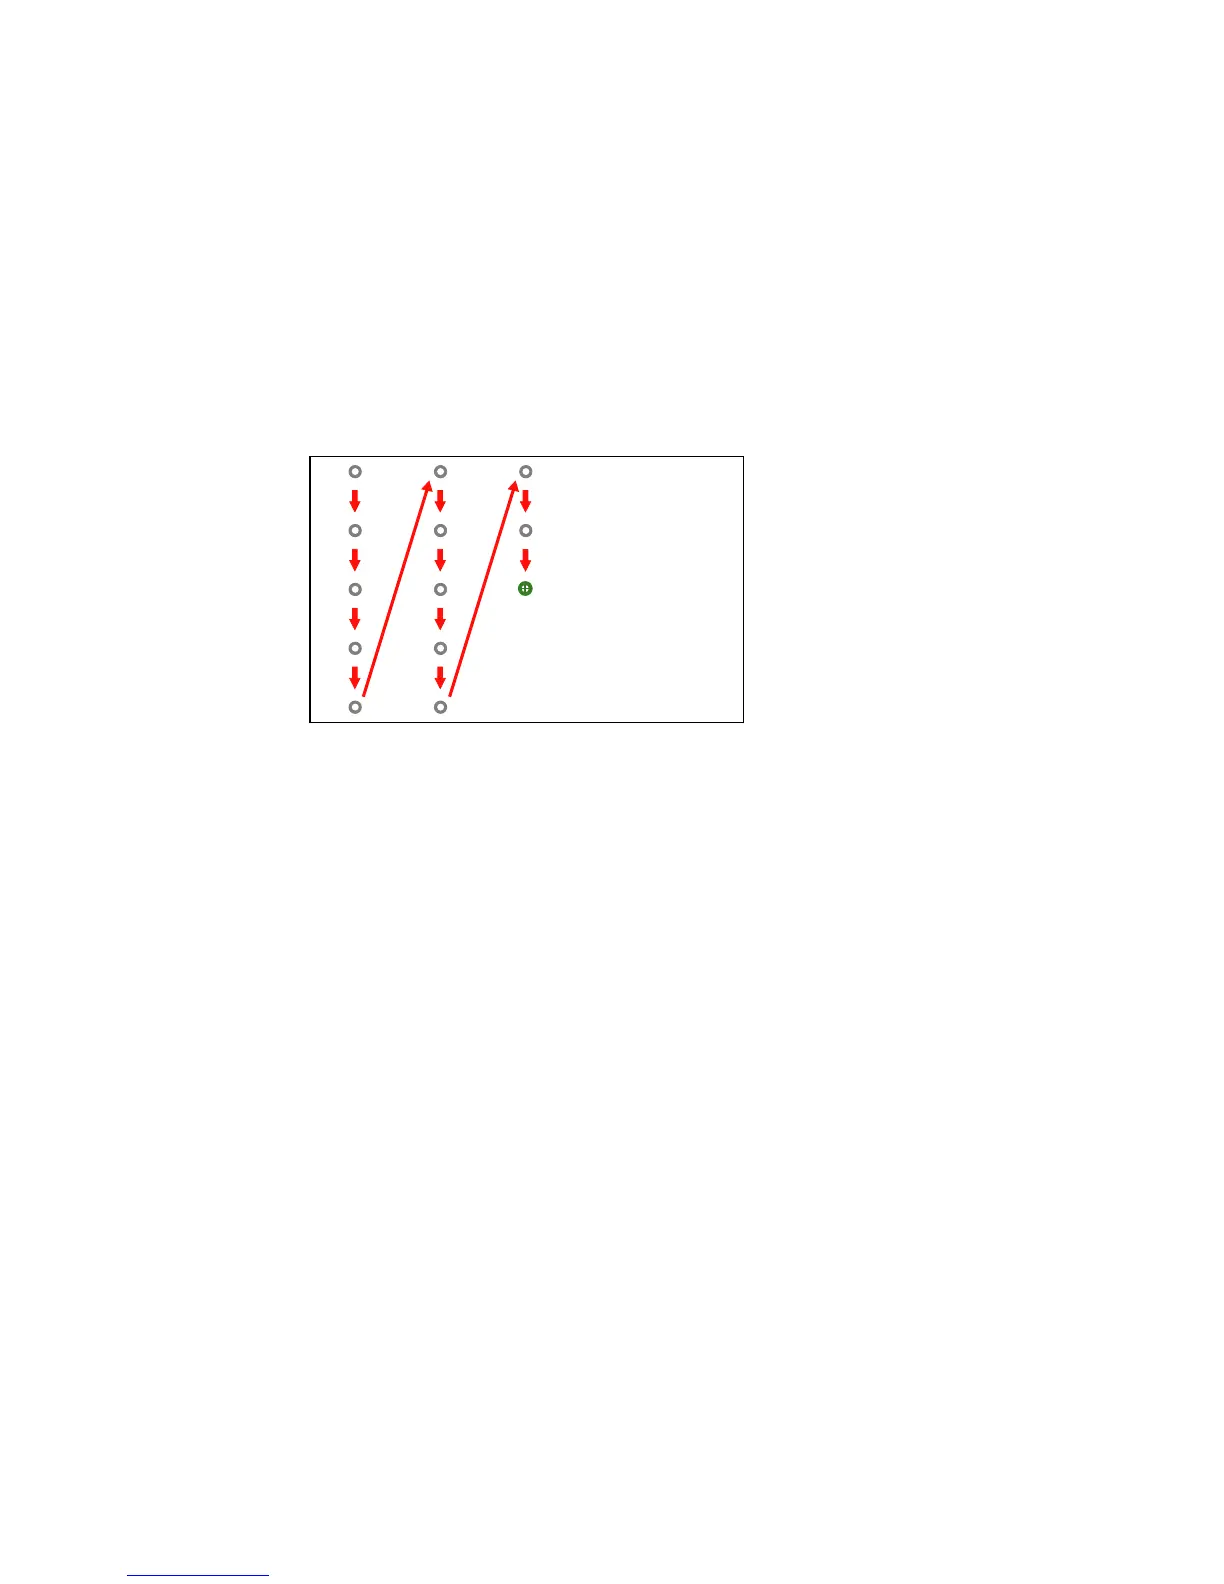
7. Touch the center of the next circle, then repeat. When you get to the bottom of the column, the next
circle appears at the top of a new column.
Note: If you make a mistake, press the Esc button on the remote control to go back to the previous
circle. To restart the calibration process, press and hold the Esc button for 2 seconds.
8. Continue until all of the circles disappear.
Parent topic: Pen Calibration
Calibrating for Finger Touch Interactivity
Finger touch calibration coordinates the position of your finger with the location of the cursor. Turn off the
other projector while performing touch calibration.
Make sure you have calibrated the pens, installed the Touch Unit, performed angle adjustment, and
turned on the Touch Unit before calibrating for finger touch interactivity.
Note: The BrightLink 685Wi and BrightLink 685Wi+ do not support finger touch.
 Loading...