168
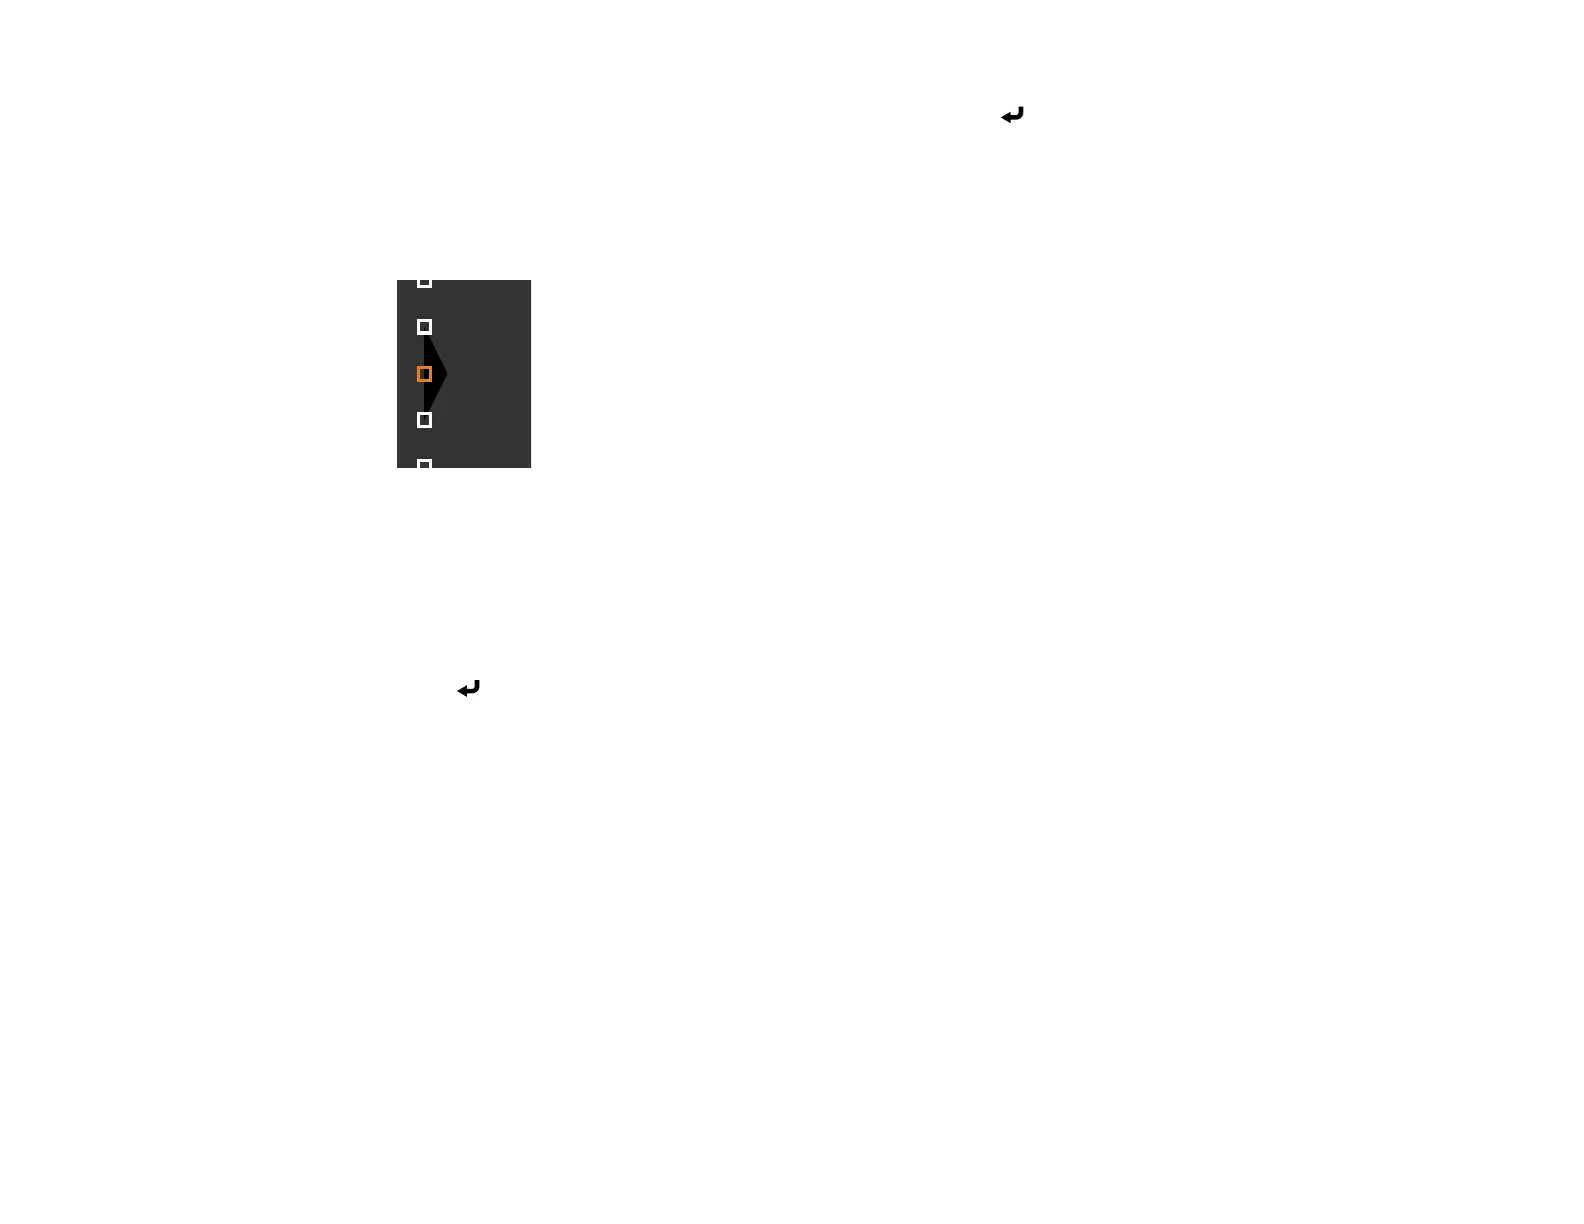
14. Use the arrow buttons to select an adjustment point and press Enter.
Note: You can change the number of adjustment points displayed by changing the Points setting in
the Area Correction menu.
The selected point turns orange.
15. Use the arrow buttons to move the point.
16. To move another point, press the Esc button and repeat the previous two steps.
17. To move another boundary line, press the Esc button repeatedly until you can select a boundary
line.
18. When you are finished, press the Esc button until you see a confirmation message. Select Yes and
press Enter.
19. When you are finished, press the Menu button.
Note: Changing the Top Edge, Bottom Edge, Right Edge, or Left Edge settings resets the Black
Level setting to its default value.
Parent topic: Using Multiple Projectors
Adjusting RGBCMY
You can adjust the Hue, Saturation, and Brightness settings for R (red), G (green), B (blue), C (cyan),
M (magenta), and Y (yellow) color components .
Turn on all the projectors and select the RGBCMY setting in each projector's Image menu so that the
color tone on the combined screen becomes entirely even.
1. Press the Menu button.