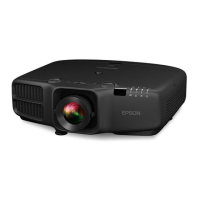
Name Function
E
Ceiling mount fixing
points (four points)
Attach the optional Ceiling Mount here when suspending
the projector from a ceiling. s p.20
F
Screw hole for the
screw to fix the lens
unit removal button
When installing a lens unit, use this screw hole to fix the
lens unit removal button using the screw supplied.
s
p.12
Control Panel
Name Function
A
[t] button
Turns the projector power on or off.
B
[Source Search]
button
Changes to the next input source that is sending an image.
C
[ ]/[ ] buttons
• Displays the Control Panel Lock screen allowing you to
make settings to lock the control panel buttons.
s
p.75
• If pressed when the Configuration menu or the Help
screen is displayed, this button selects menu items and
setting values.
Name Function
D
[ ] button
• When the Configuration menu or the Help screen is
displayed, it accepts and enters the current selection and
moves to the next level.
• If pressed while projecting analog RGB signals from the
Computer port or the BNC port, you can automatically
optimize Tracking, Sync., and Position.
E
[ ]/[ ] buttons
• Displays a test pattern. s p.26
• If pressed when the Configuration menu or the Help
screen is displayed, this button selects menu items and
setting values.
F
[ ] /[ ] buttons
• Displays the Info menu from the Configuration menu.
• If pressed when the Configuration menu or the Help
screen is displayed, this button selects menu items and
setting values.
G
[A/V Mute] button
Turns the video and audio on or off.
H
[Esc] button
• Stops the current function.
• If pressed when the Configuration menu is displayed, it
moves to the previous menu level.
I
[ ]/[ ] buttons
• Performs screen adjustments using the settings in
Geometric Correction from the Configuration menu.
s p.43
• If pressed when the Configuration menu or the Help
screen is displayed, this button selects menu items and
setting values.
J
[Menu] button
Displays and closes the Configuration menu.
Part Names and Functions
9