(7) Select the sections of the images.
s "Displaying a Scaled Image" p.102
Adjusting manually offline
Adjust the images from all projectors manually.
Advance preparation
(1) Turn on all projectors.
(2) Set an ID for all projectors and the remote controls.
s "Set the projector ID" p.40
Adjusting the projected position
(1) Adjust the position (angle) of the projector.
s "Installation Settings" p.29
(2) Adjust the arrangement of the images.
s "Performing tiling manually" p.93
Adjusting the projected images
s
"Adjusting the projected images" p.90
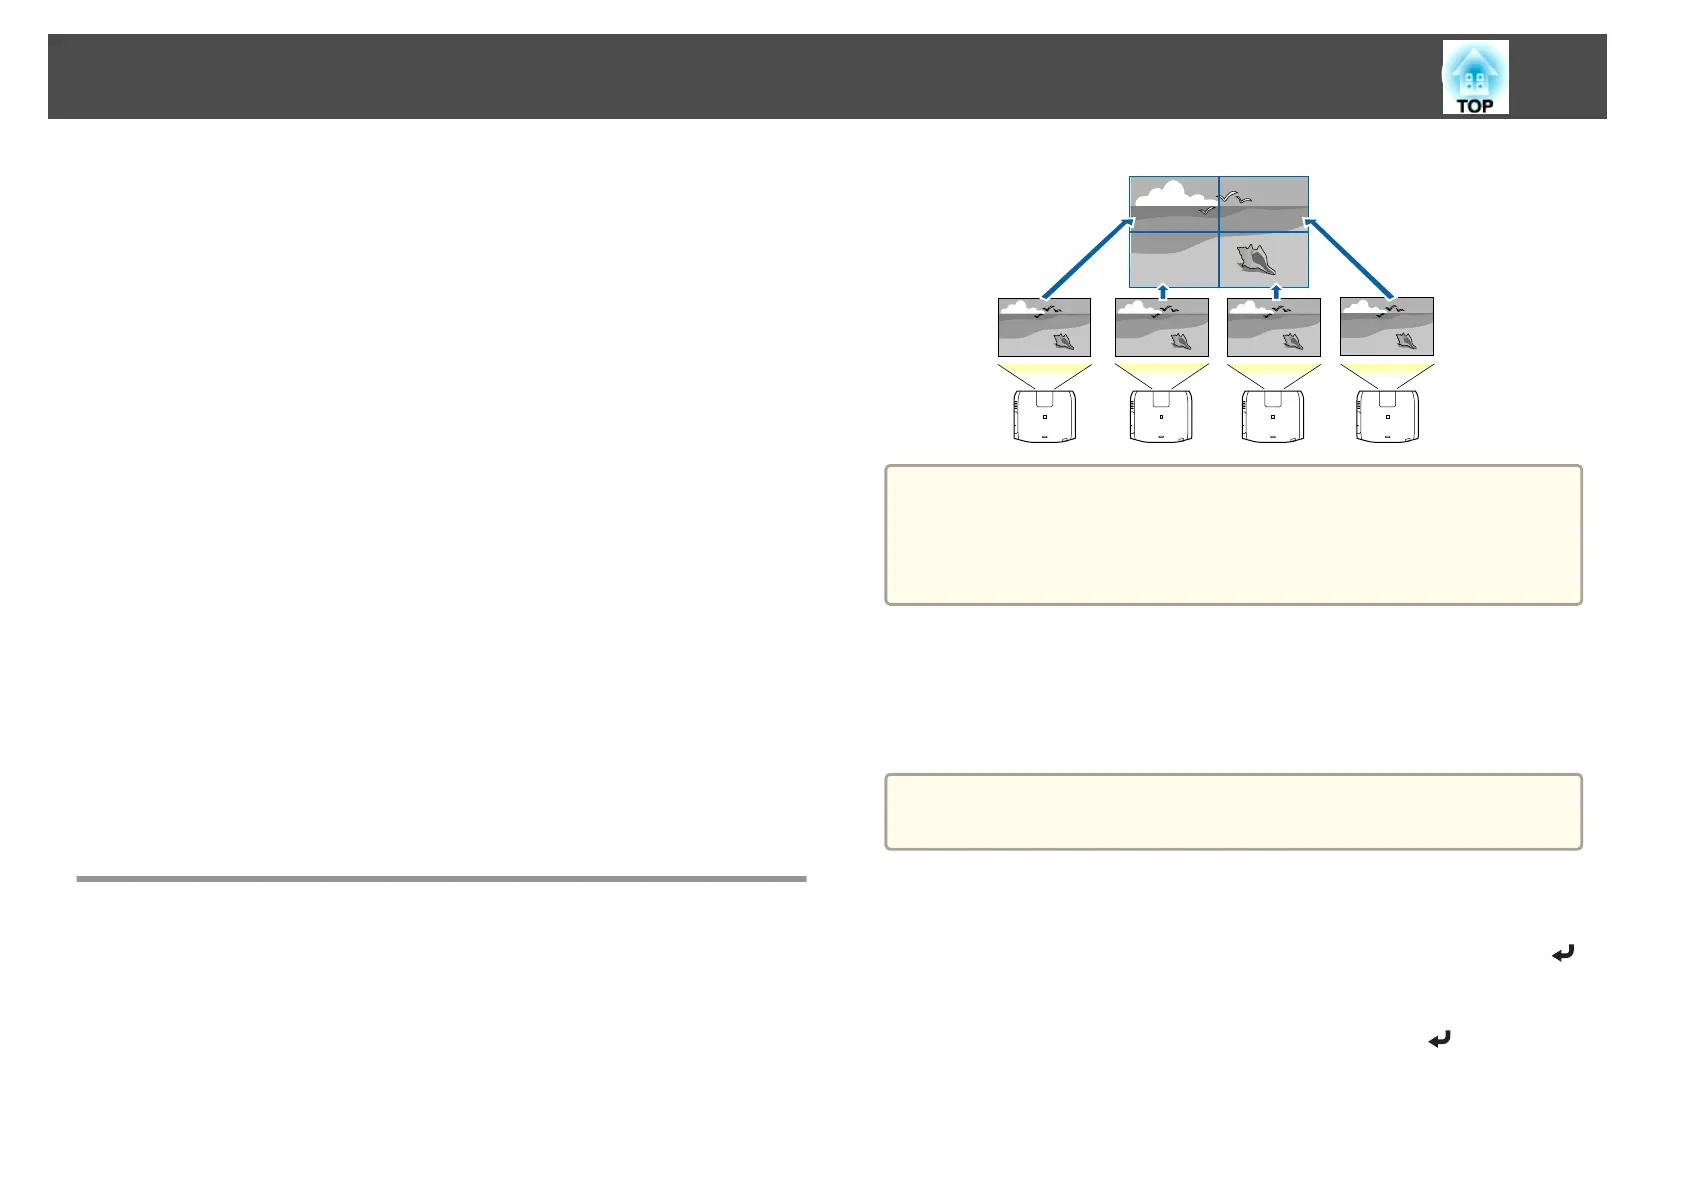
Tiling
Project the same image from multiple projectors to create one large image.
You can project by using up to nine projectors.
a
Before performing tiling, adjust the projected image so that it is a
rectangle. Also, adjust the size and focus of the images.
s
"Adjusting the Image Size" p.35
s "Correcting the Focus" p.36
Performing tiling automatically
This section explains how to select the projector being used in Projector
Grouping, and then automatically configure the images being projected.
a
Location Setup is performed using the camera built into the front of
the projector. Do not block the camera or the projected images.
a
Press the [Menu] button while projecting.
b
Select Multi-Projection from Extended, and then press the [ ]
button.
c
Select Projector Grouping, and then press the [ ] button.
Multi-Projection Function
91