166
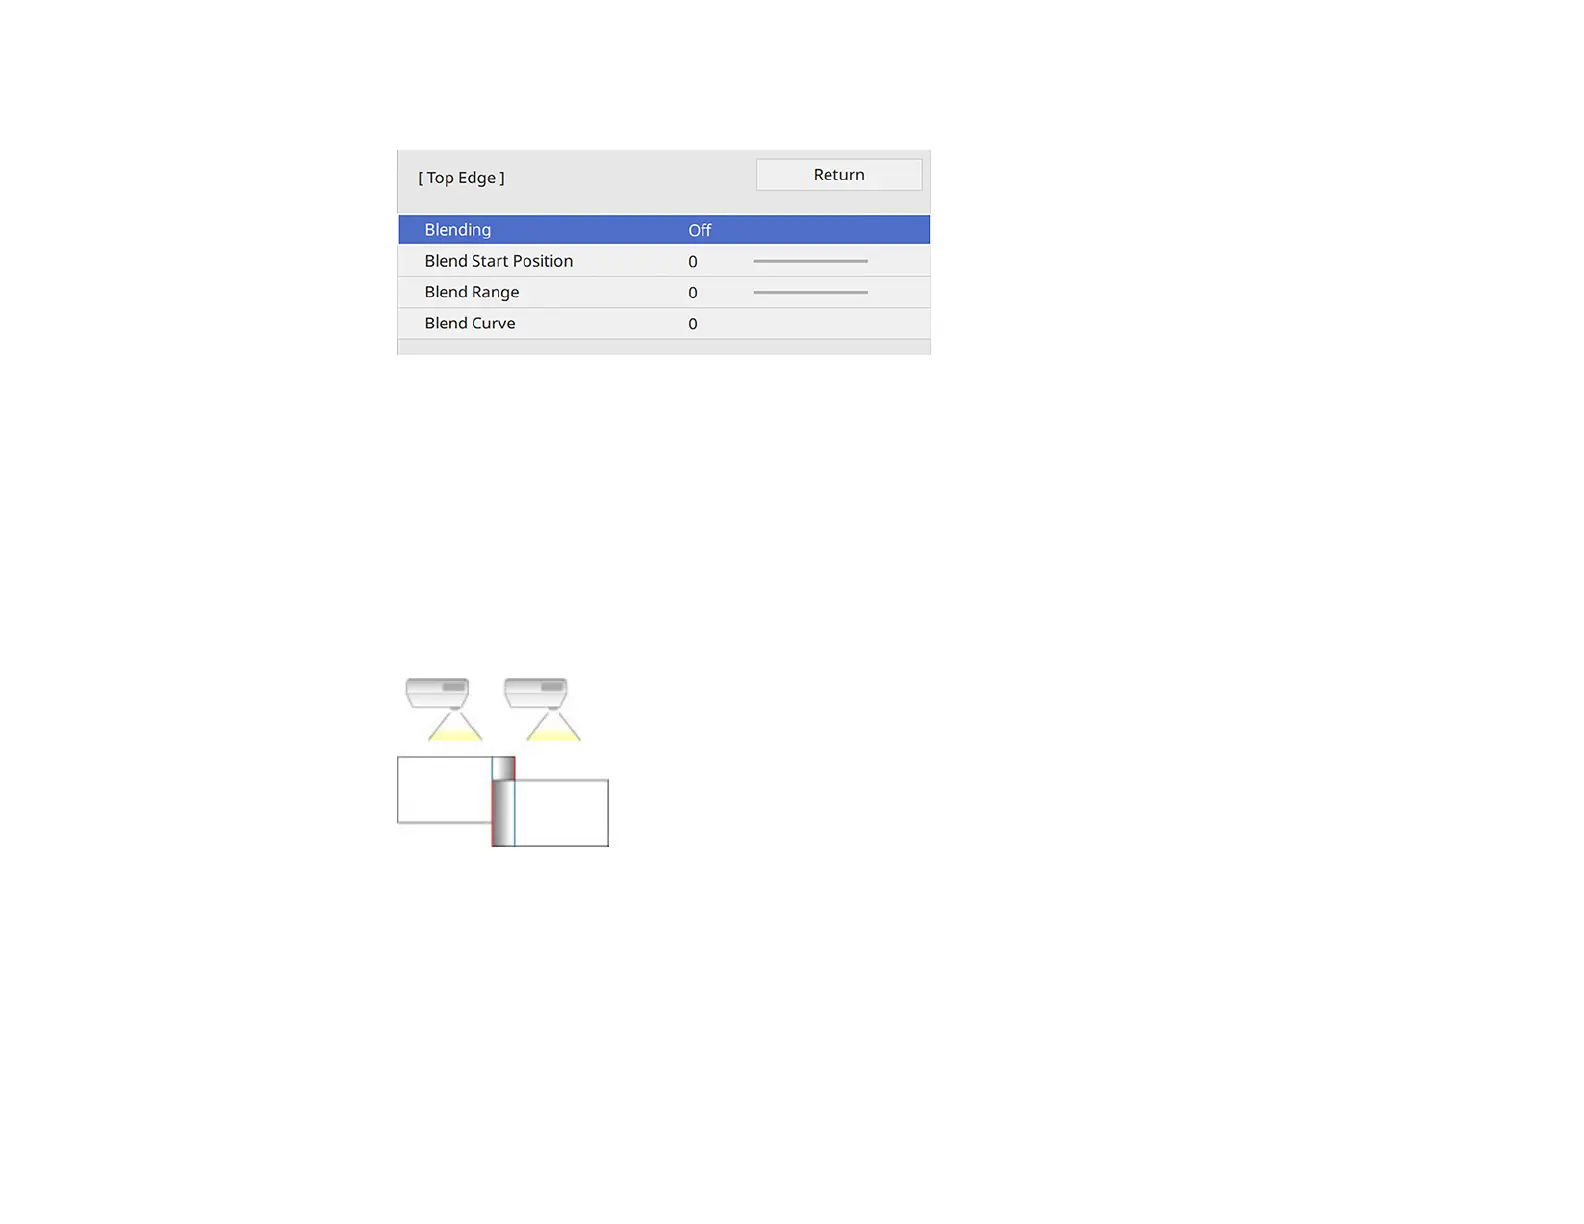
You see a screen like this:
6. Select the Blending setting and select On.
7. Press Esc to return to the previous screen.
8. Select the Blend Start Position setting and adjust the point where edge blending begins.
Note: If you created a unified image area using the Edge Blending feature, set the Blend Start
Position setting to 0.
9. Select the Blend Range setting and use the arrow buttons to select the width of the blended area so
that the displayed guides are at the edges of the overlapping area between the two images.
10. Press Esc to go back to the previous screen.
11. Select the Blend Curve setting and select a gradient for the shaded area on the projectors.
12. When the edges are blended, turn off the Line Guide and Pattern Guide settings on each projector
to check the final settings.
13. When you are finished, press the Menu button.