EPSON
PRINTER
2.10
DOTS
OR
CHARACTERS
MISSING
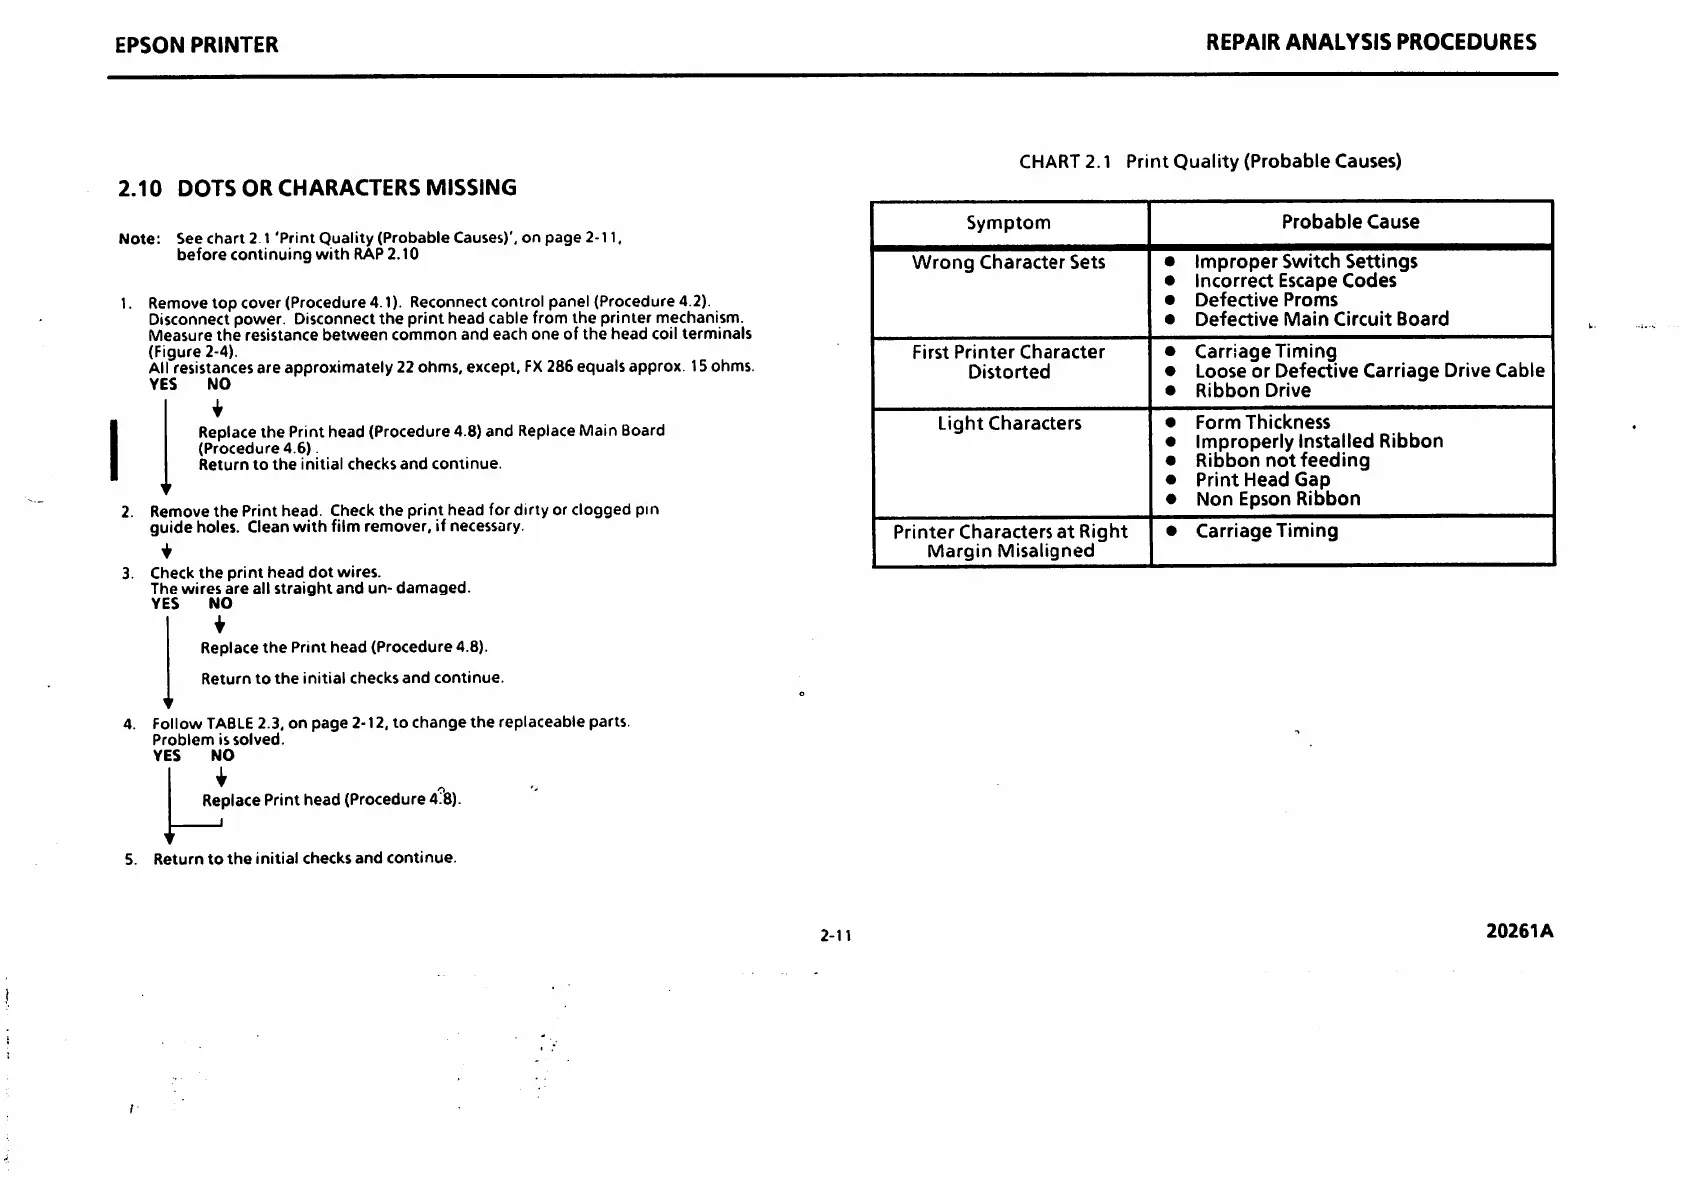
Note:
See
chart
2 1
'Print
Quality
(Probable
Causes)',
on
page
2-11,
before
continuing
with
RAP2.10
1. Remove
top
cover (Procedure 4.1). Reconnect control panel (Procedure 4.2).
Disconnect power. Disconnect
the
print head cable from the printer mechanism.
Measure
the
resistance
between
common
and
each
one
of
the
head
coil
terminals
(Figure 2-4).
Allresistances are approximately 22 ohms, except,
FX
286 equals approx. 15ohms.
YES
NO
Replace
the
Print head (Procedure 4.8) and Replace Main Board
(Procedure
4.6)
Return
to
the
initial
checks
and
continue.
2.
Remove
the
Print
head.
Check
the
print
head
for
dirty
or
clogged
pin
guide holes. Clean with film remover, if necessary.
3. Check
the
print
head
dot
wires.
The
wires
are
all
straight
and
un-
damaged.
YES
NO
Replace
the
Print
head
(Procedure
4.8).
Return
to
the
initial
checks
and
continue.
4. Follow
TABLE
2.3, on
page
2-12, to
change
the
replaceable
parts.
Problem
is
solved.
YES
NO
Replace
Print
head
(Procedure
4?8).
I
5.
Return
to
the
initial
checks
and
continue.
2-11
REPAIR
ANALYSIS
PROCEDURES
CHART2.1
Print
Quality
(Probable
Causes)
Symptonn
Probable
Cause
Wrong
Character
Sets
•
Improper
Switch
Settings
• Incorrect Escape
Codes
•
Defective
Proms
•
Defective
Main
Circuit
Board
First
Printer
Character
Distorted
•
Carriage
Timing
• Loose or Defective
Carriage
Drive Cable
•
Ribbon
Drive
Light
Characters
•
Form
Thickness
• Improperly Installed Ribbon
•
Ribbon
not
feeding
•
Print
Head
Gap
•
Non
Epson
Ribbon
Printer
Characters
at
Right
Margin
Misaligned
•
Carriage
Timing
20261A

 Loading...