Canna/Clover
booklet.fm RevC
A5-Format booklet.fm
5/10/01 Durchlauf 2
L
Proof-Abzeichnung:
ABE M. Miyagawa, Takahashi_______
Takahashi _______
ABE G. Kok _______
10
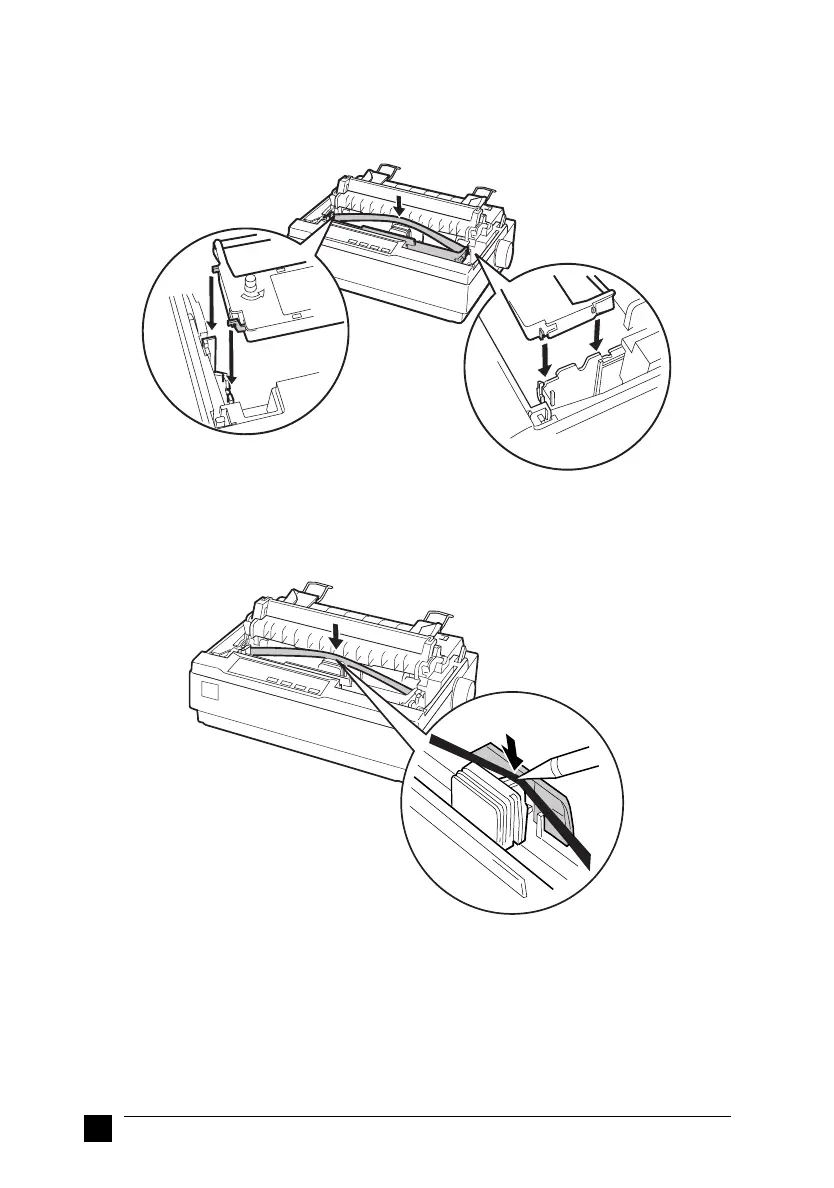
5. Insert the ribbon cartridge into the printer as shown; then press both sides of the
cartridge firmly to fit the plastic hooks into the printer slots.
6. Use a pointed object, such as a ball point pen, to guide the ribbon between the print
head and ribbon guide. Turn the ribbon tightening knob to help feed the ribbon
into place; it should not be twisted or creased.
7. Slide the print head from side to side to make sure it moves smoothly.
8. For LX-1170 users, reinstall the paper tension unit.
9. Reinstall and close the printer cover.
When printing becomes faint, you need to replace the ribbon cartridge. To remove the
old ribbon cartridge, first move the print head to the center of the printer. Then remove
the cartridge by lifting the both ends and taking it out of the printer.

 Loading...


