83
4. Select the Geometry Correction setting and press Enter.
5. Select the Quick Corner setting and press Enter. Then press Enter again.
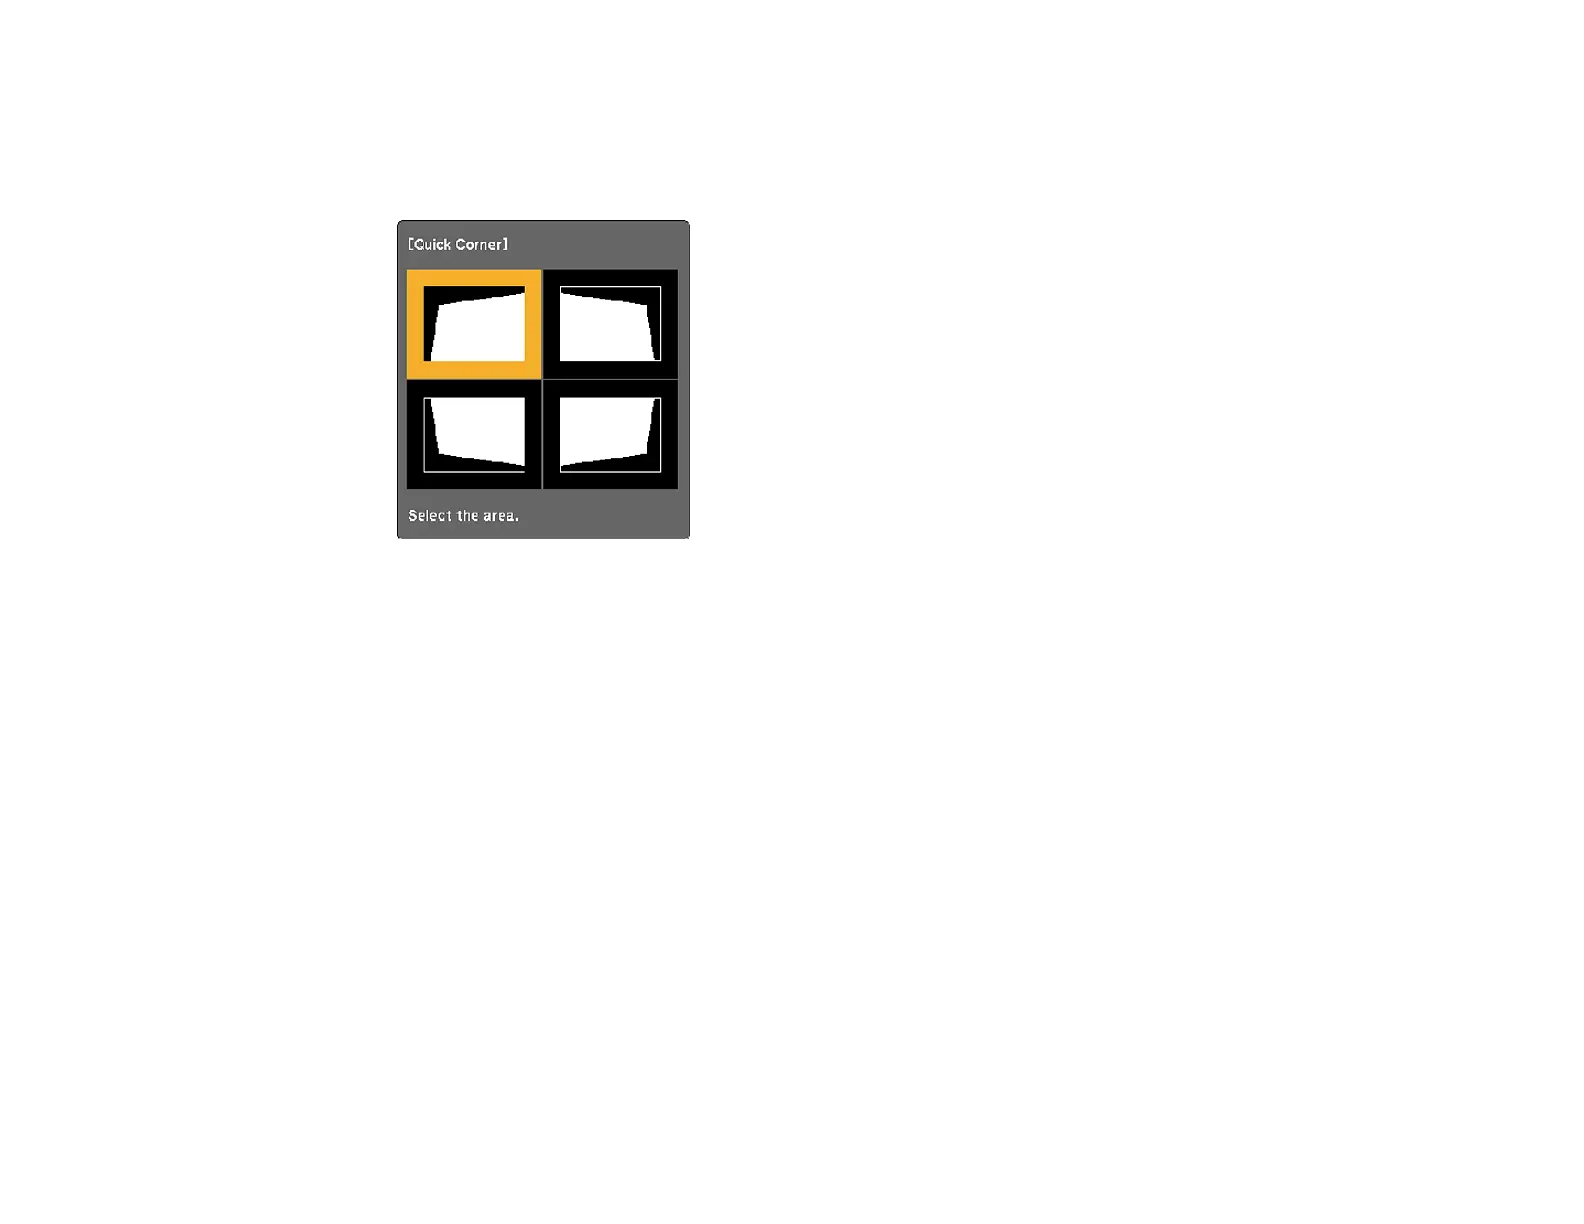
You see the Quick Corner adjustment screen:
6. Use the arrow buttons on the projector or the remote control to select the corner of the image you
want to adjust. Then press Enter.
7. Press the arrow buttons to adjust the image shape as necessary.
8. When you are finished, press Esc.
Parent topic: Image Shape
Correcting Image Shape with Arc Correction
You can use the projector's Arc Correction setting to adjust the curve or arc of the sides of your image.
1. Turn on the projector and display an image.
2. Press the Menu button.
 Loading...