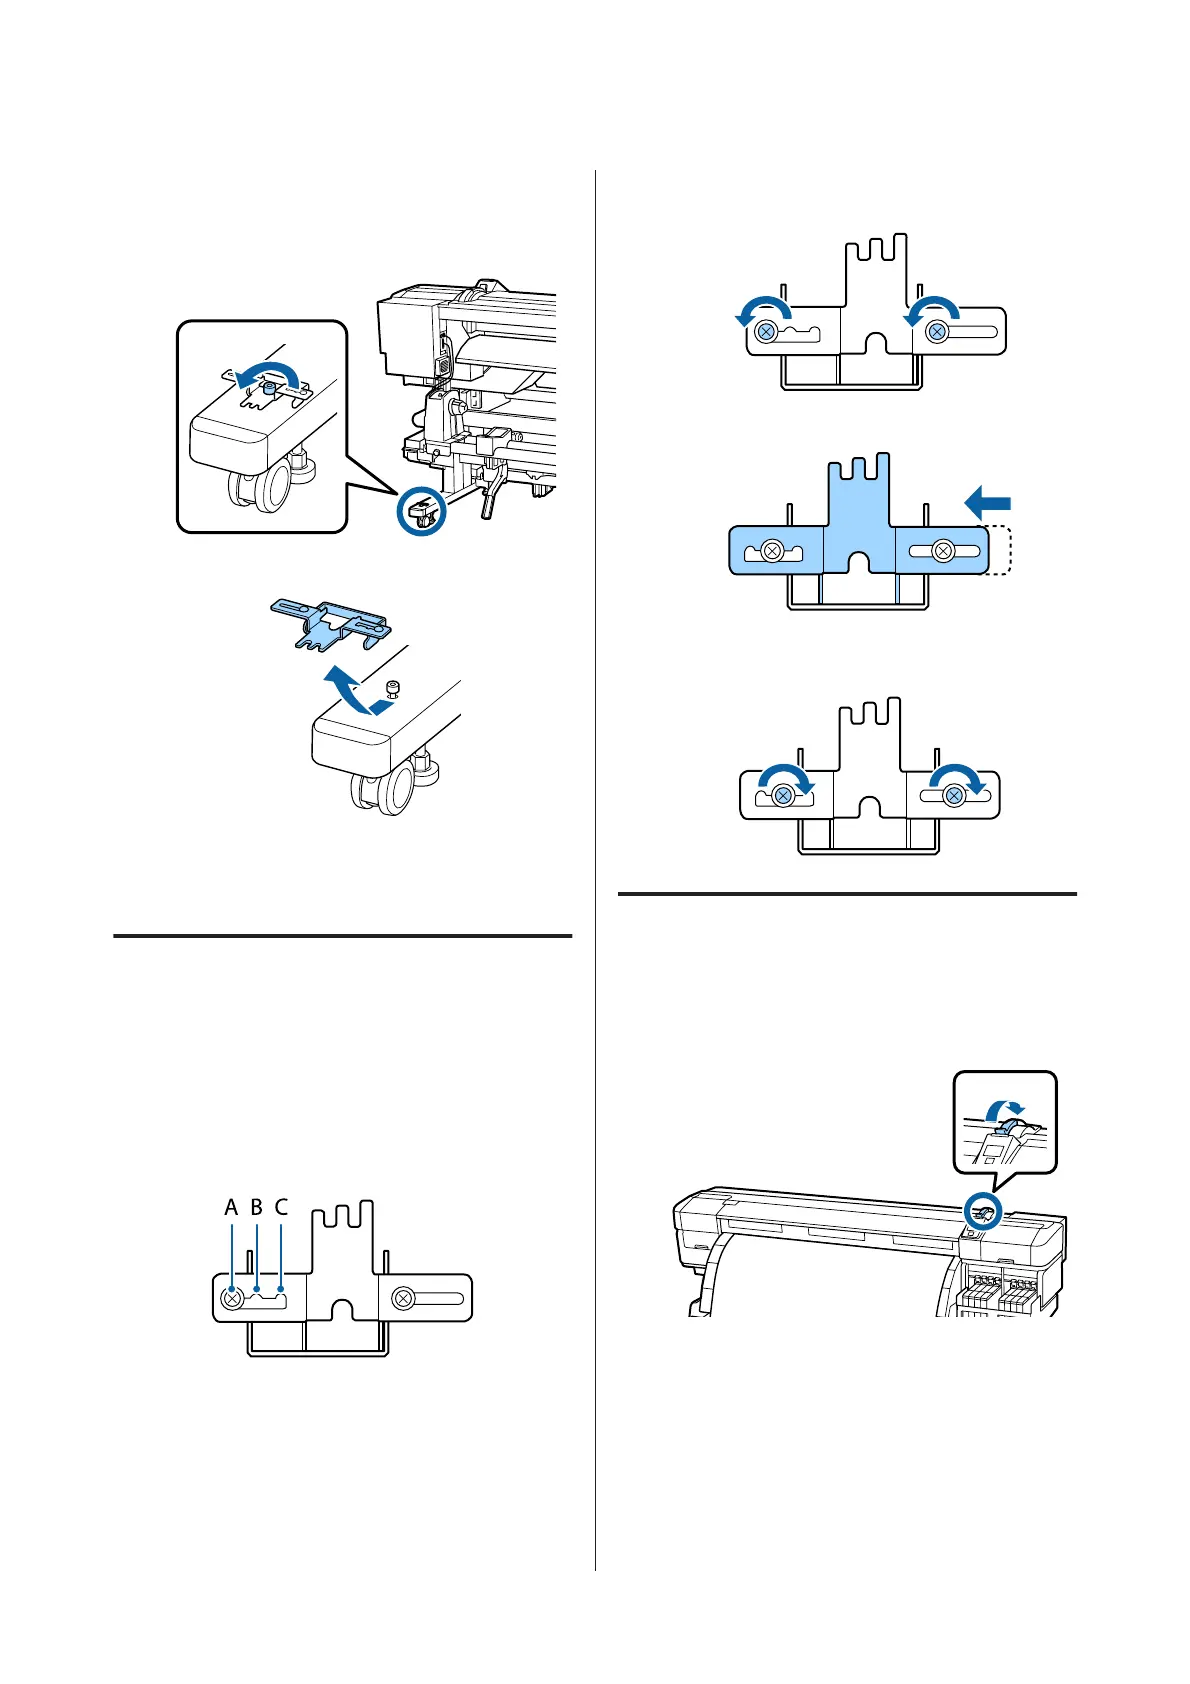
A
Loosen the screws with the hexagon wrench
(large).
Do not remove the screws.
B
Remove the spacer.
C
Tighten the screws that you loosened.
Adjusting the Spacer
You can adjust the spacer in three stages. Normally, it is
adjusted to position A. If vertical creases are not
improved, try adjusting to position B and then C.
This section explains how to adjust the position from A
to B. Follow the same procedure when adjusting to
position C.
A
Use the plus head screwdriver to loosen the two
screws.
B
Move the adjustment position from A to B.
C
Use the plus head screwdriver to tighten the two
screws.
Attaching the Spacer
A
Confirm that the printer is ready to print.
B
Raise the media loading lever.
C
Check that the adjustment position is position A.
SC-F9200 Series User's Guide
Appendix
129

 Loading...


