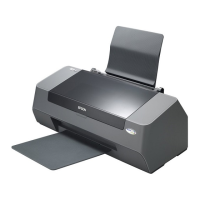
EPSON Stylus C82 Revision A
DISASSEMBLY AND ASSEMBLY Overview 25
4.1 Overview
This section describes procedures for disassembling the main components of the
product. Unless otherwise specified, disassembly units or components can be
reassembled by reversing the disassembly procedure. Things, if not strictly observed,
that could result in injury or loss of life are described under the heading “WARNING”.
Precautions for any disassembly or assembly procedures are described under the
heading “CAUTION”. Chips for disassembling procedures are described under the
heading “CHECK POINT”.
If the assembling procedure is different from the reversed procedure of the
disassembling, the procedure is described under the heading “REASSEMBLY”.
Any adjustments required after disassembling the units are described under the heading
“ADJUSTMENT REQUIRED”. When you have to remove any units or parts that are
not described in this chapter, refer to the exploded diagrams in the appendix.
Read precautions described in the next section before starting.
4.1.1 Precautions
See the precautions given under the handling “WARNING” and “CAUTION” in the
following column when disassembling or assembling the product.
4.1.2 Tools
Use only specified tools to avoid damaging the printer.
4.1.3 Screws
The screws used in the printer are as shown in Table 4-2. Make sure you always use the
correct type and number of screws for the assembling part.
W A R N I N G
Disconnect the power cable before disassembling or assembling
the printer.
If you need to work on the printer with power applied, strictly
follow the instructions in this manual.
Wear protective goggles to protect your eyes from ink. If ink gets
in your eye, flush the eye with fresh water and see a doctor
immediately.
Always wear gloves for disassembly and reassembly to avoid
iujury from sharp metal edges.
To protect sensitive microprocessors and circuitry, use static
discharge equipment, such as anti-static wrist straps, when
accessing internal components.
Never touch the ink or wasted ink with bare hands. If ink comes
into contact with your skin, wash it off with soap and water
immediately. If irritation occurs, contact a physician.
Make sure the tip of the waste ink tube is located at correct
position when reassembling the waste ink tube. Otherwise it will
cause ink leakage.
W A R N I N G
Avant de commencer, assurez vous que l’imprimante soit eteinte
et que le cordon d’alimentation soit debranche.
Veillez a jeter les piles usagees selon le reglement local.
C A U T I O N
When transporting the printer after installing the ink cartridge,
be sure to pack the printer for transportation without removing
the ink cartridge.
Use only recommended tools for disassembling, assembling or
adjusting the printer. (Refer to Table 4-1 "Special Tool List".)
Observe the specified torque when tightening screws.
Apply lubricants and adhesives as specified. (Refer to Chapter 6
for details.)
Make the specified adjustments when you disassemble the
printer. (Refer to Chapter 5 for details.)
Table 4-1. Special Tool List
Name Supplier Parts No.
Phillips Screw Driver (No.1) EPSON 1080530
Phillips Screw Driver (No.2) EPSON 1080532
Tweezers EPSON 1080561
Acetate Tape EPSON 1003963
Table 4-2. Screw Specifications
Abbreviation Description
C.B.P Cross-recessed Binding Head P-tight screw
C.B.S Cross-recessed Binding Head S-tight screw
C.C Cross-recessed Cup Head screw

 Loading...


