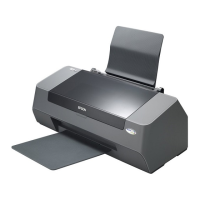
EPSON Stylus C82 Revision A
DISASSEMBLY AND ASSEMBLY Disassembly 35
4.2.3.3 PE Sensor/PE Sensor Holder/PE Lever Removal
1. Remove ASF Unit. (See Section 4.2.3.1)
2. Disconnect connector from PE Sensor.
3. While lifting PE Sensor Holder upwards, use a pair of tweezers to release 4 hooks
holding the PE Sensor Holder starting from the upper direction of the printer by
following the order shown below. Then remove the PE Sensor and PE Lever along
with the PE Sensor Holder.
Figure 4-28. PE Sensor/PE Sensor Holder/PE Lever Removal 1
4. Release 3 hooks fastening the PE Sensor to the PE Sensor Holder, then remove PE
Sensor from the PE Sensor Holder.
5. Follow the order shown below to remove the PE Lever along with Torsion Spring
0.28 from the PE Sensor Holder.
Figure 4-29. PE Sensor/PE Sensor Holder/PE Lever Removal 2
ASF Unit Assembly Points
1. Set Clutch Spring (when assembling Clutch and Clutch Gear)
2. Position Paper Back Support Lever (when setting the Paper
Back Cam to LD Roller Shaft at first step)
3. Align phase (when inserting Paper Back Cam into LD Roller
Shaft at last step)
Figure 4-27. Assembly Points
1
3
2
2'
Correct State
Wrong State
Clutch Gear Clutch
Clutch Gear
Paper Back
Cam
Paper Back Support Lever
Connector
PE Sensor Holder
Hooks
PE Lever
PE Sensor
Hook
Hook
<Rear Side>
1
2
3 4
<Front Side>
Hooks
PE Lever
Hooks
PE Sensor
Torsion Spring 0.28
1
2

 Loading...


