Checking and cleaning the print head | 33
Checking the print head nozzles using the control panel
Printless nozzle check
You can check the status of the nozzles and determine if any of them are clogged from the control panel. If
clogged nozzles are detected, you can also clean them automatically from the control panel.
1. Press the button.
2. Press the r button to select Nozzle Check.
3. Press the OK button to select Printless Nozzle Check. The nozzle check begins.
4. If no nozzle clogs are detected, press the OK button to return to the main screen.
5. If a nozzle clog is detected, a message appears on the LCD screen and displays which nozzles are
clogged. Press the button to begin automatic cleaning. If you select
Finish, you risk printing
that may exhibit banding from clogged nozzles. It is recommended to print a nozzle check pattern and
clean nozzles as necessary before contuining to print (see page 33 for instructions).
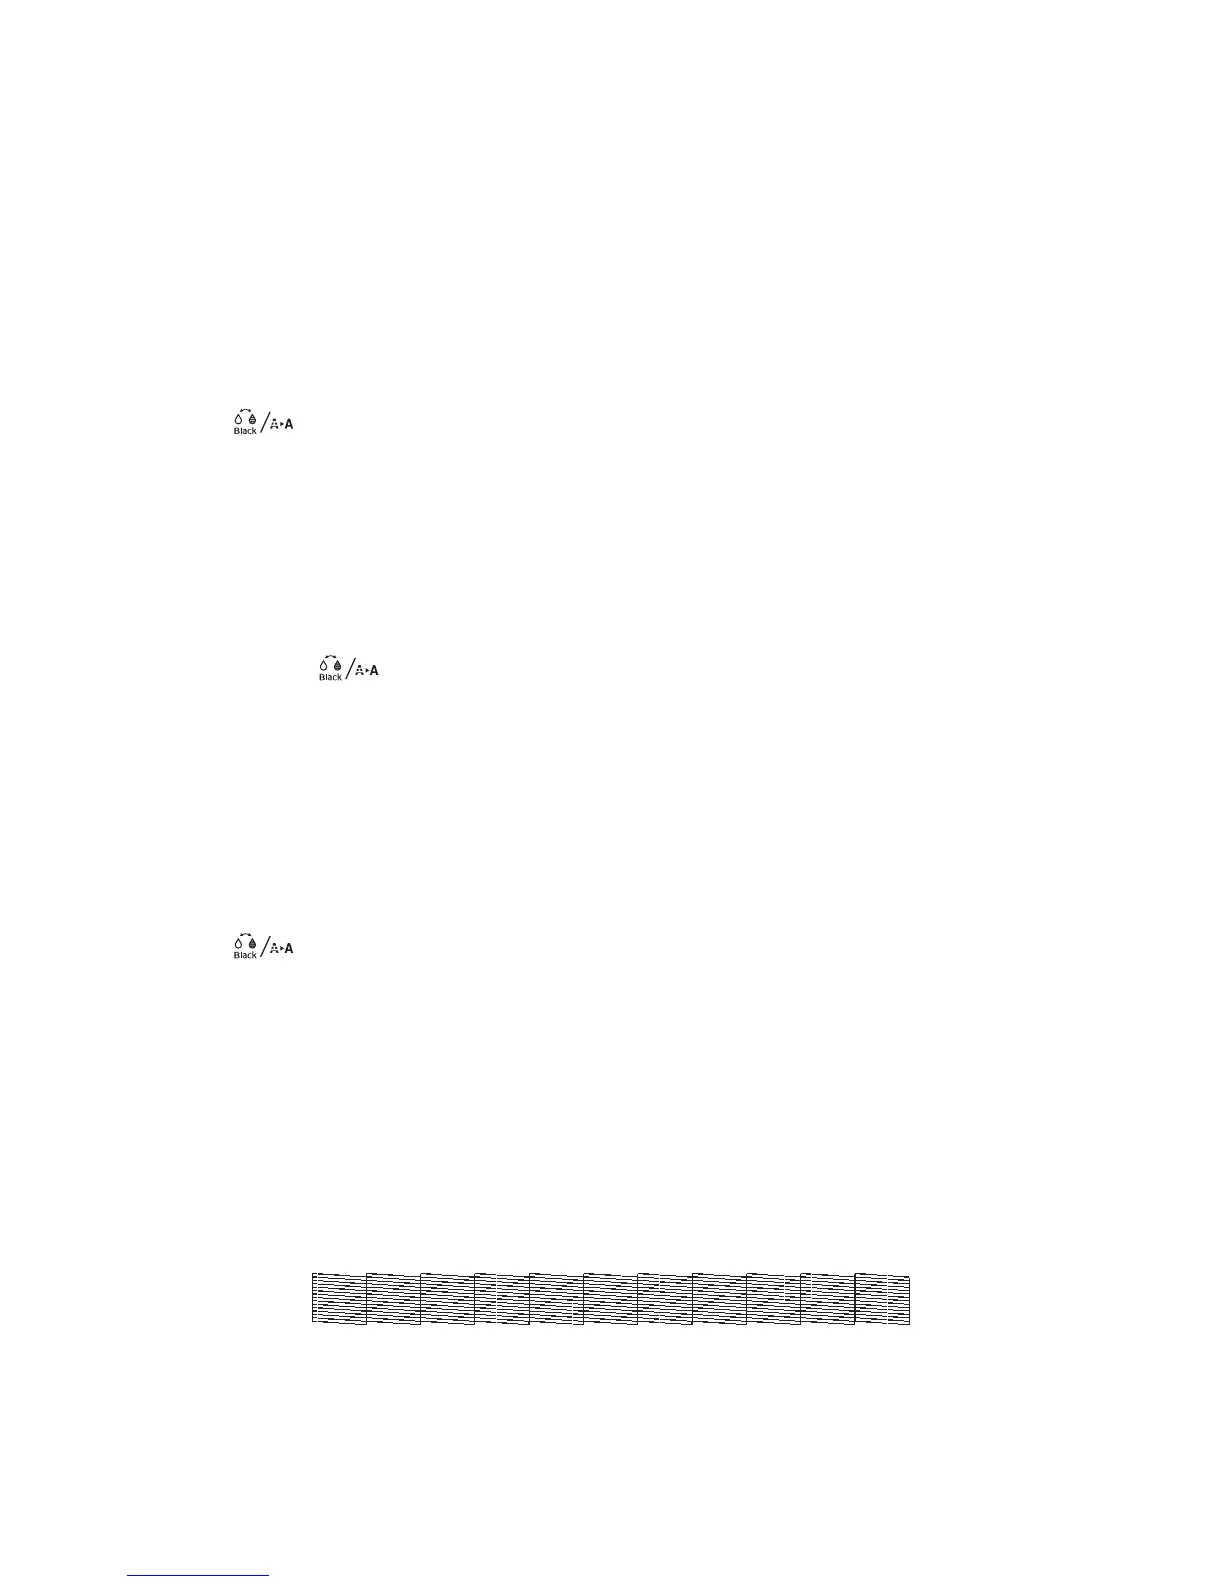
Printing a nozzle check pattern
You can print a nozzle check from the control panel and examine it to determine whether any nozzles are
clogged. Then you can run a cleaning cycle if necessary. Before you start, make sure you have loaded roll
paper or a cut sheet that is letter-/A4-size or larger.
1. Press the button.
2. Press the r button to select Nozzle Check.
3. Press the d button to select Print Check Pattern, then press the OK button. The nozzle check pattern
begins to print.
4. After the pattern is printed, use at least a 10× magnification eye loupe to examine it.
Caution: Don’t run a cleaning cycle while thick media is loaded in the printer.
• If the pattern looks good, as shown below, the print head is clean.
 Loading...