WF-2540 / WF-2530 / WF-2520 / WF-2510 / WF-2010 series Revision B
Disassembly/Reassembly Detailed Disassembly/Reassembly Procedure for each Part/Unit 40
Confidential
2.3 Detailed Disassembly/Reassembly Procedure for each Part/Unit
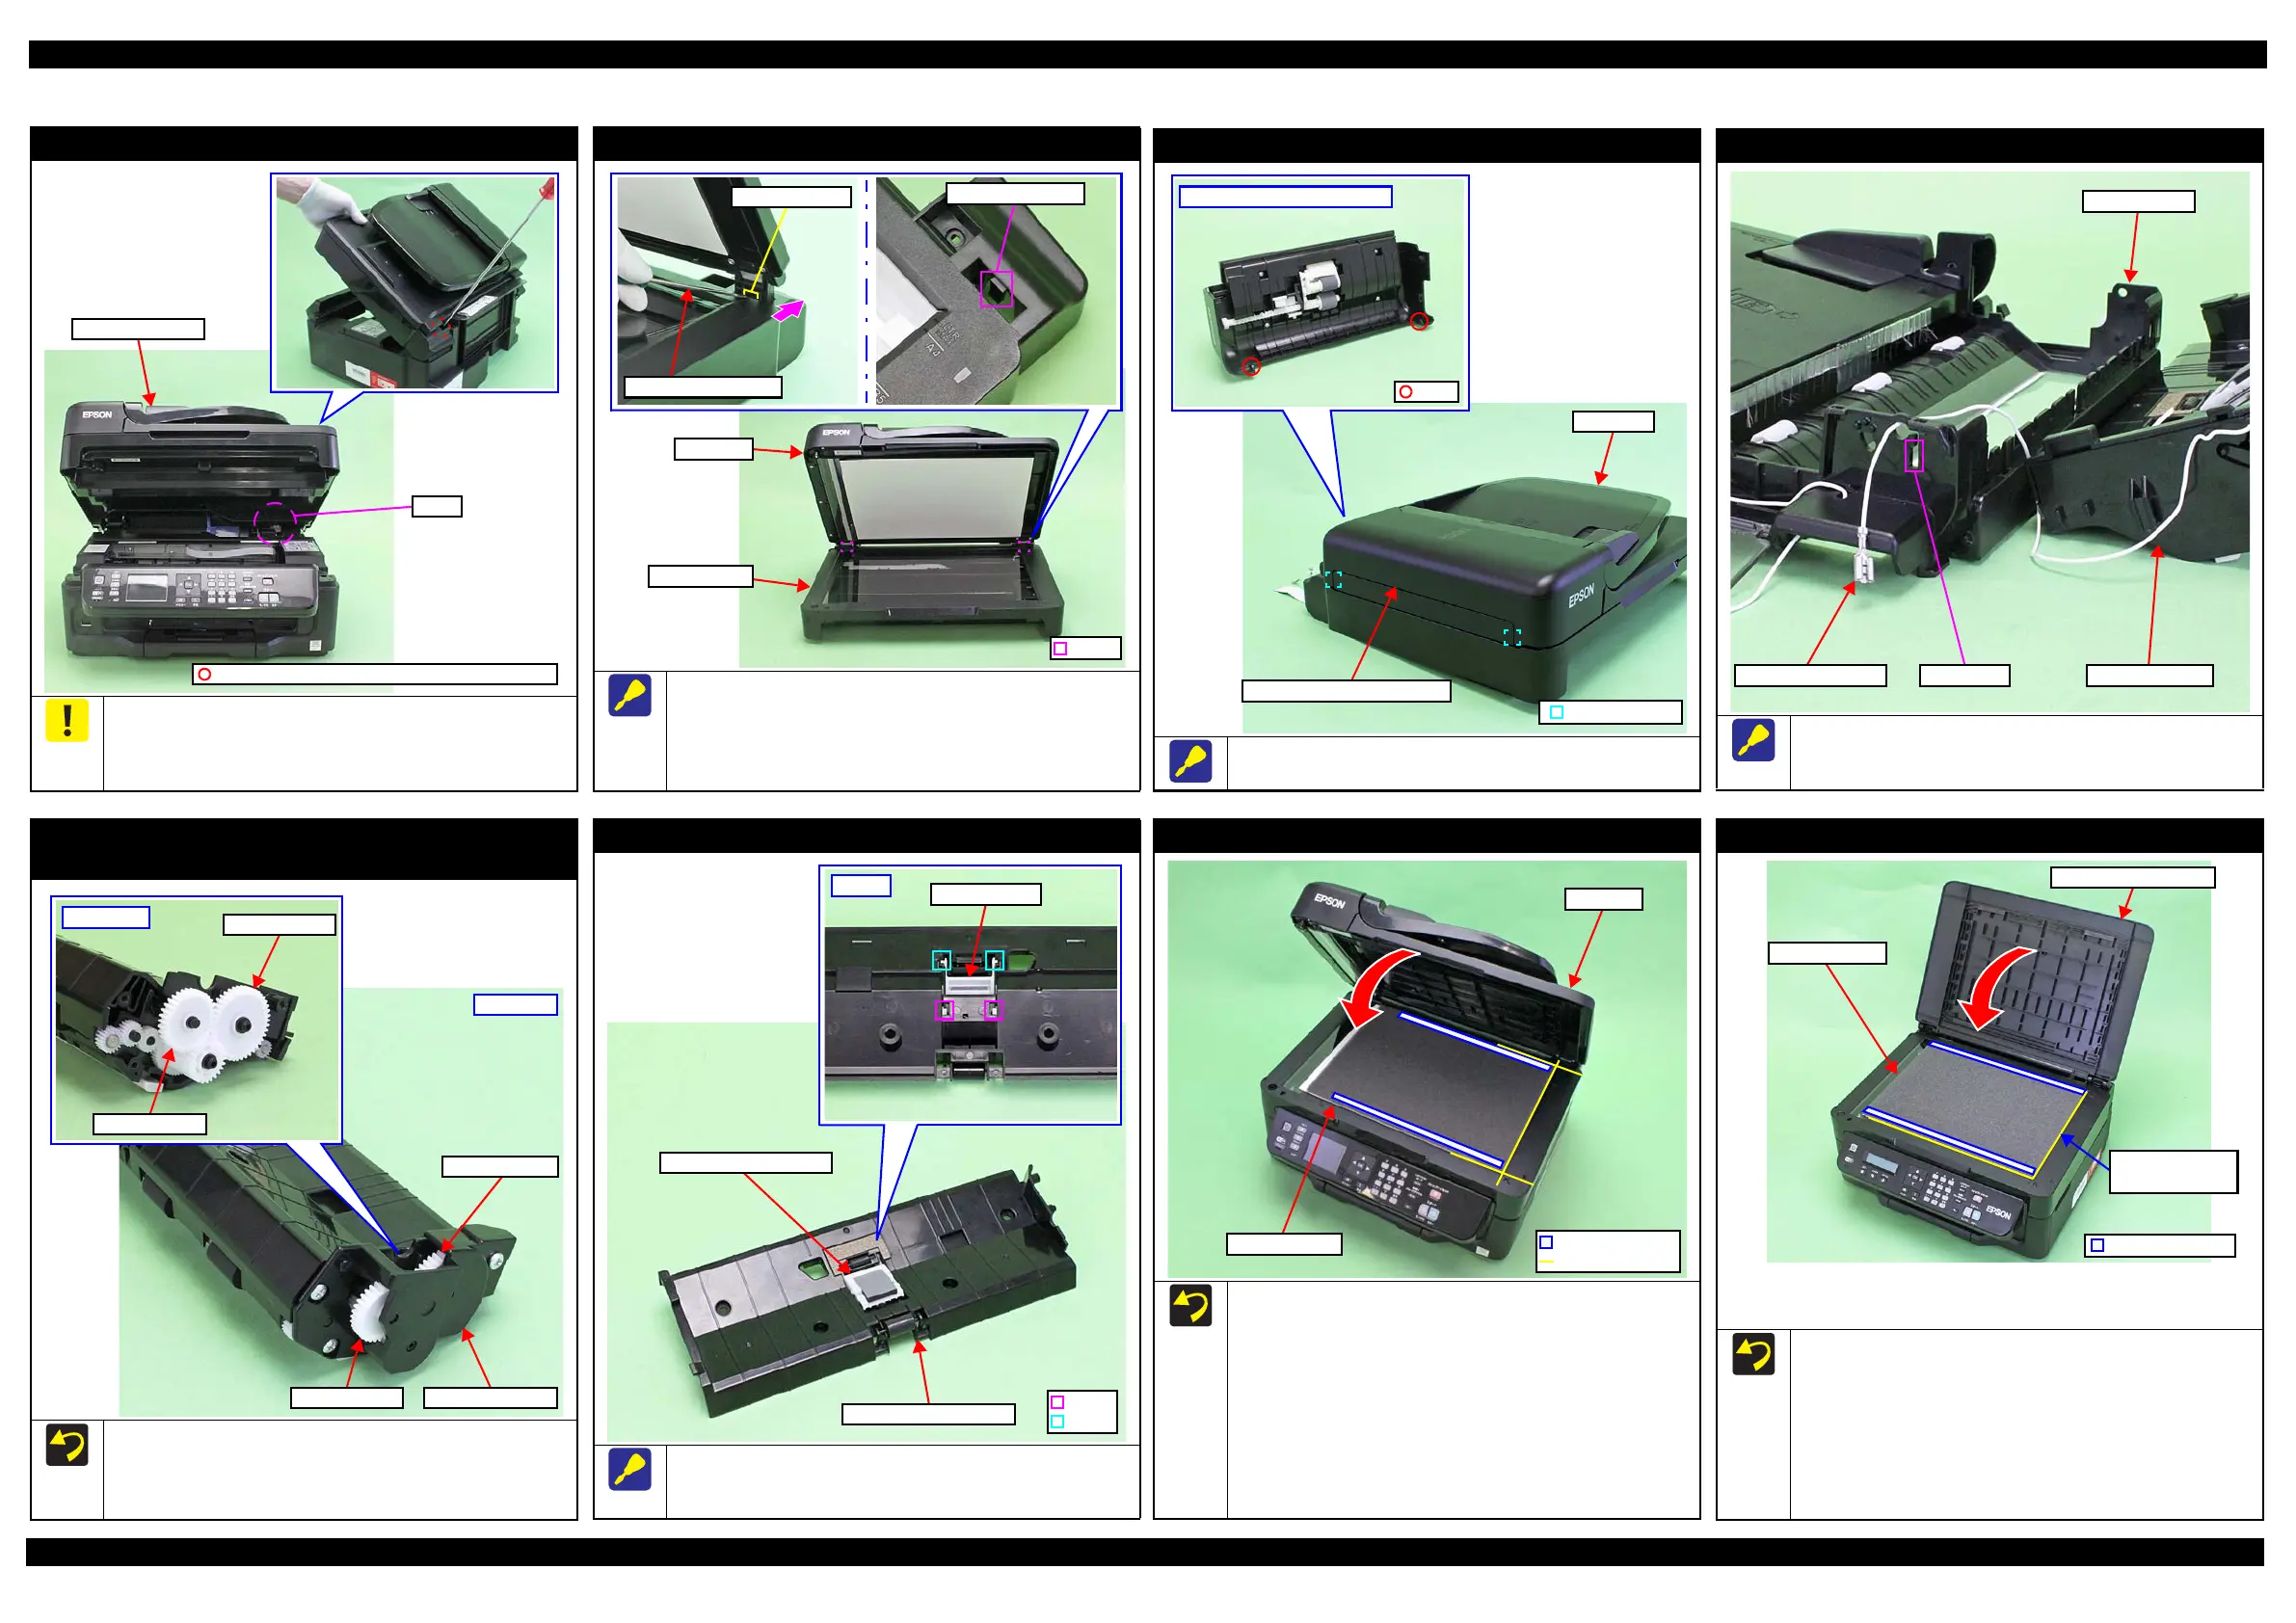
ADF/Scanner Unit (ADF compatible model)
Tighten the screw of the ADF/Scanner Unit by supporting the
ADF/Scanner Unit.
Without the support, the ADF/Scanner Unit may drop out from the
Hinge by its weight and it may damage the ADF/Scanner Unit.
ADF/Scanner Unit
Hinge
C.B.P-TITE SCREW 3x10 F/ZN-3C (6 ± 1 kgf·cm)
ADF Unit (ADF compatible model)
When removing the ADF Unit from the Scanner Unit, remove
the Hinge Left/Right from the Hook on the Scanner Unit.
Release the hooks (x2) on the Scanner Unit by inserting the
precision screwdriver to the hole of the ADF Unit Left/Right to
push the Hook to the rear.
Precision screwdriver
ADF Hinge hole
ADF Paper Guide Cover Assy (ADF compatible model)
Remove the ADF Paper Guide Cover Assy by removing the holes
(x2) of the dowels (x2) of the ADF Unit.
ADF Paper Guide Cover Assy
ADF Paper Guide Cover Assy
Hole
ADF Frame Assy (ADF compatible model)
When removing the ADF Frame Assy, remove the grounding
terminal of the ADF Frame Assy through the square hole of the
ADF Base Assy.
ADF Frame AssyGrounding terminal
ADF Base Assy
Square hole
ADF Front Frame / Spur Gear 25.8/20.4
(ADF compatible model)
Install the Spur Gear 25.8/20.4 as shown in the figure A above.
When installing the ADF Front Frame, check that the Spur
Gear 25.8/20.4 is installed on the position shown in the figure
B above.
Diagram A
Spur Gear 25.8
Spur Gear 20.4
Diagram B
Spur Gear 20.4
Spur Gear 25.8
ADF Pad Assy (ADF compatible model)
Remove the ADF Pad Assy by removing the hooks (x2) and
dowels (x2) of the ADF Pad Assy from the ADF Upper Frame
Assy.
Dowel
ADF Upper Frame Assy
Document Mat (ADF compatible model)
When attaching the Document Mat to the ADF Unit, follow the
procedure below.
1. Attach double-sided tape on the two long sides of the Document
Mat.
2. Place the mat on the document glass with double-sided tape
attachment side upward while aligning it with the standard line of
the document glass shown above.
3. Close the Document Cover and stick the Document Mat to the
Document Cover.
4. Open the Document Cover and press the double-sided tape
attachment side to secure the Document Mat to the ADF Unit
securely.
Document Mat
ADF Unit
Double-sided tape
Standard line
Document Mat (ADF non-compatible model)
When attaching the Document Mat to the Document Cover, follow
the procedure below.
1. Attach double-sided tape on the two long sides of the
Document Mat.
2. Place the mat on the document glass with double-sided tape
attachment side upward while aligning it with the reference
position of the document glass shown above.
3. Close the Document Cover and press the cover to stick the
Document Mat to the Document Cover.
Document Mat
Document Cover Assy
Reference (origin)
position
Double-sided tape
Reference position:
Align the Document Mat with the front right corner of the document glass.
Make sure the gap in yellow above must be less than 1 mm.