QX50/QX200/QX2000; (SW Version 6.0.x) 46
QX50/QX200/QX2000 Manual I: Installation Guide
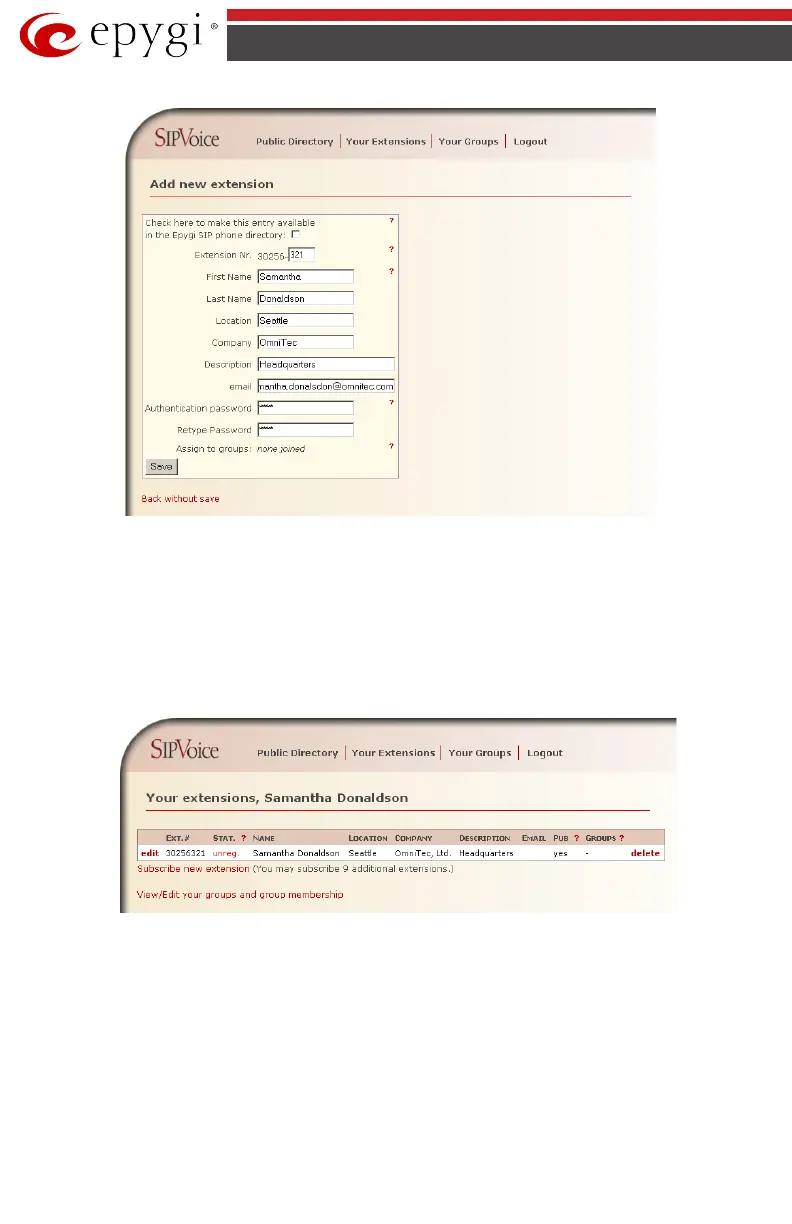
Fig.I- 38: SIP Services Add New Extension page
The Authentication password validates the entry and must match the password entered on
the QX IP PBX later. Make sure to record the name, Authentication Password and SIP extension
number for entry into the QX IP PBX later.
Save will store the entered information and conclude the basic SIP registration. The following
page then will be displayed:
Fig.I- 39: SIP Services Your Extension page
This table shows unreg. in the Stat. column. This entry will change to reg. when the required
settings in the QX IP PBX are complete and the QX IP PBX successfully registers on the SIP
Server.
Repeat this for all four extensions on the QX IP PBX and the Auto Attendant.
 Loading...


