QX50/QX200/QX2000; (SW Version 6.0.x) 9
QX50/QX200/QX2000 Manual I: Installation Guide
5 The reset button may be used in two ways: (1) to initiate a normal reset or (2) to carry
out a factory reset. A normal reset is executed by pressing the Reset button with a paper
clip for an instant. Pressing the reset button and holding it down for three seconds or
more will execute a factory reset. This will restore the factory defaults and clear all set-
tings including the IP address and the administration password you entered.
Please Note: The default LAN IP address is 172.30.0.1 for QX50/QX200 and 192.168.0.200
for QX2000 (default username - admin and password – 19).
6 Phone sockets with RJ11 connectors enable connectivity of regular analog telephones.
These are Foreign Exchange Station (FXS) analog ports.
7 Line sockets to connect the QX IP PBX to the PSTN network using standard analog phone
service. These are Foreign Exchange Office (FXO) analog ports.
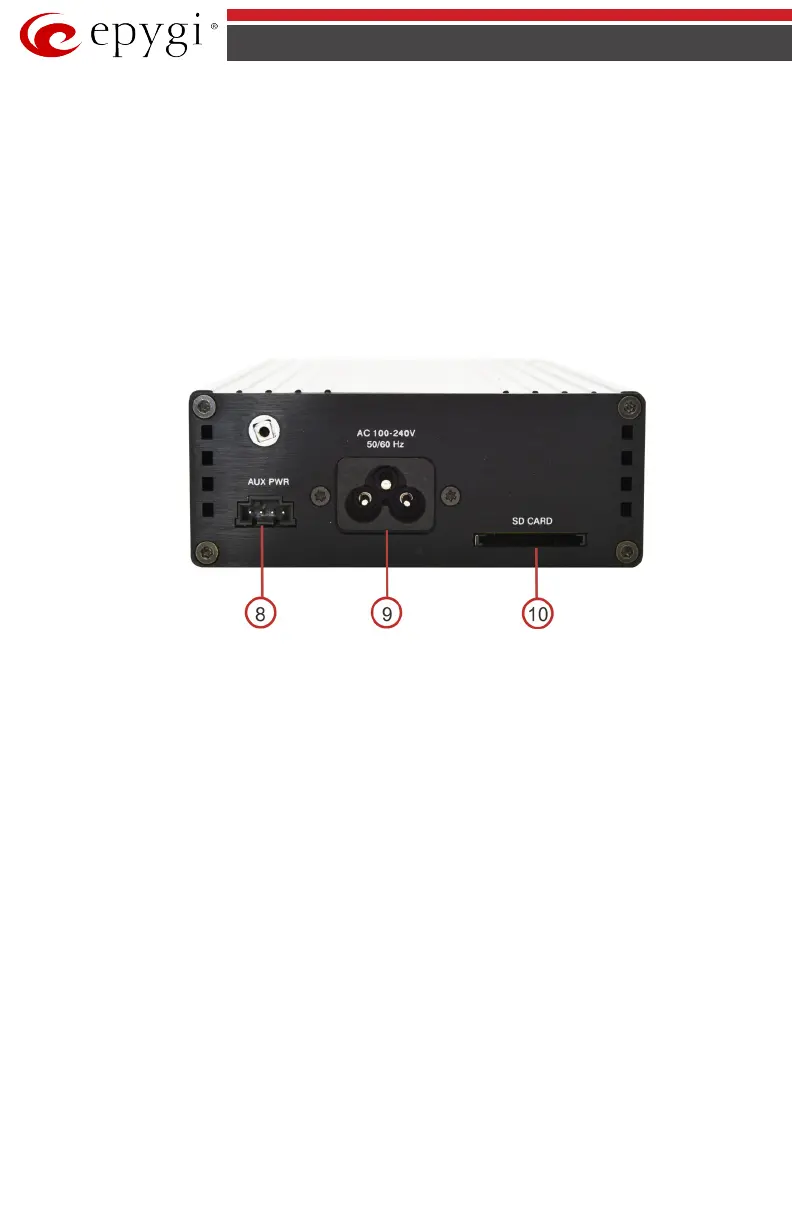
Fig.I- 3: QX50/QX200’s connector panel, back
8 AUX PWR (DC Power) connector to connect two units together. The first unit will power
the second by using 12V DC power connector.
9 AC Power supply socket to connect a power cable.
10 The SD card socket enables connectivity of SD memory card providing expansion for ad-
ditional voicemails and record data.
Attention: Power down the QX IP PBX before inserting/removing the SD memory card.
 Loading...


