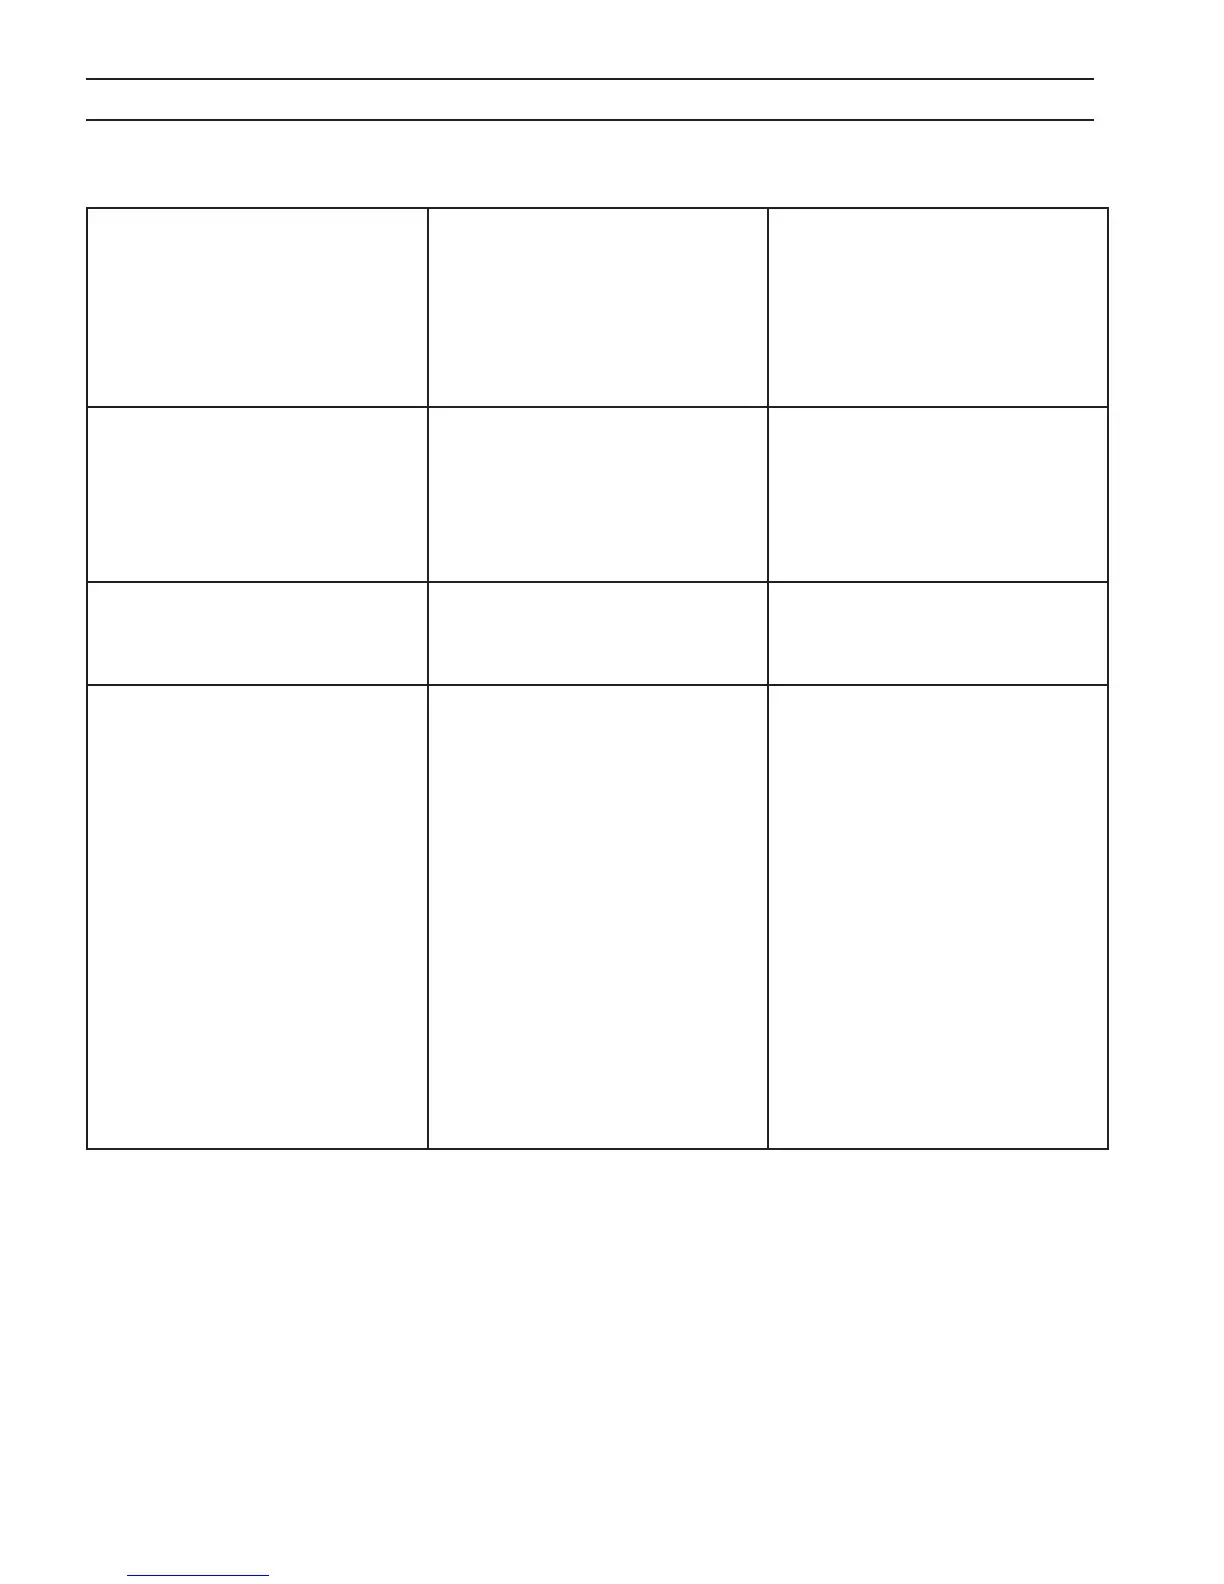
70
Power Source Temperature Fault indi-
cator is ON.
Poor ventilation at rear of console.1)
Open thermal switch.2)
Open wire between temperature 3)
switch and PCB1.
Make sure that there is 2 feet of 1)
clearance on each side of console.
With power OFF, check each ther-2)
mal switch. Normal operation is
switch closed below 194˚F.
Check wiring between tempera-3)
ture switches and PCB1, P1-15 and
P1-16.
Over / Under Voltage Fault indicator is
ON.
Input voltage is 15% above or be-1)
low the selected console operat-
ing voltage.
Bad PCB1.2)
Bad PCB1 in MOD1.3)
Bad T1 in MOD1.4)
Provided input voltage must be 1)
equal to the selected console op-
erating voltage. Change if neces-
sary.
Replace PCB1.2)
Replace PCB1 in MOD1.3)
Replace T1 in MOD1.4)
Meters M1 or M2 - no display. Bad meter.1)
Bad PCB1.2)
Replace Meter M1 and/or M2.1)
Replace one meter to verify above 2)
step did not happen twice. If still
not working replace PCB1.
Press torch switch or send start signal.
(No pilot arc or main arc transfer.)
Gas Test Switch is in START / SHIELD 1)
or CUT position.
Plasma gas pressure is too LOW.2)
Improper current command sig-3)
nal.
LEDX on MOD1 PCB1 is not ON 4)
when torch switch is depressed or
start signal sent.
LEDX is ON but main contactor 5)
does not close.
LEDX is ON. Main contactor is 6)
closed. No OCV or arc transfer.
Place Gas Test Switch in OPERATE 1)
position.
Set plasma gas pressure per torch 2)
or application requirements
(above 40 psi).
If in manual mode, Panel Switch 3)
must be in PANEL and P5 must be
in J5 connector. If in mechanized
mode, Panel Switch must be in RE-
MOTE and a current signal above 0
volts must be present. P5 must be
in J6 connector.
Test TBD.4)
Test TBD.5)
Test TBD.6)
Problem Possible Cause Corrective Action
SECTION 6 TROUBLESHOOTING