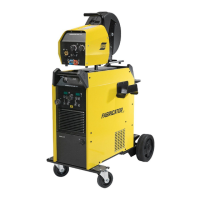
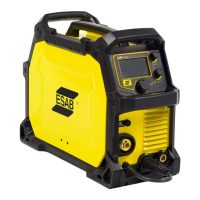
The ESAB Fabricator EM 400i and Fabricator EM 500i are advanced welding power sources designed for a range of industrial welding applications. These units are primarily intended for MIG/MAG welding, which includes welding with solid wire and various gas mixtures (CO2, Mix gas), and welding with powder-filled cored wire (FCAW-S). Additionally, they are capable of welding with coated electrodes (MMA), offering versatility for different welding tasks. The power sources are designed to be used with specific wire feed units, namely the Feed 364 and Fabricator Feed 364, ensuring compatibility and optimal performance.
Function Description
The Fabricator EM 400i and EM 500i are equipped with a comprehensive control panel that allows operators to precisely manage various welding parameters. Key functionalities include:
- Welding Process / Wire Type and Gas Selection: Operators can choose between different welding processes such as Solid wire-CO2 (MIG/MAG), Solid-Mix gas (MIG/MAG), Cored wire (MIG/MAG), and MMA welding. This selection is crucial for adapting the machine to specific material types and desired weld characteristics. To select MMA mode, the corresponding button must be pressed and held for 2 seconds, and the same action is required to exit MMA mode.
- Wire Diameter Selection: For MIG welding, the power source allows for the selection of the welding wire diameter, ensuring that the machine's settings are optimized for the chosen wire.
- Value Adjusting Knob: A central knob enables manual adjustment of critical parameters. In MMA mode, this knob controls the current. For MIG/MAG processes, it adjusts the ending arc voltage, ending arc current, and inductance. It also allows for the adjustment of current and voltage within specified ranges for overall welding control.
- Arc Force (MMA only): This feature is vital for MMA welding, as it determines how the current changes in response to variations in arc length. A lower arc force setting results in a calmer arc with less spatter, providing better control and finish.
- Inductance (MIG/MAG only): Inductance sets the dynamic characteristics of the arc in MIG/MAG welding. A lower inductance provides a softer arc, while higher inductance results in a harder arc, allowing operators to fine-tune the weld bead and penetration.
- Ending Arc Current / Crater Fill Current: This function adjusts the current for crater fill or the ending arc current in 4T and 4T repeat modes, which helps in preventing craters and ensuring a smooth finish at the end of a weld.
- Ending Arc Voltage / Crater Fill Voltage: Similar to the ending arc current, this feature adjusts the voltage for crater fill or the ending arc voltage in 4T and 4T repeat modes, contributing to quality control at the weld termination.
- Welding Control Mode: The power source offers different welding control modes to suit various operational preferences and welding tasks:
- 2-stroke: In this mode, gas pre-flow begins when the torch trigger is pressed, initiating the welding process. Releasing the trigger stops welding and starts gas post-flow.
- 4-stroke: Gas pre-flow starts when the trigger is pressed, and wire feed begins when it's released. Welding continues until the trigger is pressed again, which initiates the ending arc sequence using the set ending arc voltage and current. Releasing the trigger then stops welding and starts gas post-flow.
- 4-stroke repeat: This mode provides advanced control. Pressing the trigger starts gas flow and generates an arc. Releasing the trigger locks the arc generation. Pressing the trigger again initiates the ending arc sequence. Releasing it again stops welding. If the trigger is pressed and held within two seconds of the previous release, welding with repeated ending arc starts. Releasing it stops this repeated arc. If not pressed within two seconds, the repeated ending arc stops.
- Gas Detection: The unit includes a gas detection feature to monitor gas flow, ensuring proper shielding during welding.
- Thermal Protection: An integrated overheating protection system automatically interrupts the welding current and illuminates an indicator lamp if the internal temperature becomes too high. This protection resets automatically once the temperature returns to a safe operating range.
- Fan Control: The fan operates during startup and for 10 minutes if no welding activity occurs. In the Fabricator EM 400i, the fan runs at low speed below 200A welding current and at high speed above 200A. For the Fabricator EM 500i, these thresholds are 300A. After welding stops, the fan continues for 10 minutes before the power source enters an energy-saving idle mode.
Usage Features
The Fabricator EM 400i and EM 500i are designed for industrial use, emphasizing safety, ease of installation, and robust performance.
- Installation: Installation must be performed by a professional. The power source automatically adjusts to the supplied input voltage, simplifying setup. Proper grounding and protection by the correct fuse rating are essential. Cooling air inlets and outlets must remain unobstructed to ensure efficient operation.
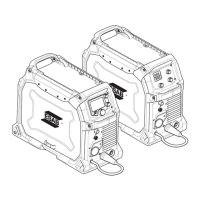
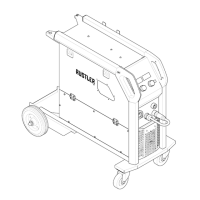
- Lifting Instructions: The units are designed with lifting eyes for safe transportation. Specific instructions and weight limits (Max 80.3 kg/177 lbs for single-point lift, Max 150 kg/331 lbs for trolley-based lifting) are provided to ensure safe handling, especially on uneven or sloping ground.
- Mains Supply: The power sources are compatible with 380-440 V, 3-phase, 50/60 Hz mains supply. Detailed recommendations for MCB sizes and minimum cable areas are provided to ensure correct and safe electrical connection. The equipment can also be supplied by power generators, with recommendations for generators having Automatic Voltage Regulation (AVR) and a rated power of ≥40 kW.
- Connection of Welding and Return Cable: The power source has positive (+) and negative (-) terminals for connecting welding and return cables. It is crucial to connect the return cable securely to the workpiece as close as possible to the welding area to ensure good contact and minimize voltage drop.
- Safety Features: The units incorporate several safety features, including warnings for electric shock, electromagnetic fields, fumes and gases, arc rays, noise, moving parts, fire hazards, and hot surfaces. These warnings emphasize the importance of personal protective equipment, proper ventilation, and adherence to safety protocols. The product is solely intended for arc welding and should not be used for thawing frozen pipes.
- User Interface: The control panel features clear indicators and buttons for intuitive operation, including an overheating LED, connections for the wire feed unit, a circuit breaker for the wire feeder motor, a fuse for the gas heater input supply, a mains power supply switch, and a 110V AC power supply socket for the gas heater.
Maintenance Features
Regular maintenance is crucial for the safe, reliable operation, and extended lifetime of the Fabricator EM 400i and EM 500i.
- Routine Maintenance Schedule:
- Before each use: Operators should check that the product and cables are not damaged and that the torch is clean and undamaged.
- Every 3 months: This includes cleaning or replacing unreadable labels, cleaning weld terminals, and checking or replacing weld cables.
- Every 6 months: The internal components of the equipment should be cleaned using dry compressed air at reduced pressure.
- Cleaning Procedure: A detailed cleaning procedure is provided, which involves disconnecting the power source from the mains, waiting for capacitors to discharge (at least 4 minutes), removing side and top panels, and then cleaning various internal parts such as the upper rear part, secondary heat sink, inductor, transformer, current sensor, power components side, and PCBs with dry compressed air. It is critical to ensure no dust remains and to correctly reassemble the covers and panels.
- Troubleshooting Guide: The manual includes a comprehensive troubleshooting section with error codes and corresponding solutions. This helps operators diagnose and resolve common issues such as welding torch faults, output terminal over-temperature, abnormal input power, IGBT or diode over-temperature, button errors, output overcurrent, input power faults, output overvoltage, and primary side overcurrent. For more complex issues or errors not covered, users are advised to contact ESAB authorized service personnel.
- Warranty: The product is covered by the manufacturer's warranty, which can be invalidated if repair work is carried out by non-authorized service centers or personnel. This emphasizes the importance of professional service for complex repairs.
- Documentation: Technical documentation, including spare parts lists, is available online, facilitating access to necessary information for maintenance and repairs.