

R
Robert BeckerSep 9, 2025
What should I do if my ESAB fabricator 141i is welding in a windy environment?
- DDiana PageSep 9, 2025
Shield the weld area from the wind or increase the gas flow.
What should I do if my ESAB fabricator 141i is welding in a windy environment?
Shield the weld area from the wind or increase the gas flow.
How to fix excessive spatter on my ESAB Welding System?
Excessive spatter can occur if the voltage is too high or too low. To resolve this, decrease the voltage or increase the wirespeed control if the voltage is too high. If the voltage is too low, increase the voltage or decrease the wirespeed.
What to do if my ESAB Welding System has undercut?
Undercut can be caused by a welding arc voltage that is too high, incorrect MIG Gun angle, or excessive heat input. Decrease the voltage or increase the wire feed speed if the voltage is too high. Adjust the MIG Gun angle. If there is excessive heat input, increase the MIG Gun travel speed and/or decrease welding current by decreasing the voltage or decreasing the wire feed speed.
Why is my ESAB Welding System producing an irregular weld shape?
An irregular weld shape can be caused by several factors: incorrect voltage and travel speed settings (convex if voltage is too low, concave if voltage is too high), wire wandering, incorrect shielding gas, insufficient or excessive heat input, or incorrect gun manipulation or angle. Adjust voltage and travel speed using the voltage control and wirespeed control. Check and possibly replace the wire. Check the shielding gas. Adjust the wirespeed control or the voltage control. Manipulate the gun correctly or place it in the correct angle.
What causes weld cracking in my ESAB fabricator 141i Welding System and how can I prevent it?
Weld cracking can occur due to several reasons: welding high carbon steel without pre/post heat treatment, incompatible filler metal, weld beads that are too small, weld penetration that is narrow and deep, excessive weld stresses, excessive voltage, or a cooling rate that is too fast. Ensure sufficient pre/post heat treatment before welding high carbon steel. Use the correct filler metal. Decrease travel speed. Reduce current and voltage and increase MIG Gun travel speed or select a lower penetration shielding gas. Increase weld metal strength or revise the design. Decrease voltage. Slow the cooling rate by preheating the part to be welded or cool slowly.
How to troubleshoot lack of penetration in my ESAB Welding System?
Lack of penetration can be due to several factors: welding current being too low, joint preparation being too narrow or the gap too tight, or the shielding gas being incorrect. Increase welding current by increasing wire feed speed and increasing voltage. Increase joint angle or gap. Change to a gas which gives higher penetration.
What to do if my ESAB Welding System's arc does not have a crisp sound?
The MIG Gun has been connected to the wrong voltage polarity on the front panel. Connect the MIG Gun to the positive (+) welding terminal for solid wires and gas shielded flux cored wires.
How to troubleshoot poor weld result from setup chart parameters in ESAB Welding System?
A poor weld result from setup chart parameters can be caused by an incorrect welder setup, polarity, shielding gas, wire type and size, or a contact tip with arc marks in the bore causing excessive drag on the wire. Check to make sure that the welder is set up correctly; also check polarity, shielding gas, wire type and size. Replace the contact tip with only a Genuine Velocity contact tip.
What to do if my ESAB fabricator 141i Welding System has a bent liner?
A bent liner will cause friction between the wire and the liner, which reduces wire feedability. Straighten the liner to resolve this issue.
Why does my ESAB fabricator 141i Welding System wire spool unwind and tangle?
If the wire spool unwinds and tangles, it's likely that the wire spool brake is too loose. Tighten the wire spool brake to resolve this.
General safety recommendations for operating welding and plasma cutting equipment.
Guide on reading the manual, including warning symbols and annotations for safe operation.
Information on locating unit identification numbers and recording them for future reference.
Procedure for checking equipment upon receipt and reporting any damage or shipping errors.
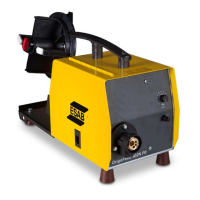
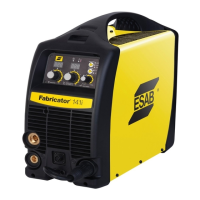
Overview of the ESAB Fabricator 141i as a multi-process welding system.
Safety precautions and methods for moving the welding power source safely.
User's responsibility for proper installation, operation, and maintenance of the equipment.
Details the components included with the Fabricator 141i portable system package.
Explanation of the rated duty cycle and how it applies to the equipment's operation.
Technical specifications for the Fabricator 141i welding system.
Guidelines for selecting a safe operating environment, considering electric shock hazards.
Recommendations for placing the welder to ensure optimal performance and safety.
Warning regarding the importance of proper ventilation for welding areas and fume control.
Requirements and warnings regarding electrical connection, voltage range, and safety.
Precautions and user responsibilities for managing electromagnetic interference in various environments.
Instructions for connecting and using the Victor flowmeter/regulator with gas cylinders.
Procedure for testing the gas system for leaks before putting it into operation.
Steps for safely shutting down the flowmeter/regulator after use.
Guidelines for proper storage of the flowmeter/regulator to protect it.
Overview of front and rear panel controls, indicators, and their functions.
Step-by-step instructions for connecting the MIG gun to the power source.
Procedure for feeding welding wire into the machine's wire feed system.
Instructions for fitting a 4" (100mm) diameter wire spool onto the wire drive.
Instructions for fitting an 8" (200mm) diameter wire spool onto the wire drive.
How to adjust feed roller pressure for optimal wire feeding without slippage.
Steps for replacing the feed rolls on the wire drive assembly.
Adjustment of the wire reel brake for proper wire tension during feeding.
Procedure for operating the flowmeter/regulator once it is connected.
Step-by-step guide to setting up the machine for MIG welding with gas.
Steps for setting up the machine for MIG welding with flux-cored wire.
Instructions for setting up the spool gun for MIG welding with gas.
Guide for connecting and setting up the machine for LIFT TIG welding.
Steps for connecting and setting up the machine for STICK welding.
Procedure for replacing a thumb screw on the torch adapter.
Explains basic MIG welding techniques for GMAW and FCAW processes.
Troubleshooting common problems encountered during MIG welding, like porosity.
Covers electrode selection, storage, polarity, and basic stick welding practices.
Discusses how different materials affect stick welding results and techniques.
Troubleshooting common issues in stick welding like current variation, gaps, and porosity.
Introduces TIG welding, shielding gases, electrode types, and filler wire selection.
Lists common problems in TIG welding and their solutions, including bead defects and arc issues.
Lists common power source faults and their remedies, such as no welding or wire feed issues.
Outlines inspection, testing, and maintenance schedules for the welding equipment.
Instructions for safely cleaning the welding power source's internal components.
Procedure for cleaning the feed rolls to ensure proper wire feeding.
Displays voltage-amperage curves showing output capabilities for different welding modes.
Lists spare parts and part numbers for the Tweco Fusion 140A MIG Gun.
Exploded view and identification of key spare parts for the welding power source.
A list of hardware items, their descriptions, and where they are used in assembly.
Schematic diagram of the Fabricator 141i's electrical circuitry for troubleshooting.
Records changes and versions of the operating manual for reference.
Contact information for ESAB offices worldwide for support and inquiries.
| Input Voltage | 115/230 VAC |
|---|---|
| Output Current Range | 30-140 A |
| Input Phase | Single Phase |
| Processes | MIG, Stick |
| Wire Diameter Range | 0.023 - 0.035 in |