ESAB FABRICATOR 141i
Manual 0-5420 4-11 BASIC WELDING GUIDE
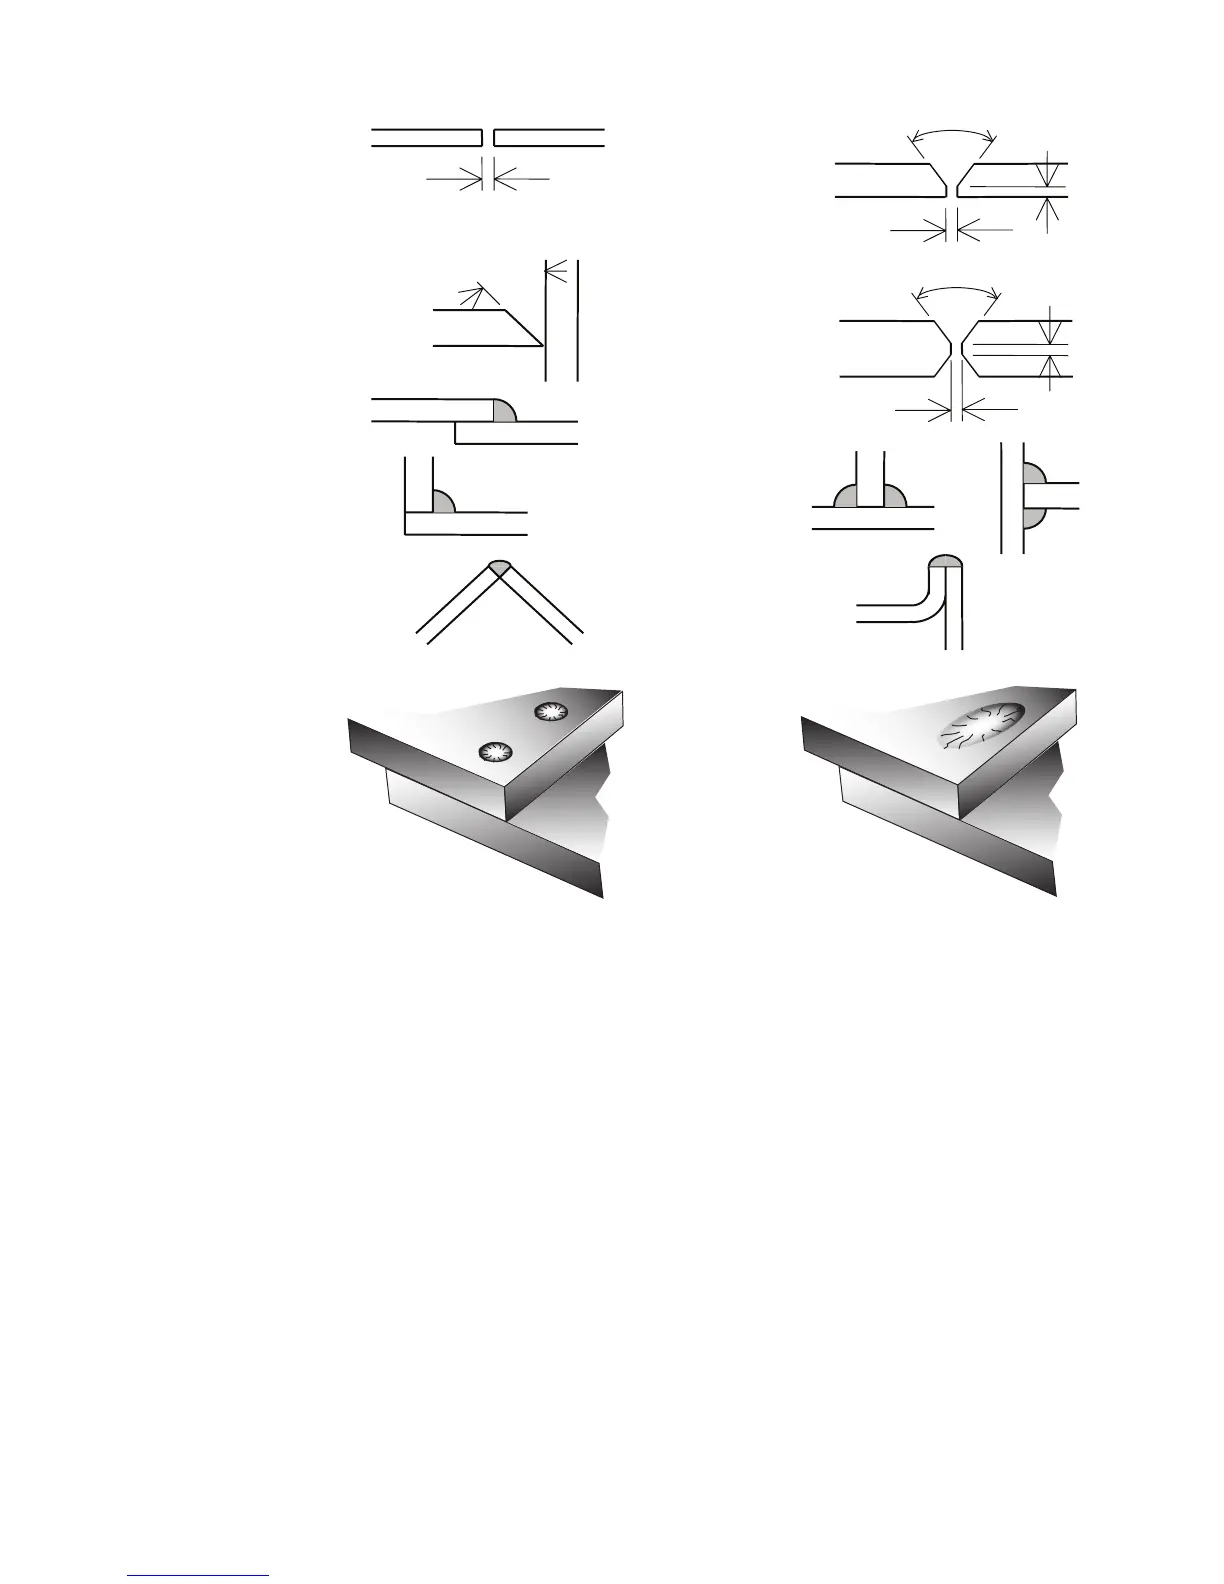
Gap varies from
1/16" (1.6mm) to 3/16" (4.8mm)
depending on plate thickness
Joint
1/16" (1.6mm) max
1.6mm (1/16”)
Single Vee Butt Joint
Not less than
70°
Double Vee Butt Joint
1/16" (1.6mm)
Lap Joint
Tee Joints
(Fillet both sides of the
joint)
Edge Joint
Fillet Joint
Corner Weld
Plug Weld Plug Weld
Not less than
70°
Single Vee Butt Joint
Not less than
45°
1/16" (1.6mm) max
Art # A-10367
Figure 4-19: Typical Joint Designs for Arc Welding
Arc Welding Technique - A Word to Beginners
For those who have not yet done any welding, the simplest way to commence is to run beads on a piece of scrap plate. Use mild
steel plate about 1/4" (6.4mm) thick and a 1/8"(3.2mm) electrode. Clean any paint, loose scale or grease off the plate and set it
firmly on the work bench so that welding can be carried out in the downhand position. Make sure that the work clamp is making
good electrical contact with the work, either directly or through the work table. For light gauge material, always clamp the work
lead directly to the job, otherwise a poor circuit will probably result.
Striking the Arc
Practice this on a piece of scrap plate before going on to more exacting work. You may at first experience difficulty due to the tip of
the electrode "sticking" to the work piece. This is caused by making too heavy a contact with the work and failing to withdraw the
electrode quickly enough. A low amperage will accentuate it. This freezing-on of the tip may be overcome by scratching the elec-
trode along the plate surface in the same way as a match is struck. As soon as the arc is established, maintain a 1/16"(1.6mm) to
1/8"(3.2mm) gap between the burning electrode end and the parent metal. Draw the electrode slowly along as it melts down.
Another difficulty you may meet is the tendency, after the arc is struck, to withdraw the electrode so far that the arc is broken
again. A little practice will soon remedy both of these faults.
 Loading...