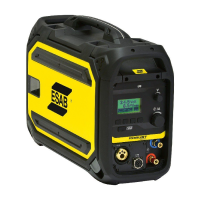
ESAB FABRICATOR 141i
Manual 0-5420 3-15 INSTALLATION, OPERATION AND SETUP
Adjusting Flow Rate
With the flowmeter/ regulator ready for operation, adjust work-
ing flow rate as follows:
1. Adjust the gas flow rate. The recommended rate for
MIG welding is 15-25 CFH. The recommended rate for
LIFT TIG welding is 10-25 CFH.
NOTE!
It may be necessary to re-check the
shielding gas flowmeter/ regulator flow
rate following the first weld sequence
due to back pressure present within
shielding gas hose assembly.
Shutdown
Close cylinder valve whenever the flowmeter/ regulator is
not in use. To shut down for extended periods (more than 30
minutes).
1. Close cylinder or upstream valve tightly.
2. Open downstream equipment valves to drain the
lines. Bleed gas into a well ventilated area and away
from any ignition source.
3. After gas is drained completely, disengage adjusting
screw and close downstream equipment valves.
4. Before transporting cylinders that are not secured on
a cart designed for such purposes, remove flowme-
ters/ regulators. Put caps on all cylinders that do not
have flowmeters/ regulators on them.
3.19 Setup for MIG (GMAW) Welding
with Gas Shielded MIG Wire
A. Select MIG mode with the process selection control.
(Refer to Section 3.10 for further information)
B. Connect the MIG Gun Polarity Lead to the positive welding
terminal (+). If in doubt, consult the electrode wire manu-
facturer. Welding current flows from the Power Source
via Dinse style connectors. It is essential, however, that
the male plug is inserted and turned securely to achieve
a sound electrical connection.
C. Fit the MIG Gun to the Power Source. (Refer to Section
3.11 Attaching the Fusion 140A MIG Gun).
D. Connect the work lead to the negative welding terminal
(-). If in doubt, consult the electrode wire manufacturer.
Welding current flows from the Power Source via Dinse
style connectors. It is essential, however, that the male
plug is inserted and turned securely to achieve a sound
electrical connection.
E. Fit the flowmeter/ regulator to the shielding gas cylinder
(Refer to Section 3.06) then connect the shielding gas
hose from the rear of the Power Source to the flowmeter/
regulator outlet.
F. Refer to the Weld Guide located on the inside of the
wirefeed compartment door for further information.
G. Switch the LOCAL/REMOTE switch
inside the wire feed compartment
to LOCAL to use the Power Sources
Wirespeed and Voltage controls.
H. Switch the MIG GUN/SPOOL GUN switch
inside the wire feed compartment to MIG
GUN.
!
WARNING
Before connecting the work
clamp to the work piece,
make sure you have ceased
feeding wire so premature
arcing will not occur.
Secure the shielding gas
cylinder in an upright position
by chaining it to a suitable
stationary support to prevent
falling or tipping.
!
CAUTION
Loose welding terminal connections can
cause overheating and result in the male
plug being fused in the terminal.
 Loading...