ESAB FABRICATOR 141i
Manual 0-5420 3-11 INSTALLATION, OPERATION AND SETUP
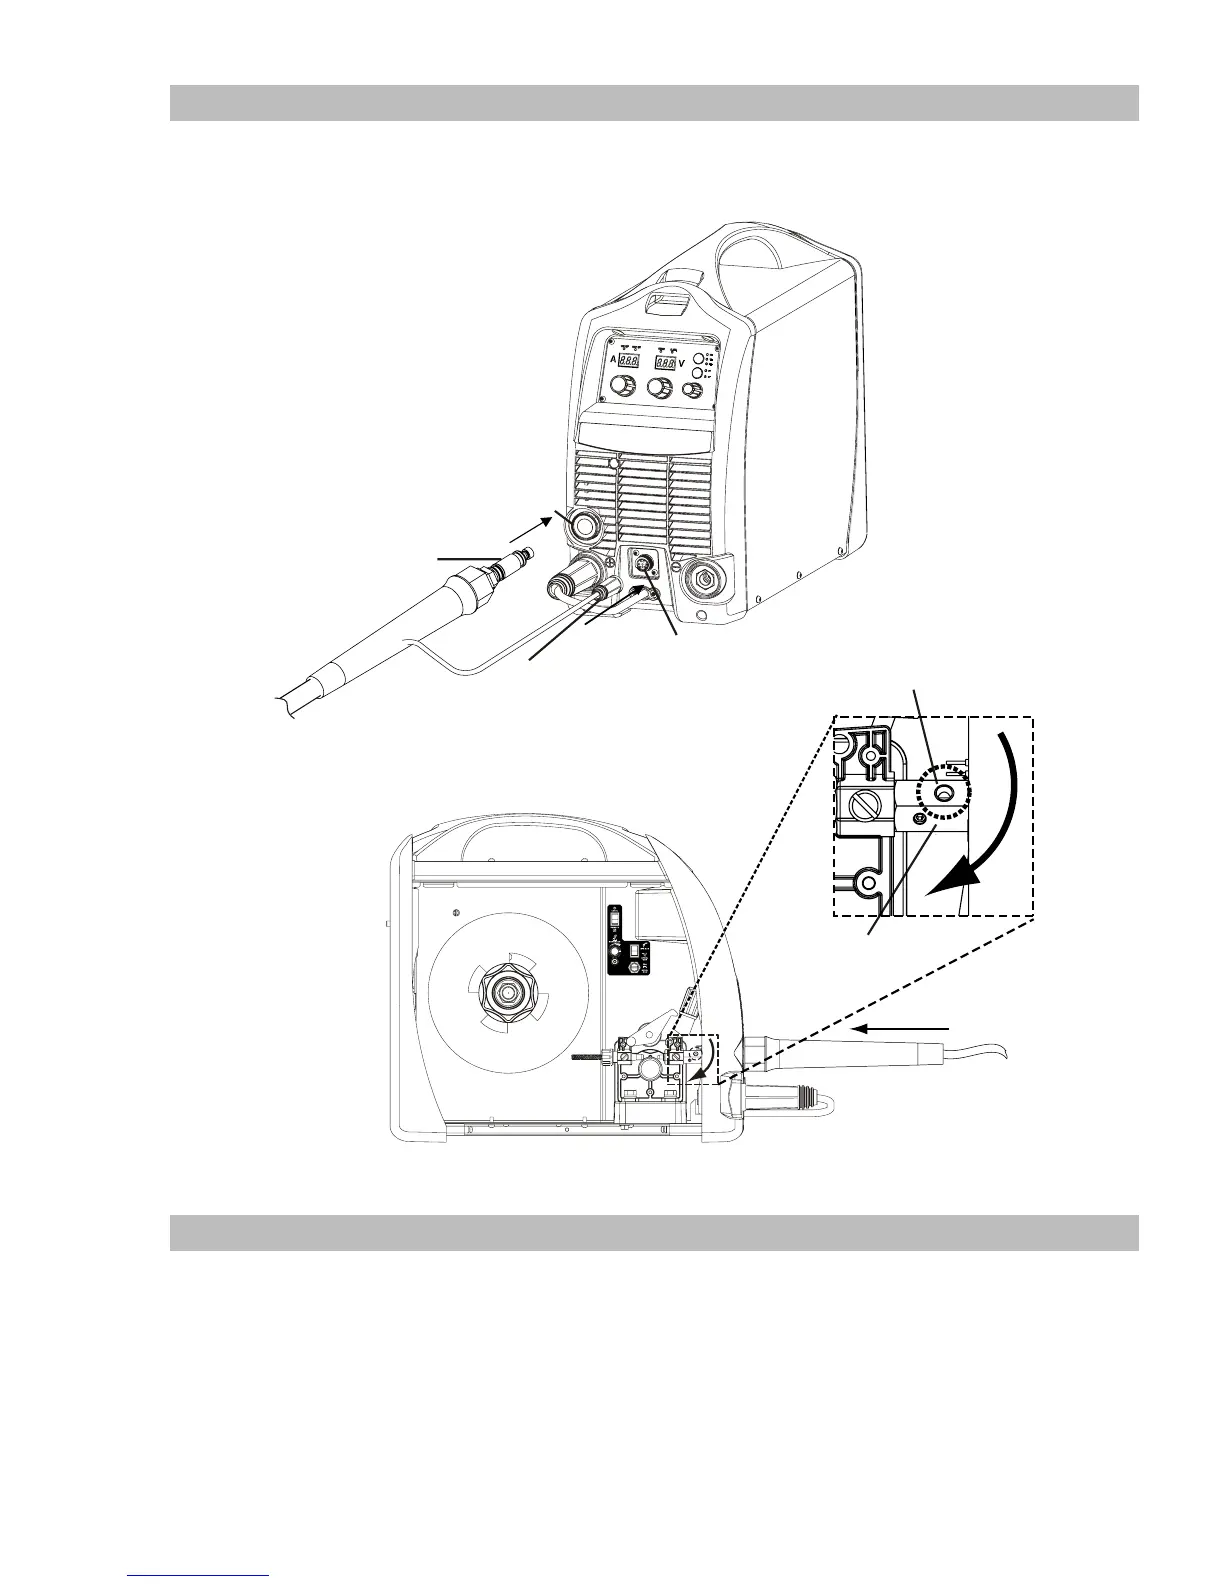
3.11 Attaching the Fusion 140A MIG Gun
Fit the MIG Gun to the Power Source by pushing the MIG Gun connector into the MIG Gun Adapter and tightening the Locking
Screw to secure the MIG Gun in the MIG Gun Adapter.
Connect the 8 pin plug by aligning the keyway then inserting the 8 pin plug into the 8 pin socket and rotate threaded collar fully
clockwise to lock the plug into position.
Art #
A-10356_AB
MIG Gun Adaptor
MIG Gun Connector
MIG Gun Connector
Thumb Screw
8 pin socket
8 pin plug
Figure 3-8: Attaching MIG Gun
3.12 Inserting Wire into the Wire Feed Mechanism
Release the tension from the Pressure Roller Arm by turning the adjustable Wire Drive Tension Screw in a counterclockwise. Then
to release the pressure roller arm push the tension screw toward the front of the machine which releases the pressure roller arm.
With the MIG welding wire feeding from the bottom of the spool (Figure 3-10) pass the electrode wire through the inlet guide,
between the rollers, through the outlet guide and into the MIG Gun. Re-secure the pressure roller arm and wire drive tension screw
and adjust the pressure accordingly (Figure 3-9). Remove the nozzle and contact tip from the MIG Gun. With the MIG Gun lead
reasonably straight, feed the wire through the MIG Gun by depressing the trigger switch. Fit the appropriate contact tip.
 Loading...