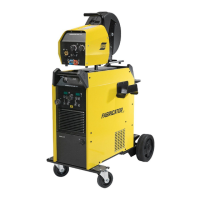
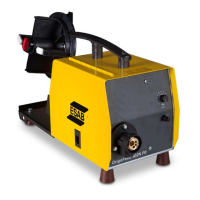
ESAB FABRICATOR 141i
INSTALLATION, OPERATION AND SETUP 3-10 Manual 0-5420
NOTE!
The preview functionality provided on
this power source is intended to act as
a guide only. Some differences may be
observed between preview values and
actual welding values due to factors in-
cluding the mode of welding, differences
in consumables/gas mixtures, individual
welding techniques and the transfer
mode of the welding arc (ie dip versus
spray transfer). Where exact settings are
required (in the case of procedural work),
it is recommended that alternate mea-
surement methods be utilized to ensure
output values are accurate.
14. Fault Indicator
This welding Power Source is protected by a self resetting
thermostat. The indicator will illuminate if the duty cycle
of the Power Source has been exceeded or if a fault is de-
tected in the Inverter. Should the Fault Indicator illuminate
the output of the Power Source will be disabled. Once the
Power Source cools down this light will go OFF and the over
temperature condition will automatically reset. Note that the
power switch should remain in the on position such that the
fan continues to operate thus allowing the Power Source to
cool sufficiently. Do not switch the Power Source off should
a thermal overload condition be present. If the fault condition
does not extinguish, then the Power Supply will need to be
taken to an authorized repair center for analysis.
15. Gas Inlet (MIG mode only for MIG Gun or Spool Gun
operation)
The Gas Inlet connection is used to supply the appropriate
MIG welding gas to the Power Source. Refer to section 3.19
to 3.20 for MIG (FCAW/GMAW) set up details.
!
WARNING
Only Welding Shielding Gases specifically
designed for arc welding applications
should be used.
16. On / Off Switch
This switch is used to turn the Power Source on/off.
!
WARNING
When the front digital displays
are lit, the machine is con-
nected to the Mains supply
voltage and the internal elec-
trical components are at Mains
voltage potential.
17. Intelligent Fan Control
When Power Supply is first turned on it will default in MIG
Mode. The Fan will operate for approximately 10 seconds,
then shut down.
When triggered in MIG mode, fan will not turn on until Power
Supply reaches temperatures in which cooling is required.
When in Lift TIG mode, as soon as output is enabled, the
fan will come on immediately and will not shut down until
welding has ceased and Power Supply is at proper operat-
ing temperature. When set to Stick mode, fan will turn on
immediately and will not turn off until welding has ceased
and Power Supply is at proper operating temperature.
Note in STICK mode the fan operates continuously.
18. Local / Remote Switch (located in wirefeed compart-
ment)
The local/ remote switch is used only when a remote control
device (such as a TIG Torch with remote current control) is
fitted to the Power Source via the remote control socket
(8 Pin Remote Socket). When the local/remote switch is in
the remote position, the Power Source will detect a remote
device and work accordingly. When in the local mode, the
Power Source will not detect the remote device and will
operate from the Power Source controls only. Note that the
trigger will operate at all times on the remote control socket
irrespective of the position of the local remote switch (ie in
both local and remote modes).
Should a remote device be connected and the local/ remote
switch set to remote, the maximum setting of the Power
Source will be determined by the respective front panel
control, irrespective of the remote control device setting.
As an example, if the output current on the Power Source
front panel is set to 50% and the remote control device is set
to 100%, the maximum achievable output from the Power
Source will be 50%. Should 100% output be required, the
respective front panel control must be set to 100%, in which
case the remote device will then be able to control between
0-100% output.
19. Burnback Control (located in wirefeed compartment)
The Burnback control is used to adjust the amount of MIG
wire that protrudes from the MIG Gun after the completion of
MIG welding (commonly referred to as stick-out). To decrease
the Burnback time (or lengthen the amount of wire protruding
from the MIG Gun at the completing of welding), turn the
Burnback control knob counterclockwise. To increase the
Burnback time (or shorten the amount of wire protruding
from the MIG Gun at the completing of welding), turn the
Burnback Control knob clockwise.
20. MIG Gun & Spool Gun Switch
The MIG Gun / Spool Gun switch is used to switch welding
mode between MIG Gun function and Spool Gun function.
21. 10A Fuse
The 10A fuse is used to protect both the spool gun motor
and internal motor.

 Loading...