EasyManuals Logo

Esco Class II User Manual

Esco Class II
73 pages
To Next Page IconTo Next Page
To Previous Page IconTo Previous Page
Page #38 background imageLoading...
Page #38 background image
28
5.4.5. Airflow Sensor Replacement Procedure
5.4.5.1. Airflow Sensor Replacement Procedure where Doughnut Sensor Housing is Used
Similar to the sensor box case, in AC2-_E_, AC2-_S_, AC2-_D_ and AC2-_G_, the airflow sensor is located on
top of the cabinet. The sensor can easily be accessed in these cabinets.
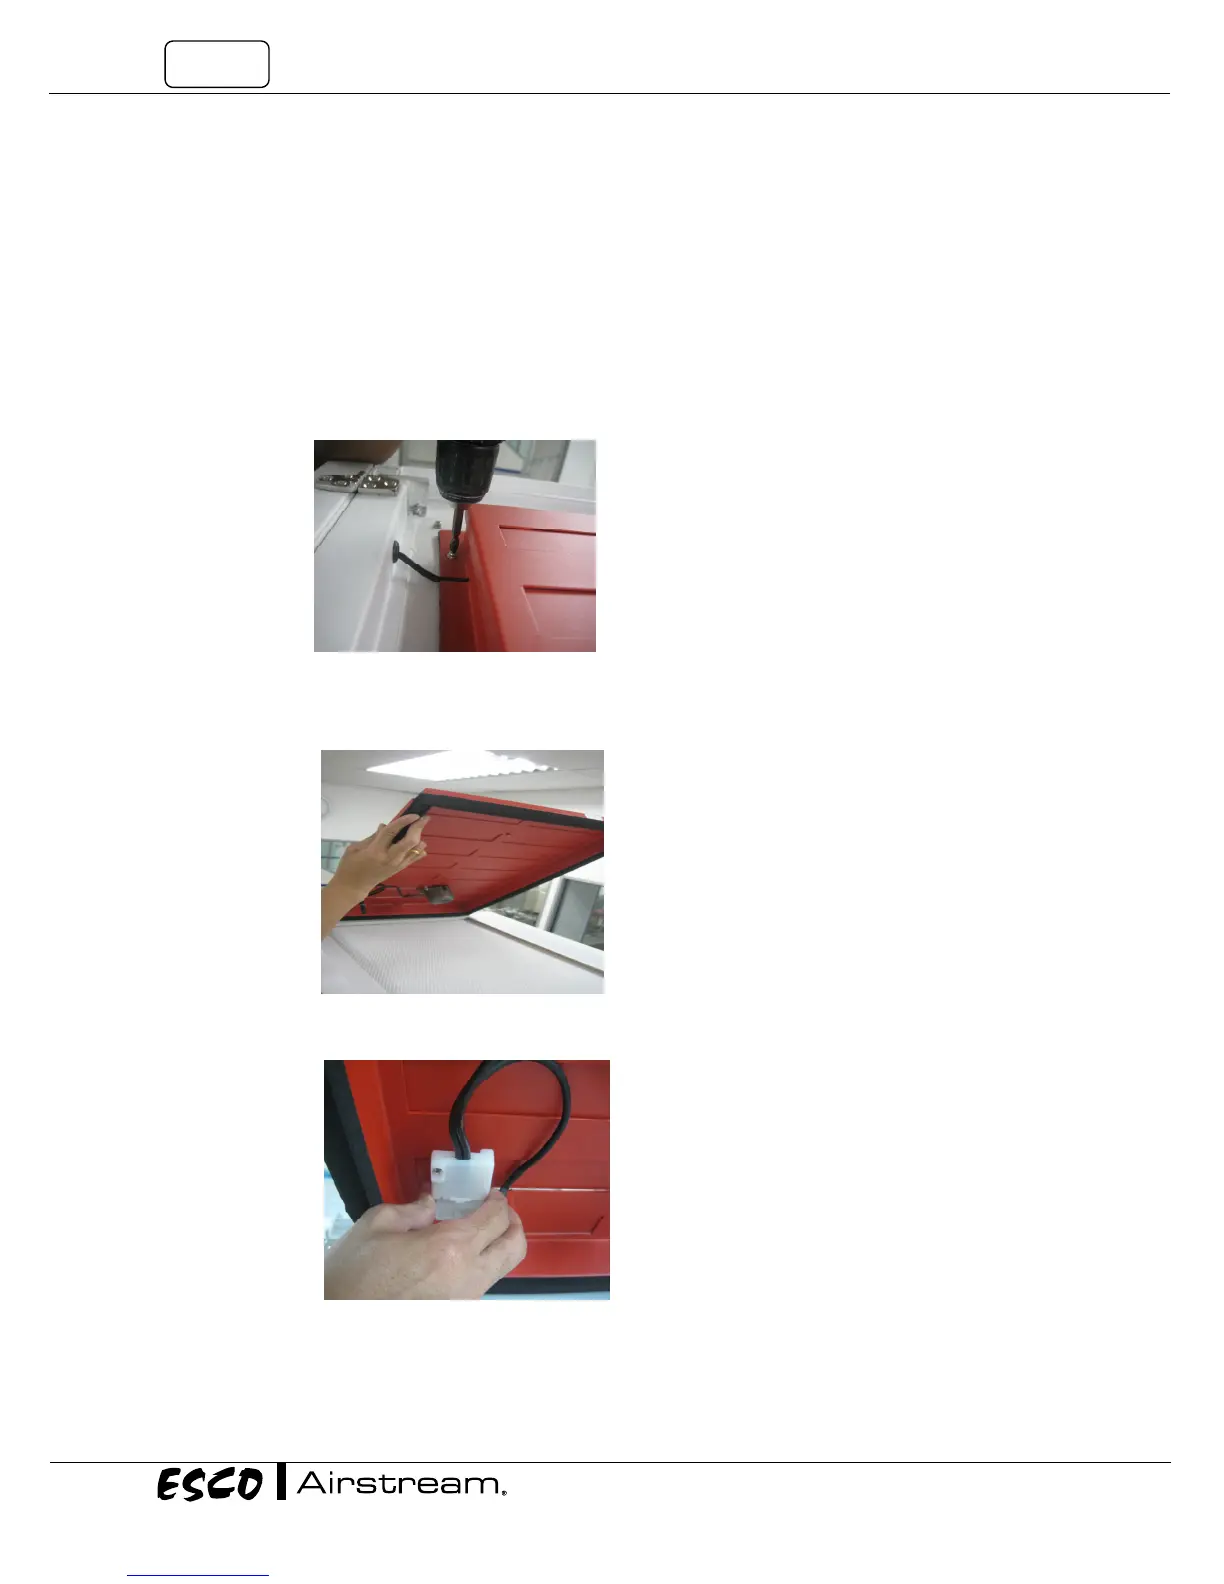
1. Start by removing the damper (unscrew) on top of the cabinet (for AC2-_E_ & AC2-_S_; damper not
applicable for AC2-_D_ and AC2-_G_).
Figure 5.6. Unscrewing the Damper
2. Lift the damper to locate the airflow sensor.
Figure 5.7. Lifting & Removing the Damper
3. Disconnect the airflow sensor cable connector.
Figure 5.8. Disconnecting Airflow sensor Cable

Questions and Answers:

Question and Answer IconNeed help?

Do you have a question about the Esco Class II and is the answer not in the manual?

Esco Class II Specifications

General IconGeneral
LightingLED
UV LightOptional
CertificationNSF/ANSI 49, EN 12469
Airflow PatternLaminar
Inflow Velocity0.38 m/s ± 20%
Downflow Velocity0.25 m/s ± 20%
HEPA Filter Efficiency99.99% at 0.3 μm
MaterialStainless steel
Noise Level< 65 dBA
Front Opening200 mm (8")
ApplicationMicrobiology, cell culture
TypeBiosafety Cabinet

Related product manuals