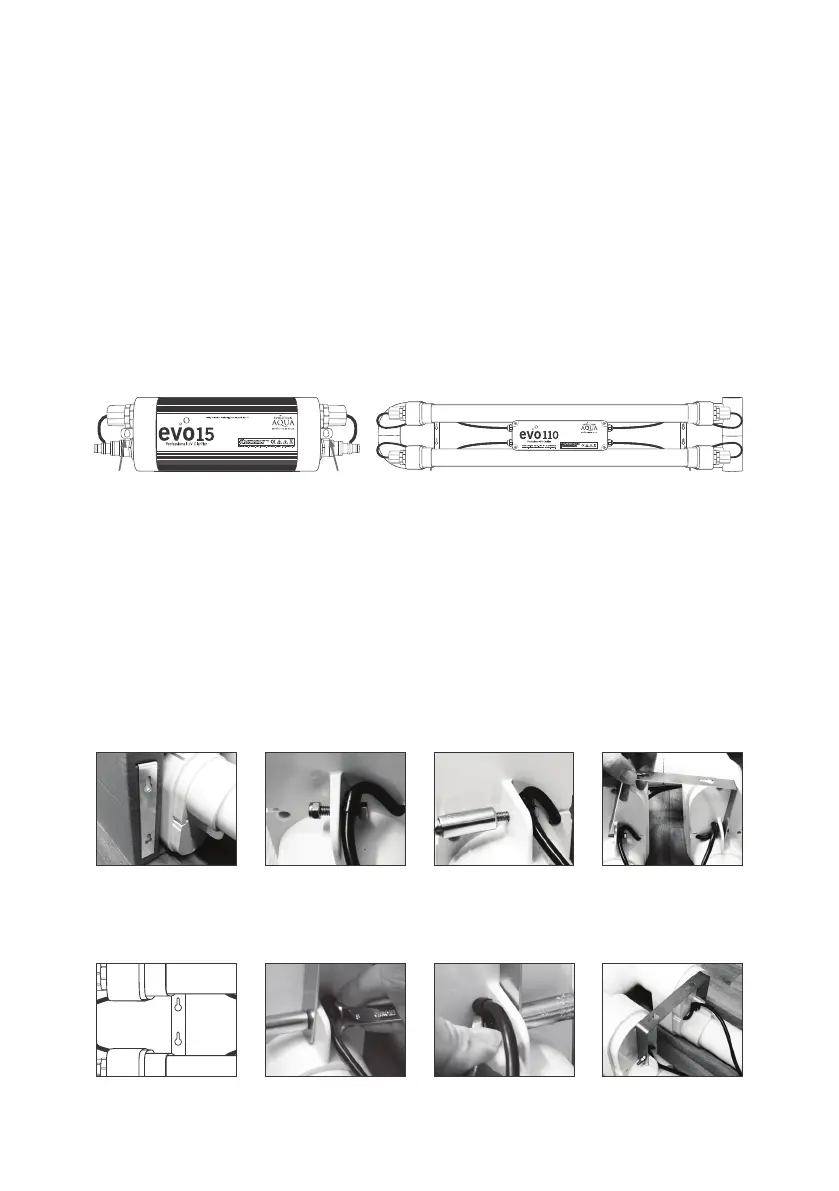
If you are going to position your evoUV outside or in an area where it is likely to get
splashed regularly with water, then you must mount the unit the correct way up,
as shown in the illustration below. If your evoUV will be positioned in a
permanently dry environment then it can be installed in any position.
Your evoUV must not be submerged in water or placed in a position where water
may collect around the unit. The electrics within the evoUV units are sealed in a
water tight unit. evoUV has an IP rating of X5, the evo110 model is IP64.
Please ensure that there is enough space at one end of the evoUV to enable bulb /
quartz sleeve removal and maintenance.
Fix your evoUV into position using the stainless steel brackets provided.
The brackets come pre-fitted on evo15, 25, 30, 55 and 75 models.
PLEASE NOTE: Wall mounting screws and washers are not provided.
Fitting evo110 mounting brackets
Two stainless steel mounting brackets are included with the evo110. These are
located within the cardboard packaging end fitment. Hex screws and nuts are
pre-installed in position to secure the brackets to the unit. Follow the steps below to
undertake this. PLEASE NOTE: Wall mounting screws and washers are not provided.
Remove brackets
from both cardboard
packaging end
fitments.
Double check the
brackets are the correct
way up to help with
wall mounting.
Screws and nuts are
pre-installed in position
where the brackets
need to go.
At one end of the UV,
unscrew the nuts only
but leave the screws
and cable holder in
place.
With the nuts off, fit the
bracket over the screw
threads with drill holes
facing upwards - ready
for wall mounting.
POSITIONING AND MOUNTING THE evoUV
MOUNTING
BRACKETS
MOUNTING
BRACKETS
MOUNTING
BRACKETS
MOUNTING
BRACKETS
9
Using an 8mm spanner
to hold the screw
heads, tighten up the
nuts to secure the
bracket.
Repeat the process for
the bracket at the other
end of the UV.
Your evo110 is now
ready to be mounted to
the wall.