www.evolutionfury.com
25
Riving Knife
The Riving Knife is a very important
component and comes factory fitted and
correctly aligned and adjusted. The Riving
Knife prevents the work from binding as
it passes through the blade. Inspect the
Riving Knife at regular intervals and replace
it if it is worn or damaged.
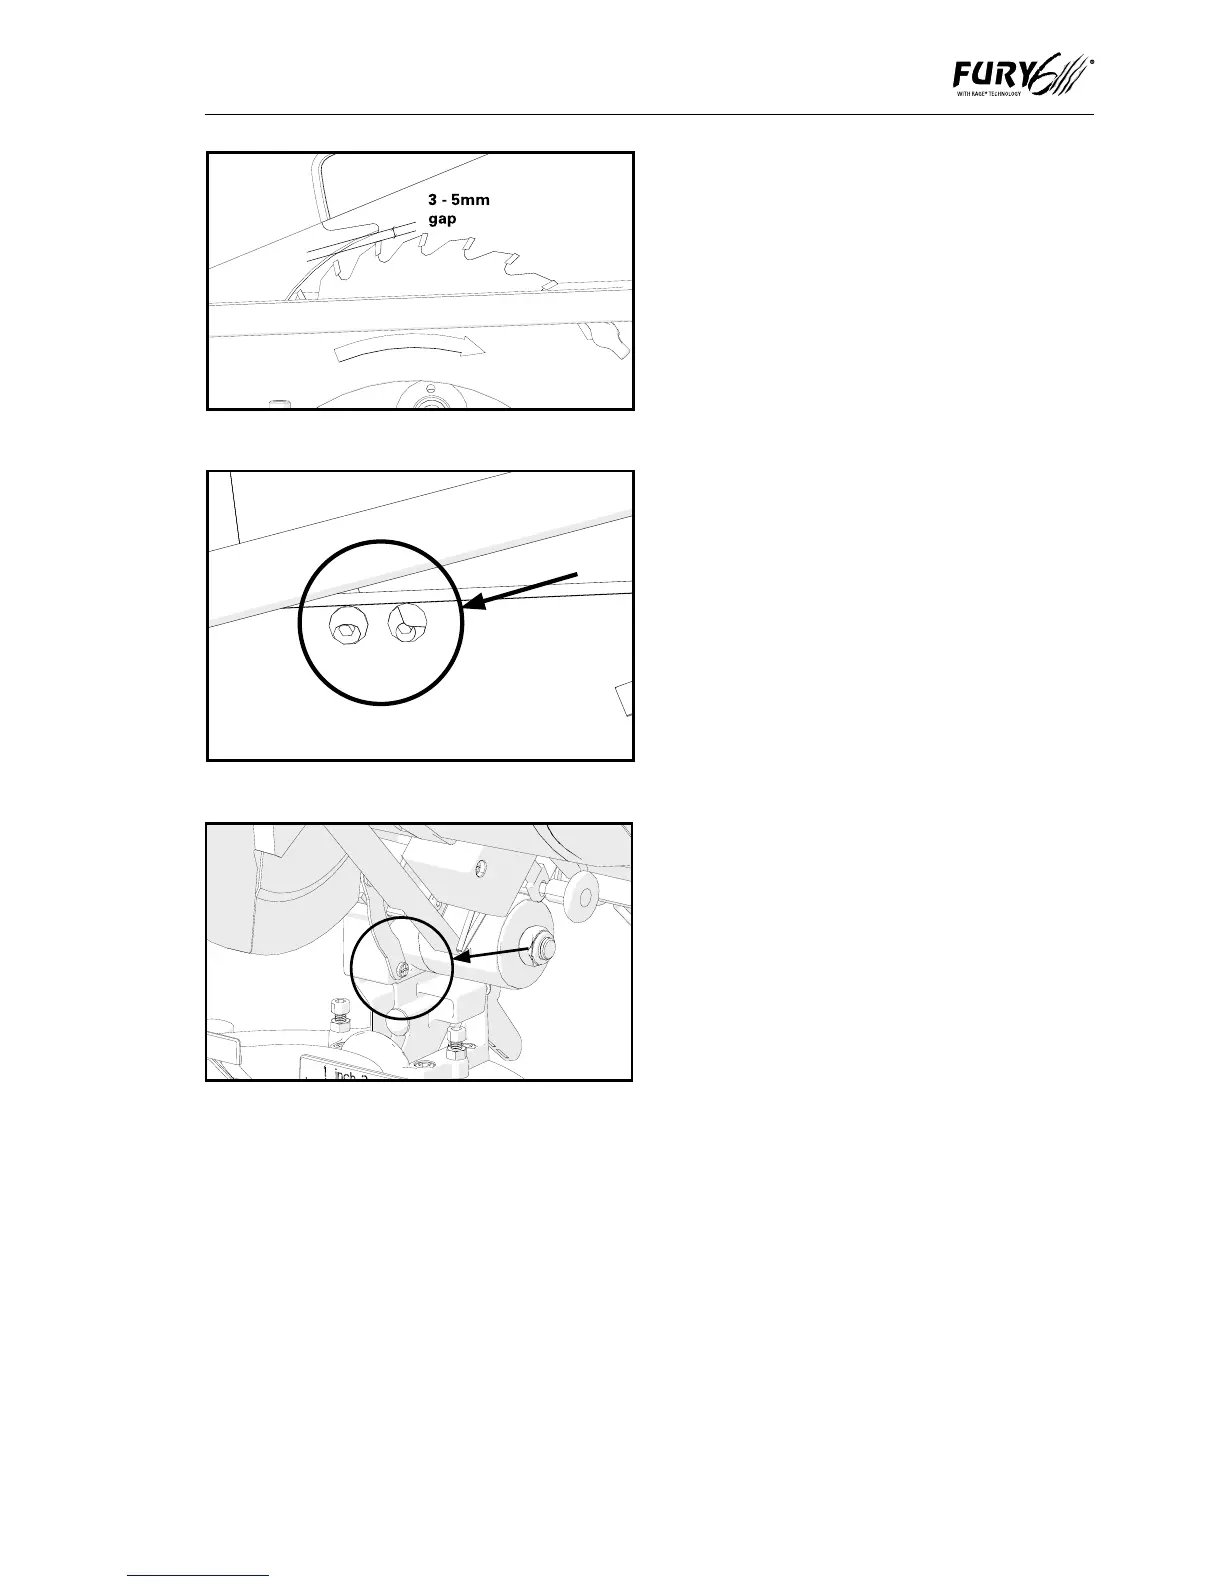
The Riving Knife should be adjusted so
that the gap between the tips of the blade
teeth and the edge of the Riving Knife is
approximately 3-5mm. (Fig.26)
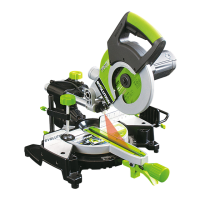
To adjust the Riving Knife loosen the two (2)
fixing screws (Fig. 27) slightly using an allen
key. When correct alignment is achieved
tighten the fixing screws.
NOTE: Use only a genuine Evolution
Riving Knife, as this is a dedicated
component for this machine. Non genuine
parts could be dangerous. If in any doubt,
please contact the Helpline.
Push Stick
A plastic push stick is provided with the
machine. When not in use store the push
stick on the machine.
NOTE: If the push stick becomes damaged
it should be replaced. If the operator makes
their own push stick, we recommend that it
follows the same pattern as that supplied.
Replacement push sticks are available from
Evolution Power Tools.
INSTALLING or REMOVING a BLADE
WARNING: Only use genuine Evolution
blades which are designed for use in this
machine. Ensure that the maximum speed
of the blade is compatible with the machine.
Only perform this operation with the machine
disconnected from the mains supply.
NOTE: It is recommended that the operator
considers wearing protective gloves when
handling the blade during installation or
when changing the machines blade.
NOTE: The blade is a very precise fit
within the Fury6 machine. Be patient and
methodical when changing the blade.
To change a blade:
• EnsurethatthemachineisinMitreSaw
Mode with the Cutting Head in its upper
position.
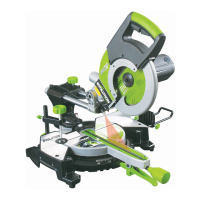
• ReleasetheRetractableLowerGuard
Operating Lever by removing and safely
storing its pivot screw. (Fig. 28)
Fig. 26
Fig. 27
Fig. 28